Do you have a question about the Skywalker STRC915.2 and is the answer not in the manual?
Details on ordering replacement parts via website or customer care hotline.
Advisory to read all warnings and instructions before commencing assembly.
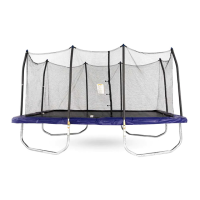
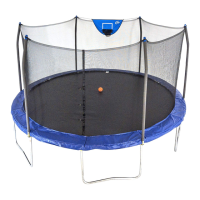
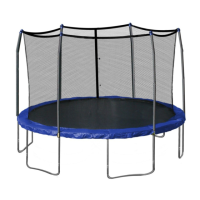
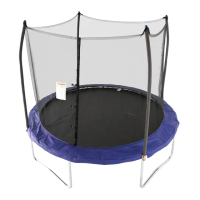
Visual guide identifying all components of the trampoline with key numbers.
Key advice and requirements before starting the trampoline assembly process.
Instructions to register the trampoline online for warranty and support.
Connects corner tubes, straight tubes, and sockets to form an initial frame section.
Secures the assembled frame section using M10 bolts, washers, and nuts.
Connects another set of tubes and sockets to form a second frame section.
Secures another frame section, leading to the creation of four corner frame sections.
Joins male and female legs using bolts, washers, and nuts to form U-shaped leg assemblies.
Inserts leg posts and assembled U-shaped legs into the trampoline frame sockets.
Fastens the four corner leg sections using bolts, washers, and nuts for stability.
Joins assembled frame sections using middle frame tubes to create two larger frame halves.
Connects the two frame halves to form the complete, free-standing trampoline frame.
Ensures the enclosure net is correctly threaded through the jump mat's V-rings.
Places the jump mat and enclosure net onto the trampoline frame, centering the enclosure door.
Attaches initial springs by hooking them to frame holes and jump mat V-rings.
Attaches big springs to the middle sections of the middle frame tubes.
Attaches smaller springs to the D-rings on the corners of the jump mat.
Attaches smaller springs to the sides of the sockets along the long frame sides.
Attaches all remaining smaller springs around the perimeter of the jump mat.
Positions and secures the frame pad pieces over the trampoline frame for protection.
Ties the frame pad straps to the trampoline frame to keep pads in place.
Applies foam to enclosure poles and joins straight and curved tubes with screws.
Inserts pole caps into the strap rings on the top of the enclosure net.
Connects curved enclosure tubes to pole caps and secures them with bolts.
Inserts straight enclosure tubes into sockets to finish the enclosure pole structure.
Installs end caps into the bottom of the enclosure pole sockets for a finished look.
Secures the safety placard to the trampoline frame near the enclosure door using a plastic tie.
Congratulatory message upon completion and request for product feedback.
Guidelines for safely moving the trampoline and enclosure, requiring two persons.
Details the fundamental bounce, emphasizing body mechanics and landing.
Instructs on performing a knee drop, focusing on posture and safe landing.
Teaches safe transition from bounce to landing on hands and knees.
Guides on performing a back drop, stressing chin-forward posture and controlled return.
Describes safe seat drop execution and returning to an erect position.
Guides on performing a front drop, emphasizing arm extension and push-off.
Details how to perform a half turntable rotation from a front drop position.
Explains the swivel hips maneuver, involving a twist and seat drop landing.
Details safe procedures for mounting and dismounting the trampoline.
Instructs on how to stop a jump by bending knees upon landing.
Classifies common trampoline accidents, detailing risks like somersaults and multiple jumpers.
Provides guidelines for safe use of the enclosure, focusing on adult supervision and child activities.
Warns about electrocution hazards due to the metal frame conducting electricity.
Highlights risks during entry/exit, advising assistance for young children and proper lighting.
Advises against pets, animals, and carrying sharp/breakable objects on the trampoline.
Defines supervisor responsibilities for enforcing rules and ensuring user safety.
Stresses user education, mastering control, and following safety instructions.
General safety rules covering usage, inspection, and conditions for supervisors and users.
Details risks from high winds and methods for preventing damage or injury.
Lists conditions and damages explicitly excluded from the product warranty coverage.
Provides guidance on inspecting the trampoline and the process for ordering replacement parts.
| Brand | Skywalker |
|---|---|
| Model | STRC915.2 |
| Category | Sports & Outdoors |
| Language | English |