DISPLAY
· In Display menu, customer can set the RSSI icon: icon + percentage, Icon, Percentage, disable, also
adjust the vertical position of the RSSI.
· The Luminance of the screen and be adjust in the menu (3 stages, default is 2).Normally do not set
the brightness too high unless the image is dim.
Image Mode
· n image setting menu, customer have standard, bright, vivid, soft and 3 customized s to adjust. I file
· ustomer can adjust Brightness, ontrast, aturation, Hue and Sharpness to C C S suit different environment in
3 user 1/2/3, the image setting can not change in 4 Pre-set files.
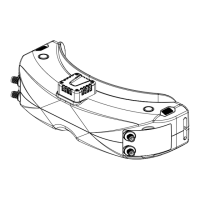
Head Tracking
·The head tracking button is on the right side of the goggles.
·The gyro required for an initialization time. When it is powered on, goggles must be kept horizontal
and stable as long as possible. When hearing the sound of a "beep", the initialization is done.
·Hold HT button to reset the PPM signal to the center, goggles will beep when press the button.
Disable the Headtracker can save the gyro initialization time to speed up goggles boot time.
FAN
·The built-in fan can not only be mainly used for defogging, but also can be used to dissipate the heat
within the product. The speed of fan can be set in the system menu.
·Press the POWER button to start up/stop the fan for defogging.
·User can manually set fan speed to adjust the fan noise.
The fan will auto turn on when the temperature over a certain point.
6
when the copy process is done, the firmware upgrade is done.
Firmware Update
Goggles
1,Connect goggles to the computer.
2,Hold the left wheel when turn on the goggles, the usb cable will power the goggles, release the left
button, computer will automatically install the driver , computer will show a new removable storage .
3, Copy the Firmware File to folder(Not the SD card). goggles will installing the update at the same time.