· POWER:DC IN power, screen displays <DC IN>,Power by battery,it is ok to select from 2S, 3S, 4S,
5S, 6S, and displayed on the screen, indicates full power, indicates low power
· CHANNEL : Displayed in 3D Mode. When enable Custom mode in 3D mode ,Band and Channeled of
RX1/RX2 will also displayed ,Displayed BAND and CH in 2D Mode
Transmitter Operation Instruction
· Please make sure the antenna and transmitter are compatible otherwise the transmitter maybe damaged.
· Please place the transmitter in well-ventilated place and avoid to place in confined place or wrap the
transmitter tightly.
· Please don't touch the antenna or the mental parts to avoid burning by the parts
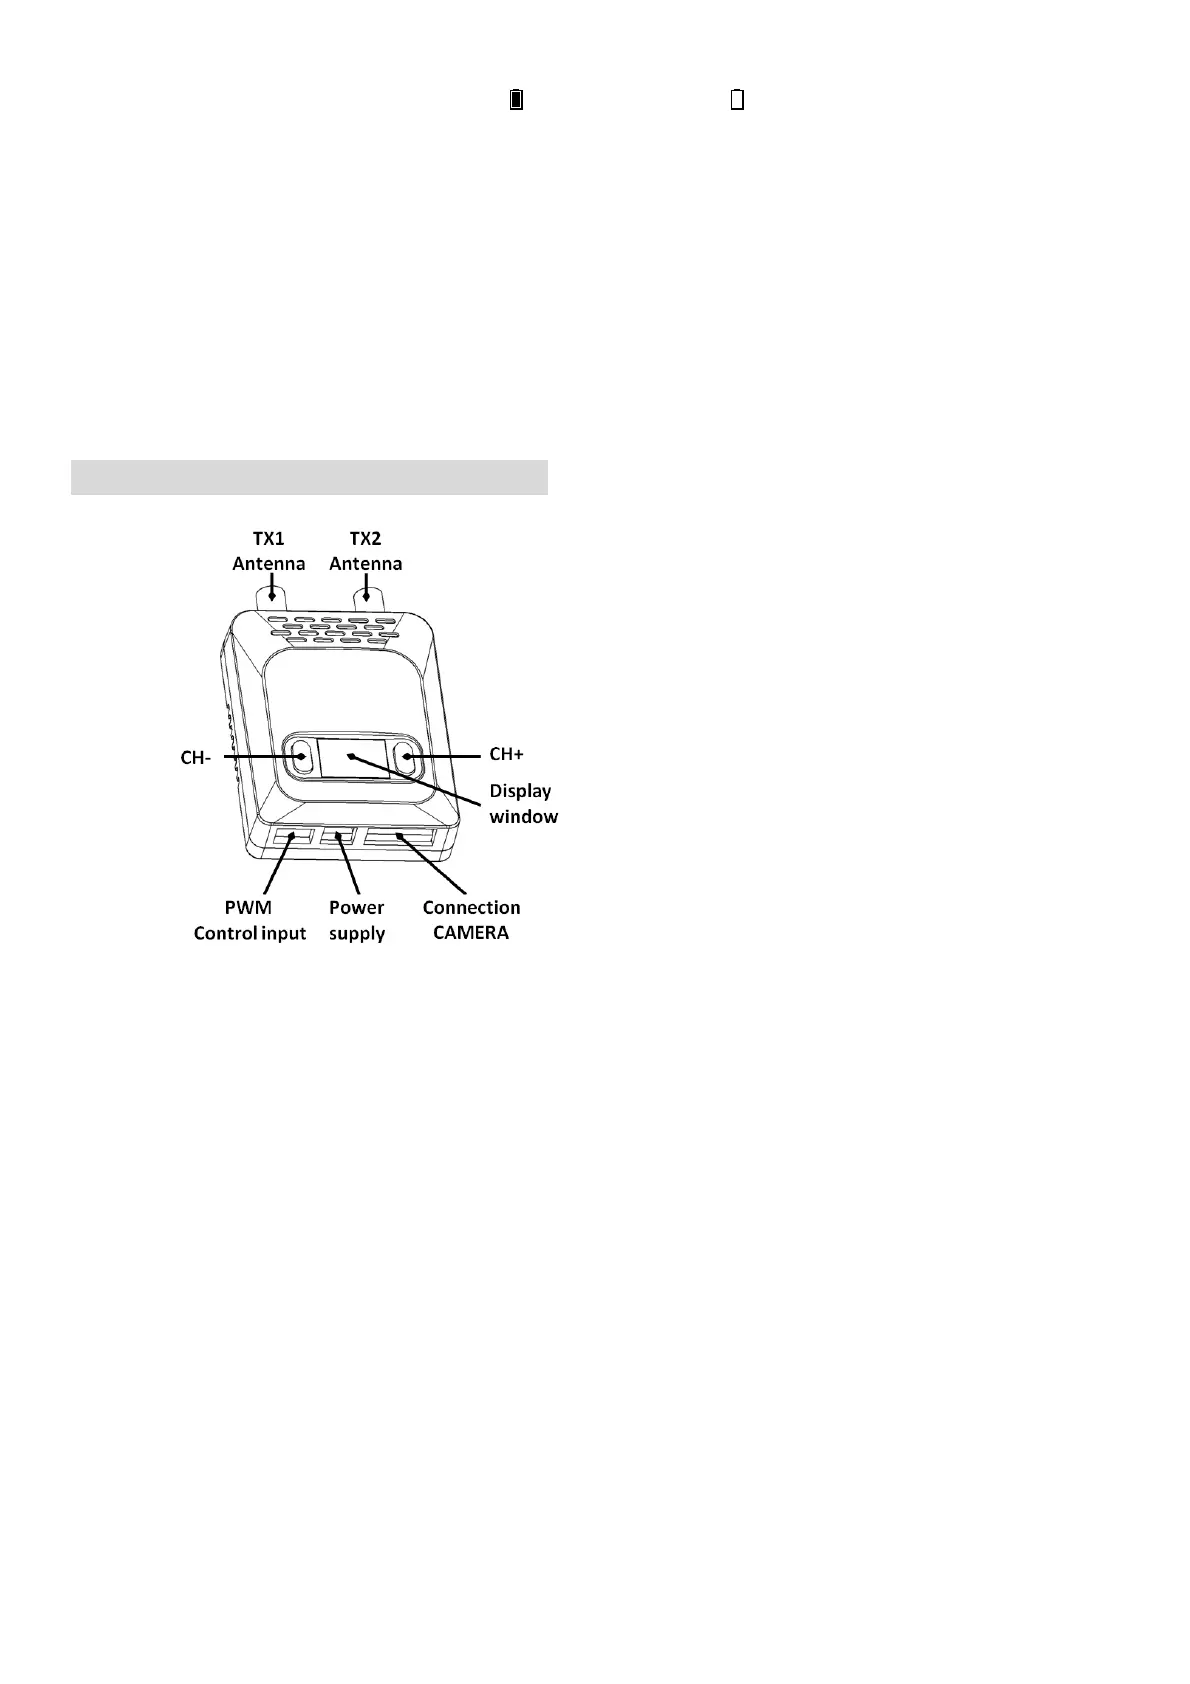
· SKY201 has two digit LED display. It showed channels in default channel mode and LEFT for TX1 band and
channel, RIGHT for TX2 band and channel in Custom channel mode.
· Press <CH->,<CH+> to adjust the channels, total 4 channels
· Long press <CH->or<CH+> to enter Custom setup. The display will flash quickly and then Press <CH-,CH+>
to setup band of TX1,TX2 separately. Long press <CH-,CH+> separately to ext Band setup. Short press
<CH->or<CH+> to setup channels . Please press <CH->or<CH+> at the same time to switch from custom to
default mode.
· It is also ok to control the channels of the transmitter through the PPM signal. To assign a Thirds switch in the
remote control ,C-H, to CH+,C-L to CH-. Connect 1PPM channel of the receiver to the S1 port of the
SKY201 to control mother channels.
· Connect another PPM channel of receiver to S2 of SKY201 in custom mode. S1 for TX1 and S2 to TX2.