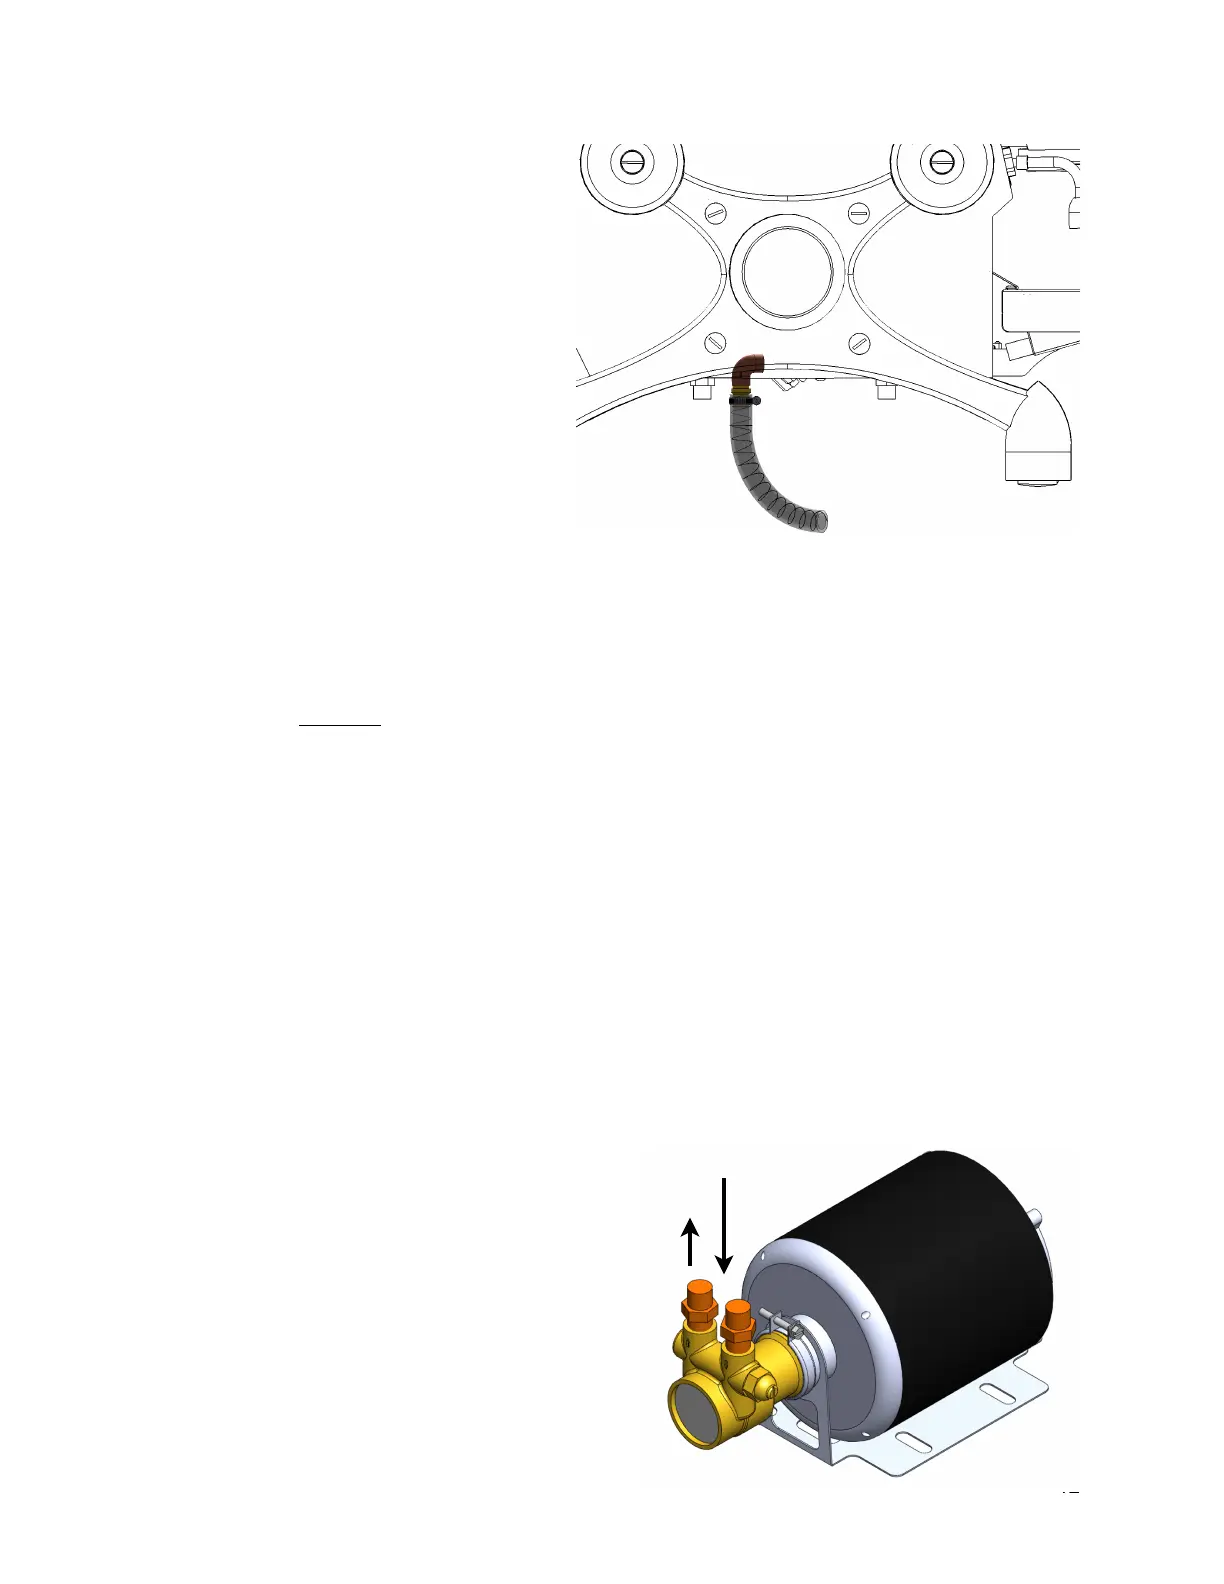
Step 3: Connect Drain Hose
Parts and tools:
•
Drain hose (included)
•
Hose clamp (included)
•
Flat-head screwdriver
Procedure:
1. Use the hose clamp to fasten
the drain hose to the drain
outlet, as shown.
‣
The drain hose has an inside
diameter of 5/8" (1.6cm).
2. Prevent clogging by ensuring
that the drain line always goes
downwards.
‣
Leave steam actuators in the “on” positions for “Step 8: Turn on Heating
Elements”.
Step 4A: Connect Water Line
For machines without hot water
IMPORTANT: Before connecting a water treatment system to your espresso
machine, rinse the system by running water through it for at least two (2) minutes.
Failure to follow this step will result in equipment damage. Read the Water
Treatment Requirements on pages 6-7 for information about avoiding and
addressing water-related issues.
Parts and tools:
•
40”x3/8” braided stainless steel hose
•
60”x3/8” braided stainless steel hose (with 90-degree fitting)
•
Wrench
Procedure:
1. Use the shorter, 40”x3/8” braided hose to connect the water treatment
system outlet to the pump inlet.
2. Use the longer, 60”x3/8” hose to
connect the pump outlet to the
espresso machine water inlet
(located at the bottom-rear of
the machine).
‣
The end with the 90-
degree fitting should
connect to the espresso
machine.
‣
Leave steam actuators in the
“on” positions for “Step 8: Turn
on Heating Elements”.!