-05--04-
(Figure1)
A
B
C
D
E
F
G
H
I
J
K
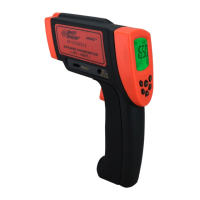
5.2 Locating a hot/cold spot: To find a hot/cold spot, aim
the thermometer outside the area of interest, then
scan across with up and down motion until you locate
the hot/cold spot.
(Figure2)
9V
DC IN
5.Quick start instruction
5.1 LCD display: B measuring unit
A measuring reading D back light on icon
C laser on icon F scanning icon
E battery power icon G data hold icon
H mode/emissivity indicator I data storge / read icon
J low temperature alarm icon
K high temperature alarm icon
5.3 Diagram description
(1) Trigger: When turn on LCD display VERXX software
version for 1 sec. And turn to display reading with
SCAN icon. Release the trigger, display reading
with HOLD icon. Built in auto power off in 30sec.
RS232
9V
DC IN
0.30
0.95
0.95
0.70
0.50
0.90
0.85
0.95
0.95
0.95
0.94
0.90
0.93
0.85
0.98
0.70
0.50
0.98
0.94
0.93
0.95
0.95
0.95
0.90
0.98
0.90
0.80
0.94
0.93
0.94
Emissivity
Emissivity
Marterial
Marterial
Aluminum
Asbestos
Asphalt
Basalt
Brass
Brick
Carbon
Ceramic
Concrete
Copper
Dirt
Frozen food
Hot food
Glass(plate)
Ice
Iron
Lead
Limestone
Oil
Paint
Paper
Plastic
Rubber
Sand
Skin
Snow
Steel
Textiles
Water
Wood