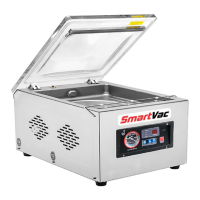
This document describes the SmartVac vacuum packing machine, model DZ-300 (Product Code VPS0300), an automatic packaging machine designed for various items including food, medicine, native products, clothing, electronic components, hardware, and instrument components.
Function Description:
The SmartVac machine is primarily a vacuum sealing package device. It offers vacuum packaging, inflation, and pumping functions. A key feature is its ability to perform vacuum or nitrogen-filled packaging without restrictions on package size or volume, making it versatile for a wide range of applications. The machine operates by removing air from a packaged bag via an air suction nozzle, then sealing the bag. This process creates a high vacuum with minimal residual air, which effectively inhibits the proliferation of bacteria and other microorganisms, preventing oxidation and mildew. For soft items, it also reduces package volume, aiding in transportation and storage. The machine utilizes international advanced control technology to automate the vacuum packaging process, allowing for adjustable heat sealing temperature and vacuum levels.
Important Technical Specifications:
- Dimensions: 540 x 440 x 540mm
- Weight: 43kg
- Pump Speed: 2-4 Times/min
- Sealing Size: 295 x 8mm
- Voltage: 220~240V
- Power: 0.7kW
The machine's structure comprises four main parts: the fuselage, the circuit system, the pneumatic system, and the vacuum system.
Usage Features:
The SmartVac machine boasts a compact structure, small size, light weight, low power consumption, high sensitivity, and convenient operation. It is suitable for packaging materials such as polyester/polyethylene, nylon/polyethylene, polypropylene/polyethylene, polyester/aluminum foil/polyethylene, and nylon/aluminum foil/polyethylene. Packaged items benefit from moisture-proof, mildew-proof, insect-proof, anti-pollution, anti-oxidation, and anti-squeezing properties, saving volume and freight, and prolonging storage periods while ensuring quality.
The control panel features several indicators and buttons:
- Vacuum gauge (11): Displays pressure in the vacuum chamber.
- Work indicator (6): Illuminates when the machine is operating.
- Emergency stop (7): Used for immediate shutdown in case of problems or urgent stops.
- Setting button (10): Used to set parameters. When powered on, "FF" indicates standby. Pressing it cycles through pumping time, sealing time, and cooling time settings.
- Add button (9): Increases time values.
- Decrease button (8): Reduces time values.
Operating Modes:
The machine supports several working modes, activated by turning the airing switch on or off:
-
Pumping, sealing, cooling: (Default mode for vacuum packaging of food, electronics, medicine, tools, department stores)
- In standby, turn on the air suction switch (indicator light on).
- Press the foot switch to start the program and vacuum pump.
- After pumping, sealing time counts down, followed by cooling time.
- Returns to standby upon completion.
-
Inflate, seal, cool: (Suitable for shockproof or extrusion-sensitive items like general food, electronics, electrical appliances)
- In standby, turn on the air inlet switch (indicator lights on).
- Press the foot switch to start the program and solenoid valve.
- After filling, sealing time counts down, followed by cooling time.
- Returns to standby upon completion.
-
Pumping, inflating, sealing, cooling: (Ideal for food preservation or packaging sensitive to extrusion)
- In standby, open both air suction and air inlet switches (both indicator lights on).
- Press the foot switch to start the vacuum pump.
- After pumping, the solenoid valve closes, and inflation time begins (for gases like nitrogen).
- Followed by sealing time countdown and cooling time countdown.
- Returns to standby upon completion.
-
Sealing, cooling: (For general separate sealing of stationery, electrical appliances, medicines)
- Turn off both air suction and air pressure switches in standby.
- Step on the foot switch.
- Sealing time counts down, followed by cooling time.
- Returns to standby upon completion.
Time Settings:
- Pumping time: Generally 20-30 seconds, adjustable based on vacuum gauge readings (aim for 0.06-0.08MPa).
- Sealing time: Typically 1.5 seconds, depending on the vacuum bag material.
- Cooling time: Approximately 3 seconds.
Emergency Stop:
In case of abnormal situations or to end work prematurely, press the emergency stop switch. The machine will power off the main board and stop. Turn the switch clockwise to return to standby.
Note: Do not turn on the machine 5 minutes before it works; this extends the service life of electronic components.
Maintenance Features:
Regular maintenance is crucial for optimal performance and longevity:
- Read Instructions: Familiarize yourself with operation, adjustment, and usage methods before use.
- Lubrication: Apply appropriate lubricating oil to all moving parts, oil holes, and grease nozzles. Fill the vacuum pump with No. 1 vacuum pump oil according to its manual. Ensure the oil level is between 1/2 and 3/4 of the oil window height during operation. Regularly check oil level and cleanliness.
- Air Filters: Clean inlet and outlet air filters regularly (weekly for the lid, monthly for the filter). Dirt on the filter can impair vacuum pump efficiency.
- Air Filter Cover: Check and clean the air filter cover regularly for foreign matter (liquid, powder, particles).
- Air Tube: Remove and clean any dirt in the air tube promptly.
- Grounding Wire: Always check for good contact of the grounding wire to ensure electrical safety.
- Heat-Sealing Bracket: Regularly inspect the Teflon tape on the heat-sealing bracket for foreign matter, flatness, and sealing strength. Replace worn, burned, or sealed Teflon sheets.
- Teflon Tape: Replace Teflon tape in time.
- Silicone Strip/Teflon Tape under Heating Sheet: If these burn out, they can cause short circuits and poor sealing. Inspect and replace as necessary.
- Fault Management: If a fault is detected, turn off the power immediately. If needed, press the emergency stop button. After the machine is homed, turn off the power, diagnose the cause, and rectify the fault.
Troubleshooting Guide:
The manual provides a detailed troubleshooting table for common issues:
- Unfavorable sealing: Caused by dirty heating plate Teflon/silicone, damaged Teflon adhesive fabric, damaged silica gel, damaged electric heating film, or short cooling time. Solutions include cleaning, replacing components, or lengthening cooling time.
- Uneven sealing: Caused by damaged silica gel, long sealing time, or short cooling time. Solutions include replacing silica gel, adjusting sealing time, or lengthening cooling time.
- Heating wire frequently broken: Caused by damaged tape or disabled electric heater. Solutions include replacing tape or heater band.
- Heating blade not rising despite bright heating lamp: Caused by damaged electric heating film or heating transformer. Solutions include replacing heater film or contacting agency for transformer replacement (dangerous to do yourself).
- Air not discharging from pocket when vacuum begins: Caused by gas nozzle not in pocket, vacuum obstruction, or dirty gas nozzle/filler. Solutions include restarting, positioning goods close to nozzle, or cleaning components.
- Pressure bar not moving down when heating lamp is lit and foot switch pressed: Caused by faulty foot switch. Solution is to check and replace the foot switch if needed.
- Pressure bar moving up immediately after loosening foot switch: Caused by misplacing upper sensor, retraction gas nozzle sensor, or front-pushed air nozzle sensor, or middle sensor. Solutions involve checking sensor signals and positioning.
- Sealing stops running (heating light extinguishes): Caused by the start sensor. Solution is to check if the start sensor signal is bright.