20. Positioning the Armrest
1. Keeping the tone-arm in the armrest and avoiding any pressure that might disturb the
HTA setting, swing both tone-arm and armrest radially until the left-hand front edge of
the headshell is at a radius of 205mm (8 1/16”) from the centre of the record spindle. The
measurement is not critical within+/- 3mm (1/8”) but the accuracy of the anti-skate
control will be affected if this is exceeded.
21. Locking the Base
1. The two M4 x 18 socket cap screws securing the tone-arm base to the sub-chassis can
now be tightened, followed by the base clamp bolts at the rear. Excessive force is
unnecessary and should be avoided. At this point the VTA screw may be removed until it
is required again.
22. Anti-Skate Control
1. The dial is calibrated and should be set to correspond with the VTF in use. Rotate the dial
until the chosen setting coincides with the index point.
Requirements are dependent on a number of variables and the recommended setting will
be found to be a good compromise. The situation lends itself to experimentation. Listen
for any discrepancy between channels. If the left channel mistracks, reduce the setting and
if the right channel mistracks increase it.
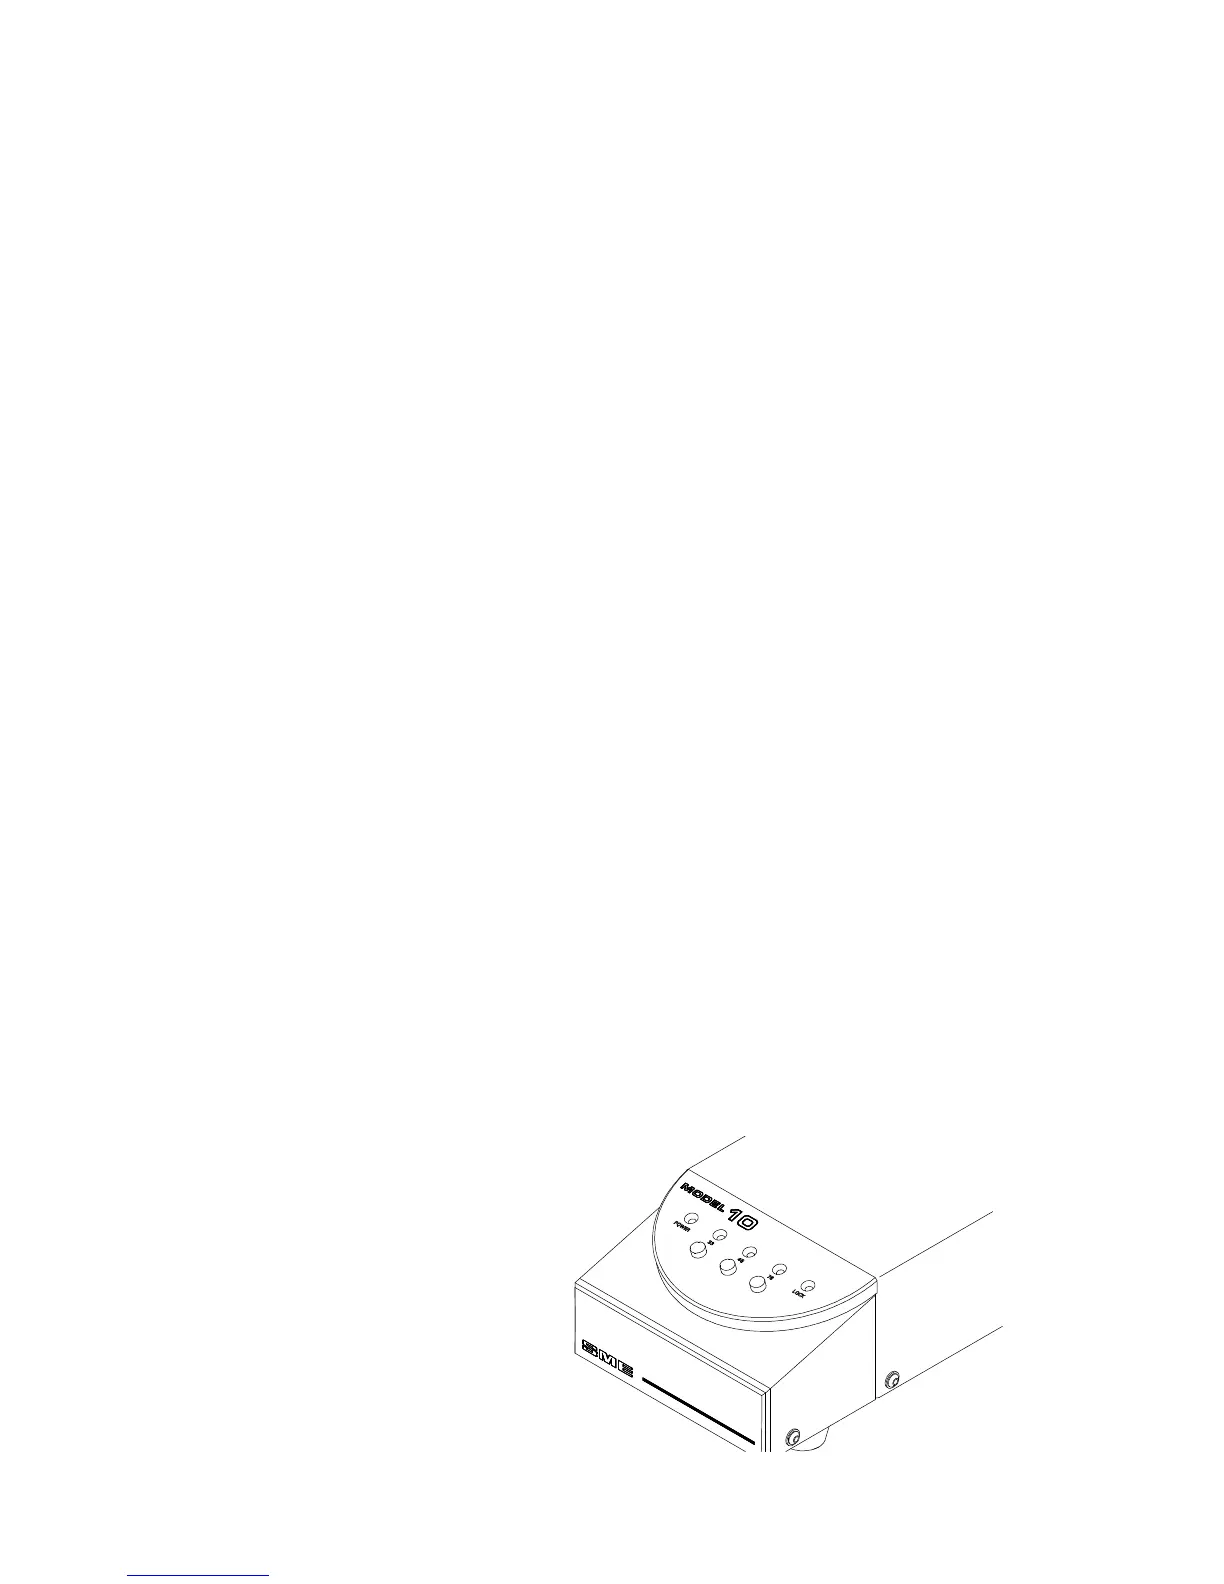
23. Operation - Turntable speed adjustment
The Model 10 precision turntable is extensively run-in and it’s speeds set before leaving
the factory. If you should wish to check the speed settings and make your own
adjustments, the procedure is as follows:
1. Complete the arm and cartridge set-up procedures as detailed in Sections 13 - 22 above.
2. Plug in the Power Supply and switch ON, the mains switch is at the rear. The LED
marked POWER will light up.
3. Place the Stroboscopic Disc (1087) on the platter. Re-check the drive belt for centrality on
the motor pulley.
4. Press button marked 33 once to
start the turntable rotating, the
LOCK LED blinks momentarily
until the speed stabilises and then
becomes constant indicating that
the selected speed is locked.
Power Supply - Control Unit
15