11. Unpacking
1. Unpack and check all items against the packing list on page 7. In the very unlikely event
that anything is missing your dealer and SME Limited should be notified at once.
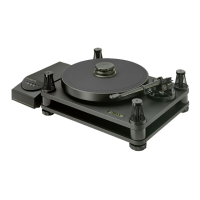
2. The design of the turntable allows it to be used on any substantial table or similar piece of
furniture in the absence of a dedicated equipment stand.
3. Rest the base and sub-chassis assembly on the soft seat of an armchair or settee so that it
stands vertically with the SME emblem pointing upwards and the underside of the base
towards you, it can be helpful to have a colleague hold it in this position. Remove the
transit screw from the underside of the base as shown on page 8.
4. Restore the unit to its normal position and keep the screw safely for possible re-use.
12. Setting Up
Note:
The spindle bearing has been fully lubricated at the factory, the addition of more oil at this
stage is unnecessary. See Section 25 ‘Maintenance’ for details of lubrication.
1. Unpack the drive belt and place it over the driven pulley. Press it down as far as the
flange, ensuring that it is free from twists, then stretch it over the motor pulley.
2. Examine the face of the driven pulley and the underside of the platter to ensure that both
mating surfaces are clean, place the platter squarely over the turntable spindle lowering it
gently until it rests on the driven pulley. Rotate the platter slowly by hand to position the
belt on the pulleys.
WARNING
: The unique Isodamp extensional damping material with
which the platter is faced has been diamond turned and scrolled for intimate contact with
the record. Avoid handling or anything that might mar the surface, as like the record
itself, it could be easily damaged.
3. Insert the stylus guard into the holes provided in the base, as shown on page 8. Push down
to ensure full engagement.
4. If desired the turntable can be levelled by rotating the appropriate supporting foot. If the
base is lifted slightly at the same time the foot will turn more readily. Check the
adjustment with a precision spirit level placed on the platter.
5. Any SME nine-inch precision pick-up arm can be used with the Model 10 turntable, the
SME Model 10 precision pick-up arm is particularly recommended for its high quality at
moderate cost.
6. Unpack the power supply unit, the mains voltage setting is indicated on the back panel.
Before fitting the power cord check carefully that this matches your mains voltage.
7. The power cord has a standard moulded mains plug. In the event that it must be replaced
the original plug should be cut off and disposed of responsibly.