Do you have a question about the Smeg AP91VJME and is the answer not in the manual?
Ensure all electrical equipment is earthed as per safety regulations for proper operation.
Use compatible plugs and sockets, ensure socket accessibility, and never unplug by pulling the cable.
Perform a quick test after installation; if issues arise, disconnect and call for assistance.
Never attempt to repair the appliance yourself; contact authorized service.
Avoid placing flammable items in the oven to prevent fire hazards.
Be cautious as the appliance becomes very hot during use; avoid touching heating elements.
Appliance use is restricted for individuals with reduced physical/mental ability unless supervised.
Installation requires a qualified technician, adherence to standards, and specific clearances from walls and cupboards.
Ensure voltage, cable cross-section, and earthing match specifications for safe electrical connection.
Verify power supply line voltage and cable cross-section match appliance specifications.
For fixed connections, install a multipolar cut-out device accessible near the appliance.
Ensure adequate room ventilation for gas combustion and air exchange, keeping vents unobstructed.
Extract combustion products via hoods or chimneys; efficient systems require specialist planning and regulatory compliance.
Connect the appliance to the gas supply using appropriate hoses and ensuring all safety conditions are met.
Install rubber hoses up to 1.5m, ensuring no contact with moving parts or crushing, and verify conditions.
Rubber hoses must be permitted only if they can be inspected along their entire length.
Connect to gas mains using a compliant rubber hose, ensuring secure fittings with seals and clamps.
Connect LPG gas using a compliant pressure regulator and ensuring supply pressure matches specifications.
Assemble LPG hose connectors, seals, and clamps correctly for a secure connection to the regulator and cylinder.
Connect with a compliant steel hose (max 2m length), ensuring a seal and checking for leaks with soapy solution.
Disconnect the appliance from the power supply before performing gas adaptation operations.
Replace hob burner nozzles by removing caps, unscrewing old nozzles, and fitting new ones suitable for the gas type.
Table detailing burner types, heating capacity, and nozzle diameters for LPG and Natural Gas.
Adjust oven burner by replacing nozzles and regulating primary air based on gas type.
Replace oven burner nozzle using a socket wrench after loosening fixing screws and moving the burner.
Adjust oven primary air by loosening a screw and turning a sleeve to the correct position for the gas type.
Regulate hob burner minimum flame for natural gas by adjusting a screw on the tap rod.
Adjust LPG hob burner minimum by tightening a side screw clockwise; restore sealing afterwards.
Adjust oven burner minimum by turning a screw on the thermostat knob, ensuring flame stability.
Level the appliance using adjustable feet for proper cooking results, adjusting height as needed.
Use the knob to light the gas burner and select cooking temperature between Min. and 275°C.
Warning: The gas oven and grill/rotisserie functions cannot be operated at the same time.
Steps to light hob burners, ensuring correct placement of parts and safety precautions.
Pre-heat oven before first use to burn off residues; do not cover oven bottom with foil.
Gas oven must be lit with the door open due to a safety system blocking ignition when closed.
Instructions for operating the gas oven, including electronic and manual ignition methods.
Ignite gas oven using electronic spark by pressing thermostat knob and turning to maximum temperature.
Manually ignite gas oven using a lit match, pressing thermostat knob and checking flame through inspection hole.
Instructions for operating the gas grill burner, including manual and electrical ignition.
Manually ignite grill burner by pressing knob, turning to grill position, and applying a lit flame.
Electrically ignite grill burner by pressing knob, turning to grill position, and confirming ignition.
Warning: Gas oven and gas grill cannot be operated simultaneously.
Instructions for using the rotisserie in maxi oven cookers, including assembly and activation.
Thread support frame, position rod, and push into oven; activate by turning switch. Operations must be done with oven off and cold.
Heat grill for 5 minutes before use; season food, coat with oil/butter, and use the oven tray.
Set the oven to turn on and off automatically using the programmer for desired cooking duration and end time.
Clean the oven regularly after cooling, removing all removable parts, including the oven rack.
Disconnect appliance from power supply before performing any operations requiring access to powered parts.
Remove the oven door by lifting levers, raising it to 45°, and then detaching it from the hinges.
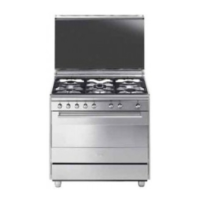
| Type | Freestanding |
|---|---|
| Number of Burners | 5 |
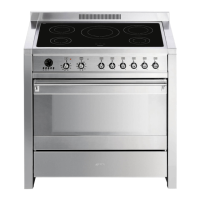
| Width | 90 cm |
| Energy efficiency class | A |
| Hob type | Gas |
| Number of ovens | 1 |
| Fuel Type | Gas |
| Ignition Type | Automatic |
| Material | Stainless Steel |