EasyManua.ls Logo

Smeg Professional Series - User Manual

Smeg Professional Series
30 pages
Print Icon
To Next Page IconTo Next Page
Loading...
Table of Contents
3
EN
1Installation 12
1.1 Product dimensions 12
1.2 Unpacking, moving and positioning the range 15
1.3 Electrical connection 17
1.4 Gas connection 18
1.5 Conversion to propane gas (LPG) 21
1.6 Wall and floor attachment 29
1.7 For the installer 32
IMPORTANT SAFETY INSTRUCTIONS
WARNING
If the instructions contained in this manual are not followed
precisely, fire or explosion may result causing property
damage, personal injury or loss of life.
- Do not store or use gasoline or other flammable vapors or
liquids near this or any other appliance.
- WHAT TO DO IF YOU SMELL GAS
Do not try to light any appliance.
Do not touch any electrical switches.
Do not use any telephones in your building.
Immediately call your gas supplier from a neighbor’s phone.
Follow the gas supplier’s instructions.
If you cannot reach your gas supplier, call the fire
department.
- Installation and service must be performed by a qualified
installer, service company or gas supplier.
INSTALLATION AND SERVICE MUST BE PERFORMED BY A
QUALIFIED INSTALLER.
IMPORTANT: SAVE FOR THE LOCAL INSPECTOR’S USE.
Question and Answer IconNeed help?

Do you have a question about the Smeg Professional Series and is the answer not in the manual?

Summary

1 Installation

1.1 Product dimensions

Details on the physical size and measurements of the appliance.

1.2 Unpacking, moving and positioning the range

Instructions for safely removing and placing the appliance.

1.3 Electrical connection

Guidance on connecting the appliance to the electrical power supply.

1.4 Gas connection

Steps and precautions for connecting the gas supply.

1.5 Conversion to propane gas (LPG)

Procedure for converting the appliance from natural gas to LPG.

1.6 Wall and floor attachment

Instructions for securing the appliance to the wall or floor.

1.7 For the installer

Specific guidance and final checks for the installation professional.

IMPORTANT SAFETY INSTRUCTIONS

Cabinet clearances

Location of the gas and electric outlets

Testing for gas leaks

Setting the pressure regulator for propane gas

Burner and nozzle characteristics tables

Installing the anti-tip bracket

Overview

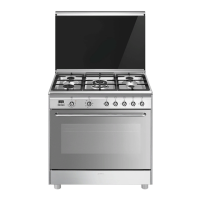
This document outlines the installation, safety, and maintenance procedures for a gas cooking range. It emphasizes the importance of proper installation by qualified professionals to ensure safe and efficient operation.

Function Description:

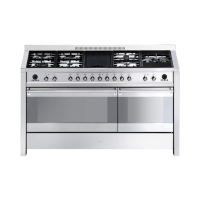
This appliance is a household cooking gas range designed for preparing food using gas burners and an oven. It is equipped with features for both natural gas and propane gas operation, requiring conversion by a qualified technician if propane is to be used. The range includes multiple surface burners with varying heat outputs, an oven burner, and a broiler burner, all designed for precise temperature control during cooking.

Usage Features:

  • Surface Burners: The range features several surface burners, including Dual Flame and Rapid burners, each with individual control knobs for adjusting flame intensity. The burners are designed to ignite electrically, but can also be lit manually in the event of a power outage. Users are instructed to adjust the flame size to prevent it from extending beyond the edge of cooking utensils, ensuring safety and efficiency.
  • Oven and Broiler: The appliance includes an oven and broiler for baking, roasting, and broiling. The oven door can be removed for easier handling during installation, though it is not strictly necessary. Users are cautioned against using the oven for storage to avoid hazardous situations.
  • Gas Type Conversion: The range is shipped from the factory configured for natural gas. However, it can be converted for use with propane gas (LPG) using a specific conversion kit provided. This conversion involves replacing burner nozzles and adjusting the pressure regulator. The manual provides detailed instructions for this process, stressing that it must be performed by a qualified installer.
  • Altitude Operation: The appliance is designed to operate at altitudes up to 10,000 ft (3048 m) above sea level. For altitudes above 2,000 ft (610 m), adjustments may be required to ensure stable burner flames, particularly at the lowest setting. These adjustments should also be performed by a certified professional.
  • Anti-Tip Device: A crucial safety feature is the anti-tip bracket, which must be installed on the floor or wall to prevent the range from tipping over. The manual provides detailed steps for assembling and securing this bracket, and users are instructed to verify its proper engagement by gently tilting the range forward.
  • Ventilation: The manual strongly recommends installing a ventilation hood above the appliance to ensure proper air circulation and exhaust of combustion by-products. It also advises against obstructing air vents or openings for heat exhaust and emphasizes the need for fresh air for proper burner combustion.
  • Electrical Connection: The range requires a grounded 120-Volt electrical outlet. It is equipped with a three-prong grounding plug, and users are warned against cutting or removing the grounding prong. The electrical installation must comply with all local codes and be performed by a qualified electrician.

Maintenance Features:

  • Gas Leak Testing: After any gas connection or conversion, a gas leak test must be performed using a non-corrosive leak detection fluid (e.g., soapy water). Users are explicitly warned against using a flame to check for leaks. If bubbles appear, indicating a leak, the gas supply must be turned off, connections tightened, and the test repeated.
  • Burner Flame Stability Check: After installation and conversion, the stability of the burner flames should be checked at both maximum and minimum settings. For natural gas, the minimum flame can be adjusted by turning a screw on the tap rod. For propane gas, the screws at the side of the tap rod must be turned clockwise all the way. The manual provides visual cues for proper flame appearance (e.g., soft blue flames for natural gas, yellow tips on outer cones for propane gas).
  • Gas Tap Lubrication: Over time, the gas taps may become stiff or jam. The manual indicates that these should be cleaned internally and relubricated by a specialized technician.
  • Nozzle Preservation: Users are advised to save the nozzles removed during gas type conversion along with the instructions for possible future use, should the appliance need to be converted back to a different gas type.
  • Regular Inspections: The document implies the need for regular checks by qualified personnel, particularly for gas connections and burner adjustments, to ensure continued safe operation.
  • Cleaning: While not explicitly detailed as a maintenance feature, the instruction to wipe off residues after a gas leak test suggests general cleaning practices are expected. The removal of grates, griddle plates, burner heads, burner caps, and oven racks during installation also implies these components are removable for cleaning purposes.

Smeg Professional Series Specifications

General IconGeneral
MaterialStainless Steel
Fuel TypeDual Fuel
Number of Ovens1
Number of Burners6
Oven TypeConvection
Power SourceElectric Oven / Gas Cooktop

Related product manuals