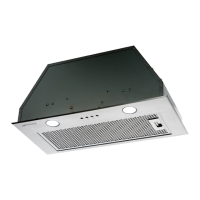
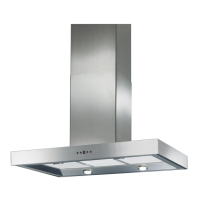
This document provides the user instruction manual for Smeg cooker hoods, models PUM601X and PUM901X, emphasizing "technology with style." It covers essential information for safe installation, operation, and maintenance of the appliance, ensuring optimal performance and longevity.
The primary function of these cooker hoods is to extract cooking fumes and odors from the kitchen, improving air quality and preventing grease buildup. They are designed for domestic use only and are not suitable for commercial applications such as barbecues or fast-food shops. The manual stresses the importance of proper installation and regular maintenance to keep the appliance in good working order.
Usage Features:
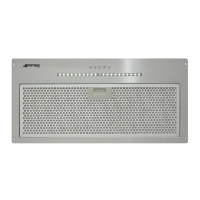
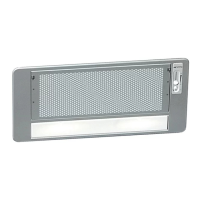
The cooker hood offers three fan speeds—low, medium, and high—each indicated by a fan icon with 3, 4, or 5 blades, respectively. To activate a fan speed, the user presses the corresponding button, which also illuminates an indicator light. Pressing the button again will stop the motor. This allows users to adjust the extraction power based on their cooking needs, from light simmering to heavy frying.
In addition to the fan controls, the cooker hood includes a lighting function. A dedicated light button activates two lighting lamps, illuminating the cooking surface. Pressing the button again turns the lights off. This feature enhances visibility while cooking, making it easier to monitor food preparation.
For light replacement, the manual provides clear instructions: press the lamp cup, twist the bulb counter-clockwise to remove it, and then insert a new lamp. This simple procedure ensures that users can maintain adequate lighting without professional assistance.
The cooker hood is designed to be installed at a distance of 65-75 cm (26-30 inches) from the cooking surface for optimal performance. The manual provides detailed installation instructions, including drilling specifications for the cupboard and methods for mounting the hood. It emphasizes that all installation work must be carried out by a qualified electrician or competent person to ensure safety and proper functioning.
Maintenance Features:
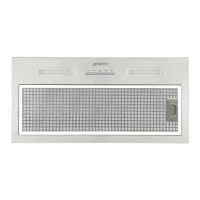
Regular cleaning of the cooker hood and its filter mesh is crucial for maintaining good working order and preventing the accumulation of grease. The manual advises against using detergents that corrode metal products, as the grease filters are made of metal. Two methods are provided for cleaning the filters:
- Manual Cleaning: The filter can be soaked in water (40℃-50℃) with a grease-loosening detergent for 2-3 minutes, then cleaned with a soft brush. Users are cautioned not to brush too hard to avoid damaging the filter.
- Dishwasher Cleaning: Alternatively, the filter can be placed in a dishwasher with detergent, setting the temperature to around 60℃.
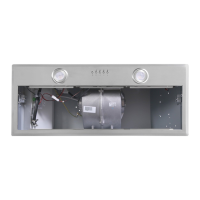
To protect the main body of the rangehood from corrosion, it should be cleaned weekly with hot water and soap or a non-corrosive detergent. Grinding detergents are explicitly warned against, as they can damage the body. It is also critical to keep the motor and other spare parts free from water to prevent damage to the appliance.
The manual also covers the installation and removal of the charcoal filter, which is essential for models operating in recirculation mode (without external venting). Users are instructed to twist the charcoal filter in the direction shown in the diagram to remove or install it. This ensures that the filter can be easily replaced when saturated, maintaining effective odor removal.
Safety and Troubleshooting:
The manual includes a "WARNING" section that highlights critical safety precautions. It states that young children should be supervised to prevent them from playing with the appliance and that the appliance is not intended for use by persons with reduced physical, sensory, or mental capabilities unless supervised. It explicitly warns against flambéing under the range hood and advises keeping the cooker hood away from flames.
Adequate room ventilation is emphasized when the cooker hood and a gas hob are operating simultaneously. The manual also prohibits exhausting gas from the cooker hood through the same heated flue used for gas hobs and other kitchen appliances. Before installation and usage, users must verify that the voltage (V) and frequency (Hz) indicated on the cooker hood match their home's electrical supply.
A "TROUBLESHOOTING" section is provided to help users diagnose and resolve common issues. This section lists potential faults, their causes, and corresponding solutions. For example:
- Light on, but motor does not work: Possible causes include a blocked leaf, damaged capacitor, jammed motor bearing, or a bad smell from the motor. Solutions range from removing the blocking to replacing the capacitor or motor.
- Light does not work, motor does not work: This could be due to a damaged light or loose power cord. Solutions involve replacing the lights or connecting wires as per the electric diagram.
- Oil leakage: Causes might be untightly sealed one-way valve/air ventilation entrance or leakage from the U-shaped section. Solutions include sealing with glue or soap/paint.
- Shake of the body: This can be caused by a damaged leaf or a motor that is not tightly hung. Solutions involve replacing the leaf or locking the motor tightly.
- Insufficient suction: Possible causes are too long a distance between the body and the gas top, or too much ventilation from open doors/windows. Solutions include readjusting the distance or choosing a new location.
- The machine inclines: This indicates that the fixing or hanging screws are not tight enough, requiring them to be tightened and made horizontal.
The manual also includes a warranty section, detailing the warranty period and conditions, and providing contact information for Smeg Australia Pty Ltd customer service. It advises users to retain the purchase invoice or sales docket for warranty claims.
In summary, the Smeg cooker hood manual provides comprehensive guidance for users to safely and effectively operate and maintain their PUM601X or PUM901X appliance, ensuring a clean and pleasant cooking environment.