EasyManua.ls Logo

Smeg PV175B3 - User Manual

Smeg PV175B3
24 pages
Print Icon
To Next Page IconTo Next Page
Loading...
Contents
3
EN
1Instructions 4
1.1 General safety instructions 4
1.2 Identification plate 7
1.3 Manufacturer liability 7
1.4 Appliance purpose 7
1.5 This user manual 8
1.6 Disposal 8
1.7 How to read the user manual 9
2 Description 10
2.1 General Description 10
2.2 Symbols 11
2.3 Available accessories 11
3Use 12
3.1 Instructions 12
3.2 First use 12
3.3 Using the hob 12
4 Cleaning and maintenance 14
4.1 Instructions 14
4.2 Cleaning the appliance 14
5Installation 16
5.1 Clearances above and around domestic appliances 16
5.2 Safety instructions 17
5.3 Section cut from the work surface 18
5.4 Mounting 18
5.5 Fixing brackets 19
5.6 Gas connection 20
5.7 Adaptation to different types of gas 22
5.8 Electrical connection 26
We advise you to read this manual carefully, which contains all the instructions for
maintaining the appliance's aesthetic and functional qualities.
For further information on the product: www.smeg.com
These instructions apply only for the destination countries listed on the appliance's data plate.
This is a class 3 built in hob.
Question and Answer IconNeed help?

Do you have a question about the Smeg PV175B3 and is the answer not in the manual?

Overview

This document serves as a comprehensive user manual for a built-in hob, providing instructions for its installation, safe use, and maintenance. The manual is structured into five main sections: Instructions, Description, Use, Cleaning and Maintenance, and Installation. It emphasizes safety, proper handling, and technical specifications to ensure optimal performance and longevity of the appliance.

Function Description

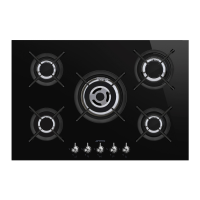
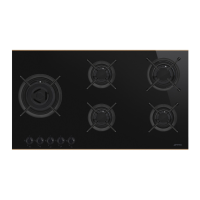
The device is a built-in hob designed for domestic cooking. It features multiple gas burners, each controlled by a dedicated knob on the front panel. The hob is equipped with an electronic ignition device for easy lighting of the burners. Safety features include a device that cuts off the gas supply in case of accidental flame extinction. The hob is designed to be integrated into a kitchen work surface, with specific requirements for ventilation and clearances. It can be adapted for use with different types of gas (Natural Gas or ULPG) by replacing nozzles and adjusting primary air, a task to be performed by qualified personnel.

Important Technical Specifications

Gas Burners:

  • Auxiliary: Nominal gas consumption (ULPG) 4.1 MJ/h, Injector 54 (1/100 mm), Primary air 4 mm. Nominal gas consumption (NG) 4.7 MJ/h, Injector 98 (1/100 mm), Primary air 4 mm.
  • Semi-rapid (SR): Nominal gas consumption (ULPG) 6.0 MJ/h, Injector 67 (1/100 mm), Primary air 2 mm. Nominal gas consumption (NG) 6.1 MJ/h, Injector 110 (1/100 mm), Primary air 3 mm.
  • Reduced Rapid (RR): Nominal gas consumption (ULPG) 9.4 MJ/h, Injector 82 (1/100 mm), Primary air 2 mm. Nominal gas consumption (NG) 9.4 MJ/h, Injector 135 (1/100 mm), Primary air 2 mm.
  • Large Rapid (R1): Nominal gas consumption (ULPG) 14.5 MJ/h, Injector 100 (1/100 mm), Primary air 10 mm. Nominal gas consumption (NG) 14.5 MJ/h, Injector 170 (1/100 mm), Primary air 6 mm.
  • Medium Rapid (R2): Nominal gas consumption (ULPG) 10.8 MJ/h, Injector 85 (1/100 mm), Primary air 3 mm. Nominal gas consumption (NG) 10.8 MJ/h, Injector 145 (1/100 mm), Primary air 5 mm.

Cookware Diameters:

  • Auxiliary: 7 - 18 cm
  • Semi-rapid: 10 - 24 cm
  • Reduced rapid: 18 - 24 cm
  • Medium rapid: 20 - 26 cm
  • Large rapid: 20 - 26 cm

Installation Dimensions:

  • Cut-out (L x X x Y): 600-720 mm (L) x 550-560 mm (X) x 478-482 mm (Y).
  • Minimum clearances to combustible surfaces:
    • Vertical combustible surface: 200 mm from the edge of the nearest burner.
    • Overhead: 650 mm from the highest part of the highest surface, 750 mm for an exhaust fan.
    • Non-combustible surface: 50 mm.
    • Benchtop: 20 mm.
  • Top pan support height: 9-12 mm above the benchtop, maximum 40 mm with respect to the surface supporting the appliance.
  • Gas connection: Flexible hose assembly not exceeding 1200 mm (Class B or D, 10mm internal diameter).
  • Electrical connection: 220-240 V 1N~, 3 x 1 mm² three-core cable. Cables must withstand 90°C. Terminal supply wires tightening torque: 1.5 - 2 Nm.

Usage Features

Ignition and Flame Adjustment:

  • To light a burner, press and turn the corresponding knob anti-clockwise to the maximum flame symbol.
  • If the burner does not light within 15 seconds, turn the knob to the off position and wait 60 seconds before trying again.
  • After lighting, keep the knob pressed for a few seconds to allow the thermocouple to heat up.
  • Flame intensity can be adjusted between maximum and minimum settings by turning the knob.
  • To turn off a burner, return the knob to the off position.

Safety Devices:

  • In case of accidental flame extinction, a safety device will trip, cutting off the gas supply. Return the knob to the off position and wait at least 60 seconds before attempting to relight.

Optimal Cooking Practices:

  • Use pans with lids and of suitable size for the burner to maximize efficiency and minimize gas consumption. Flames should not extend beyond the sides of the pan.
  • Once contents boil, reduce the flame to prevent boil-overs.
  • All pans or griddles must be placed within the perimeter of the hob to prevent burns or damage.
  • All pans must have smooth, flat bottoms.

Griddle Use:

  • Pre-heat griddle on maximum power for no more than 10 minutes.
  • Reduce power during cooking.
  • Ensure burner flames do not extend beyond the griddle's edge.
  • Maintain a gap of at least 150 mm between the griddle's edge and the side wall.
  • Do not place the griddle over more than one burner simultaneously.

Maintenance Features

General Cleaning:

  • Clean surfaces regularly after use, once they have cooled.
  • Use specific non-abrasive, chlorine-free products. Apply to a damp cloth, wipe the surface, rinse thoroughly, and dry with a soft or microfibre cloth.
  • For food stains or residues, avoid metallic sponges or sharp scrapers. Use wooden or plastic utensils if necessary.
  • Do not allow sugary food residues (e.g., jam) to set on the hob, as they can damage the enamel.

Removable Components:

  • Cooking hob grids: Remove, clean with lukewarm water and non-abrasive detergent, remove encrustations, dry thoroughly, and return to the hob. Continuous contact with flame may cause enamel modifications over time, which is normal and does not affect operation.
  • Flame-spreader crowns and burner caps: Remove for easier cleaning. Wash in hot water with non-abrasive detergent, remove encrustations, dry perfectly, and refit ensuring correct positioning in their housings.
  • Igniters and thermocouples: Keep perfectly clean for correct operation. Check frequently, clean with a damp cloth if necessary, and remove dry residues with a wooden toothpick or needle.

Gas Taps:

  • If gas taps become difficult to turn or blocked, clean them internally and replace the lubrication grease. This should be performed by a specialized technician.

Annual Service:

  • Annual service by an authorized person is recommended, especially if issues like incomplete ignition, yellow tipping, carbon deposition, lifting, floating, lighting back, or objectionable odor are noticed.

Disposal:

  • The appliance must be disposed of separately from other waste, in accordance with European directives.
  • Cut the power supply cable and remove it with the plug.
  • Consign to appropriate selective collection centers for electrical and electronic equipment waste, or return to the retailer when purchasing an equivalent product.
  • Packaging materials are recyclable and should be consigned to appropriate collection centers.

Safety Precautions for Maintenance:

  • Always use necessary personal protective equipment (PPE).
  • Switch off the power supply before performing any work.
  • Cleaning and maintenance must not be carried out by unsupervised children.

Smeg PV175B3 Specifications

General IconGeneral
BrandSmeg
ModelPV175B3
CategoryHob
LanguageEnglish

Related product manuals