EasyManua.ls Logo

Smeg SF750AS - User Manual

Smeg SF750AS
26 pages
Print Icon
To Next Page IconTo Next Page
Loading...
Contents
29
EN
1 Instructions 30
1.1 General safety instructions 30
1.2 Manufacturer liability 31
1.3 Appliance purpose 31
1.4 Disposal 31
1.5 Identification plate 32
1.6 This user manual 32
1.7 How to read the user manual 32
2 Description 33
2.1 General Description 33
2.2 Control panel 33
2.3 Other parts 34
2.4 Available accessories 35
3 Use 36
3.1 Instructions 36
3.2 First use 36
3.3 Using the accessories 37
3.4 Using the oven 37
3.5 Cooking advice 40
3.6 Analogue programmer 41
4 Cleaning and maintenance 43
4.1 Instructions 43
4.2 Cleaning the appliance 43
4.3 Removing the door 43
4.4 Cleaning the door glazing 44
4.5 Vapor Clean 47
4.6 Extraordinary maintenance 48
5 Installation 50
5.1 Electrical connection 50
5.2 Cable replacement 50
5.3 Positioning 51
We advise you to read this manual carefully, which contains all the instructions for
maintaining the appliance’s aesthetic and functional qualities.
For further information on the product: www.smeg.com
Question and Answer IconNeed help?

Do you have a question about the Smeg SF750AS and is the answer not in the manual?

Overview

This document describes a built-in oven, providing instructions for its safe use, operation, maintenance, and installation.

General Description

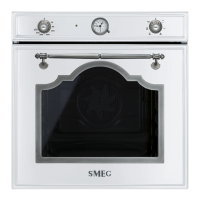
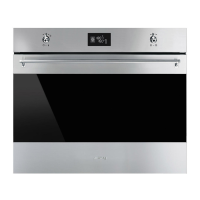
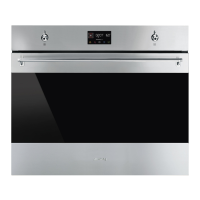
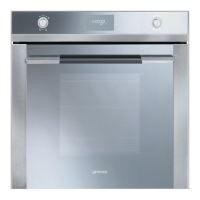
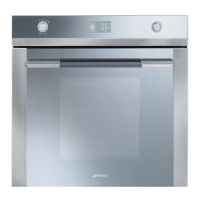
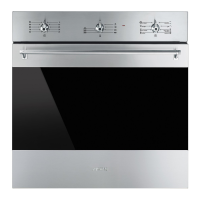
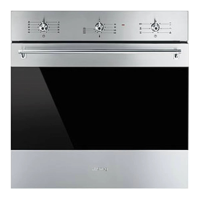
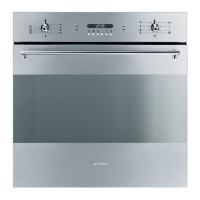
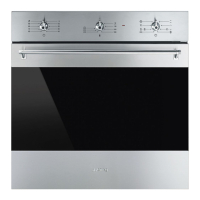
The oven features a control panel, interior lighting, and a cooling fan. The control panel includes a temperature knob, a thermostat indicator light, an analogue programmer, and a function knob. The oven cavity is equipped with shelves for positioning trays and racks at different heights, with insertion heights indicated from the bottom upwards.

Usage Features

The oven offers various cooking functions, each suited for different cooking modes:

  • Static: Heat comes from above and below, ideal for traditional cooking of single dishes like roasts, bread, cakes, and fatty meats.
  • Grill: Heat from the grill element provides perfect grilling results for thin and medium-thickness meats. It can be combined with a rotisserie (if fitted) for even browning. Suitable for sausages, spare ribs, bacon, and grilling large quantities of meat evenly.
  • Lower Element: Heat from the bottom element completes cooking for foods requiring a higher bottom temperature without affecting browning. Perfect for cakes, pies, tarts, and pizzas.
  • Turbo: Combines fan-assisted and traditional cooking, allowing different foods to be cooked on several levels quickly and efficiently without odours mingling. Ideal for large volumes requiring intense cooking.
  • Eco: Uses the grill and lower heating element in combination, suitable for cooking on a single shelf with low energy consumption.
  • Fan Assisted: The fan combined with traditional cooking ensures consistent cooking for complex recipes, biscuits, and cakes, even when cooked simultaneously on several levels (2nd and 4th shelves recommended for multiple-level cooking).
  • Fan with Grill: Air produced by the fan softens the strong heat from the grill, ensuring even grilling of very thick foods. Perfect for large cuts of meat like pork shin.
  • Fan with Circulaire: The fan and circulaire heating element (at the rear of the oven) allow cooking different foods on several levels simultaneously, provided they require the same temperatures and cooking type. Hot air circulation ensures instant and even heat distribution, preventing odours and flavours from mingling (e.g., fish, vegetables, and biscuits).
  • Fan-assisted Bottom: The fan combined with the lower heating element allows for more rapid cooking. Recommended for sterilising or finishing off foods that are already well-cooked on the surface but need more internal heat. Perfect for any type of food. In pyrolytic models, this function also includes special defrosting and proving functions.
  • Vapor Clean: An assisted cleaning procedure that uses steam to soften dirt residues, making internal oven cleaning easier.

Using the Oven:

  1. Switching On: Select the desired cooking function using the function knob, then set the temperature using the temperature knob. Ensure the programmer clock shows the "manual cooking" symbol.
  2. Using Accessories: Racks and trays are inserted into side guides until they stop, with mechanical safety locks facing downwards and towards the oven back. The tray rack is inserted into the tray to collect fat separately from food.
  3. Cooking Advice:
    • General: Use fan-assisted functions for consistent multi-level cooking. Do not shorten cooking times by increasing temperature. Keep the appliance clean.
    • Meat: Cooking times vary by thickness and quality. Use a meat thermometer or press the roast to check doneness.
    • Grill/Fan with Grill: Meat can be grilled in a cold or preheated oven. Preheat for Fan with Grill. Place food at the centre of the rack. For Grill, turn the temperature knob to maximum.
    • Desserts/Pastries/Biscuits: Use dark metal moulds for better heat absorption. Temperature and cooking time depend on dough quality. Use a toothpick to check doneness. If desserts collapse, reduce temperature by 10°C and increase cooking time.
    • Defrosting/Proving: Place frozen foods in a lidless container on the first shelf, avoiding overlap. For meat, use a rack on the second level and a tray on the first to drain liquids. Cover delicate parts with aluminium foil. For proving, place a container of water at the bottom of the oven.
  4. Analogue Programmer: Displays current time, sets programmed cooking operations, and programs the minute minder timer.
    • Setting Time: Pull out and turn knob A clockwise.
    • Manual Cooking: Turn knob A clockwise until pointer B aligns with the "manual cooking" symbol.
    • Timed Cooking: After selecting function and temperature, turn knob A, then move pointer B to the desired cooking time (0-180 minutes). Heating elements turn off and a buzzer sounds when time elapses. Turn knob A clockwise to the "manual cooking" symbol to turn off the buzzer.

Maintenance Features

Cleaning and Maintenance:

  • Instructions: Do not use steam jets, abrasive/corrosive detergents (scouring powders, stain removers, chlorine, ammonia, bleach), or rough/sharp metal scrapers.
  • Cleaning the Appliance: Use manufacturer-distributed cleaning products. Clean regularly after cooling. Remove all removable parts before cleaning.
  • Removing the Door: Open the door completely, insert two pins into hinge holes, then grasp the door and lift it at a 30° angle to remove. To reassemble, insert hinges into slots, ensuring grooved sections A rest completely, then lower the door and remove pins.
  • Cleaning Door Glazing: Keep glass clean with absorbent kitchen roll. For stubborn dirt, use a damp sponge and ordinary detergent.
  • Removing Internal Glass Panes: Pull the rear part gently upwards (1), then the front part upwards (2) to detach pins from housings. Clean external and internal panes with absorbent kitchen roll or a damp sponge and neutral detergent. Refit panes in reverse order, ensuring pins are centred and inserted into housings.
  • Removing Racks/Trays Support Frames: Pull the frame towards the oven interior to unhook from groove A, then slide it out from seats B. Reinsert in reverse order.
  • Cleaning the Top Section: The oven cavity has a tilting heating element. Push the middle section of the upper heating element towards the rear to release it, then gently lower it. Do not excessively flex the element. Return to position after cleaning.
  • Vapor Clean Cycle:
    1. Preliminary Operations: Remove all accessories (except upper guard if fitted) and self-cleaning panels. Pour approx. 40 cc of water onto the oven floor. Spray a water and washing-up liquid solution inside the oven (approx. 20 times). Close the door. Wash self-cleaning panels separately in warm water and detergent.
    2. Setting: Turn function and temperature knobs to the "Vapor Clean" symbol. Set cooking time to 18 minutes using the analogue programmer.
    3. End of Cycle: Open the door and wipe away dirt with a microfibre cloth. Use a non-scratch sponge with brass filaments for stubborn deposits. Use specific oven cleaning products for grease. Remove remaining water. Dry the oven using a fan-assisted function at 160°C for approx. 10 minutes. Wear rubber gloves and consider removing the door for easier access.
  • Extraordinary Maintenance:
    • Removing/Replacing Oven Seal: Unhook clips in the 4 corners, then pull the seal outwards. To install, hook clips onto the oven seal.
    • Oven Seal Maintenance: Keep the seal soft and elastic. Clean with a non-abrasive sponge and lukewarm water.
    • Replacing Internal Light Bulb: Unplug the appliance. Remove all accessories and rack/tray support frames. Remove the bulb cover with a screwdriver (avoid scratching enamel). Slide out and remove the bulb. Replace with a 40W bulb of the same type. Refit the cover, ensuring moulded part A faces the door. Press the cover down completely onto the bulb support.

Installation

  • Electrical Connection: Have qualified personnel perform the connection. Connect to earth according to safety standards. Disconnect mains power supply. Check grid characteristics against the identification plate. The appliance works at 220-240V~. Use a three-core cable (3 x 1.5 mm² internal conductors). The ground wire should be 20 mm longer than others.
    • Fixed Connection: Install an omnipolar circuit breaker near the appliance in an easily reachable position.
    • Plug and Socket: Ensure plug and socket are of the same type. Avoid adapters/shunts to prevent overheating.
  • Cable Replacement: Disconnect mains power supply. Unscrew rear casing screws to access the terminal board. Replace the cable. Ensure cables follow the best route to avoid contact with the appliance.
  • Positioning:
    • Heavy Appliance: Position with assistance.
    • Pressure on Open Door: Do not use the oven door to lever the appliance into place or exert too much pressure when open.
    • Heat Production: Ensure furniture material is heat resistant and has required slots. Do not install in a recess that can be closed with a door or in a cupboard.
    • Power Cable Position: (Rear view diagram provided).
    • Front Panel Seal: Glue the supplied seal to the rear of the front panel to prevent water/liquids from leaking.
  • Fastening Bushings: Remove bushing covers from the front. Mount the appliance into the recess. Secure with screws. Cover bushings with removed covers.
  • Mounting Under Worktops: (Diagrams with dimensions provided). Ensure the furniture's rear/bottom part has an opening of approx. 60 mm.
  • Mounting into a Column: (Diagrams with dimensions provided). Ensure the furniture's top/rear part has an opening approx. 35-40 mm deep.

Smeg SF750AS Specifications

General IconGeneral
Oven TypeElectric
Oven SizeLarge
Energy RatingA
Energy Efficiency ClassA
Number of Functions10
Number of Oven Functions10
Dimensions (H x W x D)592 x 597 x 548 mm
ColorStainless Steel
Number of Ovens1
ColourStainless Steel
Oven Capacity70 liters
Power Consumption3.0 kW

Related product manuals