9
ZCT761ACE Rev. D (03/20)
DO NOT BLOCK VENT OPENINGS!
Application
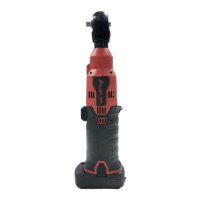
The Snap-on Cordless Impact Wrench is ideal for a wide
variety of fastener turning jobs in both the industrial and
automotive fields. When used with Snap-on impact
sockets, it provides power and speed for greater job
efficiency with less operator fatigue. The impact wrench
also adds the freedom of movement not usually available
with products requiring air hoses or electrical cords.
Operation
Friction Ring Anvil
1. When installing an impact socket, to avoid accidental
starting of the tool, remove the battery pack.
2. Align the square of the socket with four flats at the end
of the anvil.
3. Push the socket over the friction ring, until it comes to
a stop.
4. To remove the impact socket, grip the socket firmly and
slip off the anvil
This type of anvil is suitable for exchanging sockets regularly,
like in a garage environment.
Fuel Gauge
The tool is equipped with a fuel gauge to indicate the
battery’s state of charge. It is located on the left side of
the tool at the top of the handle. A round tri-color LED
changes color depending on state of charge. The gauge
is activated for three seconds at each trigger pull. The
following describes its function:
• LED IS GREEN - Battery is between 80% and 100%
charged
• LED IS YELLOW - Battery is between 25% and 80%
charged
• LED IS RED - Battery is between 0% and 25% charged
• LED IS FLASHING RED - Battery needs charging
immediately
Toggle Trigger
A
B
Figure 3: Using the Forward/Reverse Toggle Switch
A – Forward (Clockwise)
B – Reverse (Counterclockwise)
• For fastening operations (forward/clockwise rotation),
use index finger to depress top part of switch. Release
and screwdriver will stop.
• To unfasten (reverse/counterclockwise rotation), use
middle finger to depress the bottom part of switch.
Inserting Bits/Shank - CT761AQC
Figure 4: Inserting Bits/Shank
A – Tool Bit Quick Disconnect
B – Collar
1. Pull the Quick Disconnect away from the tool.
2. Screwdriver bits interlock by simply pressing bit into
tool holder of the tool.
3. Make sure collar (B) has fully returned to initial
position.
4. Pull on bit to see if it is retained.