South Bend, Indiana USA | networketi.com
SNOW/ICE CONTROL INSTALLATION MANUAL | PART NO. 23918 REV B
7
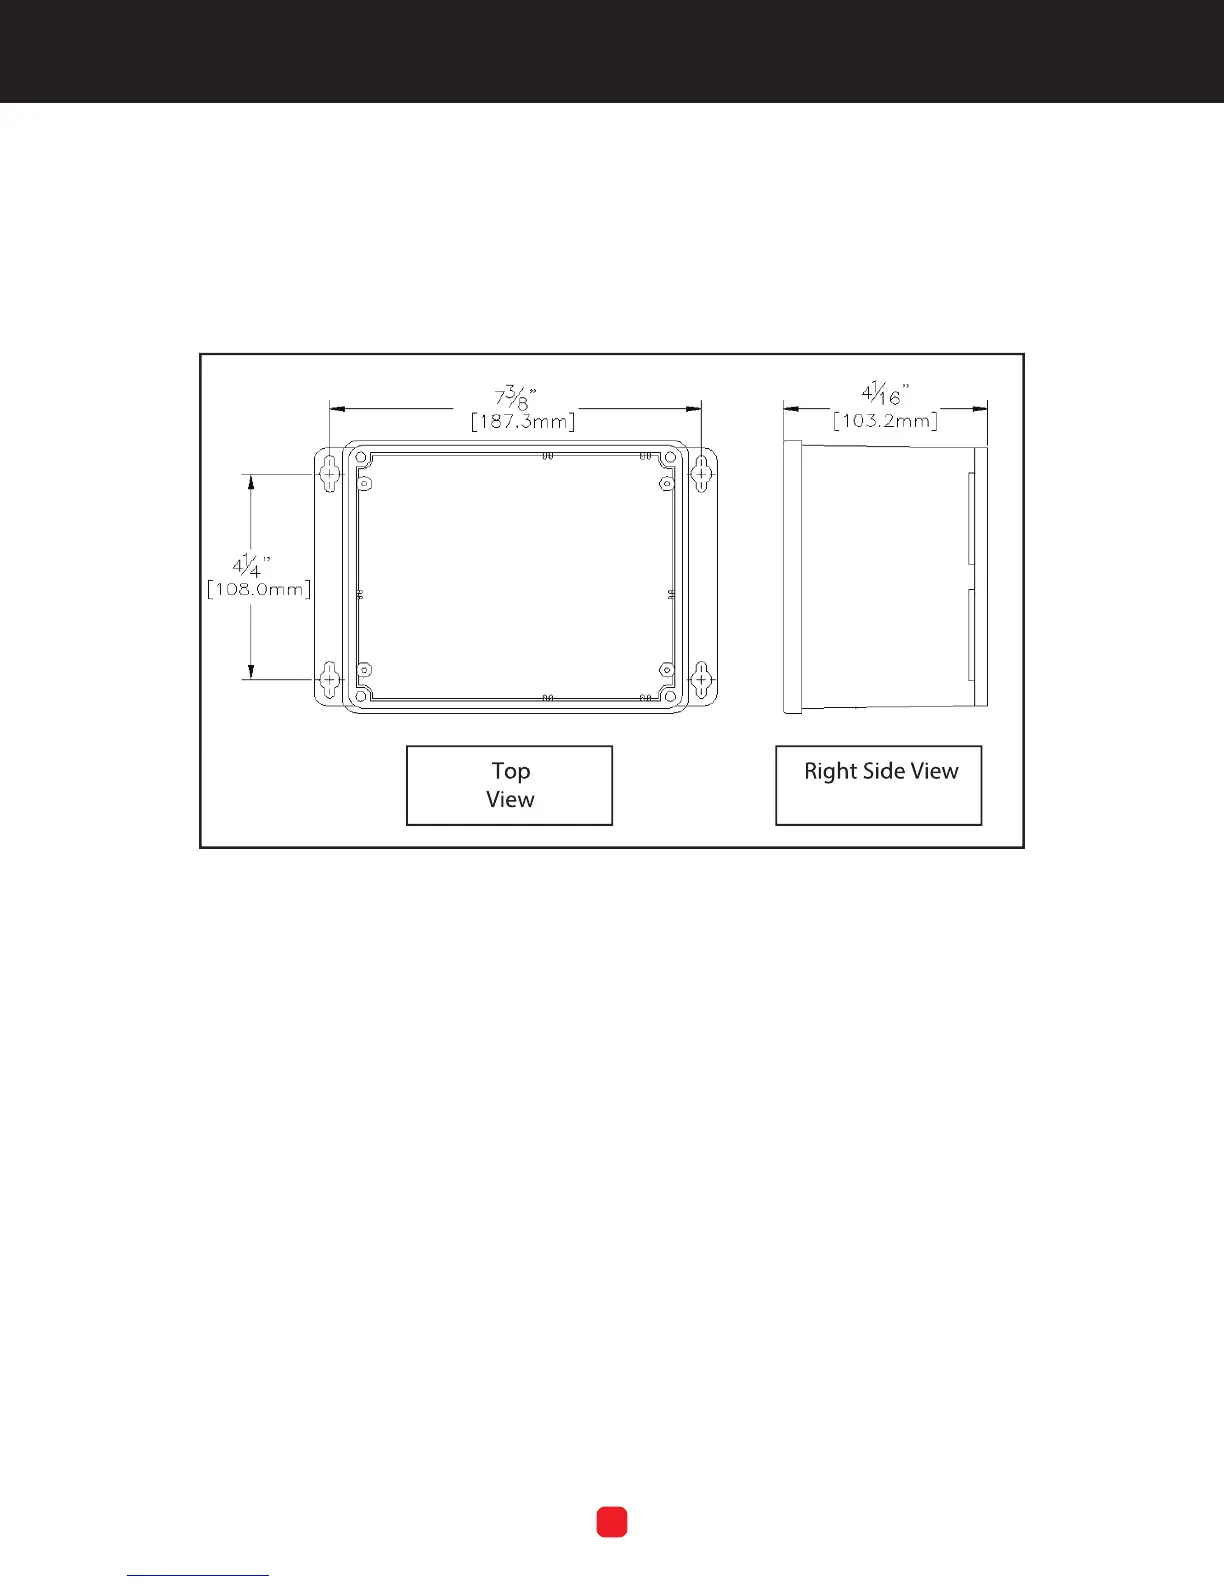
The dimensions shown in the Top View of Figure 1 below are for the mounting hole location footprint
and run from centerline to centerline of the four slotted mounting holes. The dimension shown in the
Right Side View of Figure 1 is from the bottom of the enclosure to the top of the clear plastic lid and
shows the distance that the unit will protrude from the mounting surface.
FIGURE 1. GF PRO Mounting Hole Footprint
To install the control box, perform the steps below.
1. Use the box as a template to determine the mounting
hole footprint pattern. Hold the unit up against the
wall onto which it will be mounted, with the mounting
blocks against the wall, then mark the wall at the
locations of the slotted mounting holes to determine
the location of the mounting holes on the wall.
2. As desired, to hold the box in place during the
installation process, you may loosely install one or
both of the top mounting bolts as the remaining holes
are marked. To ensure accurate and level installation,
however, do not fully tighten any of the mounting
hardware until the locations for all the mounting holes
have been determined and marked.
3. Once the four mounting holes have been located and
marked, install the box to the wall using properly sized
mounting hardware. Be sure to use mounting hardware
appropriate for the job, heavy-duty and long enough
to fasten the unit securely to the mounting surface.
Make sure to use all four mounting holes. Because
conduit will also be installed to protect the cables
running from the control box, install the box, but leave
the mounting hardware loose enough to work the
conduit into place. The conduit will be installed later
in this process, at which time all mounting hardware
will be securely tightened.