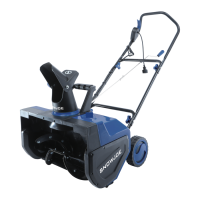
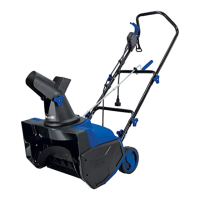
This document is an operator's manual for the Snow Joe Electric Snow Thrower, specifically models SJ620-RM and SJ621-RM. It provides essential information for safe operation, assembly, maintenance, and troubleshooting of the device.
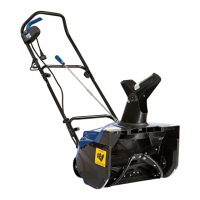
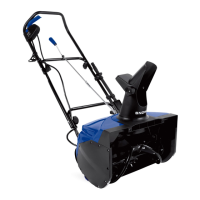
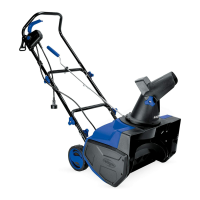
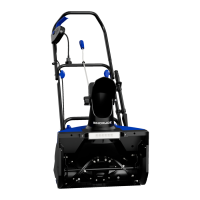
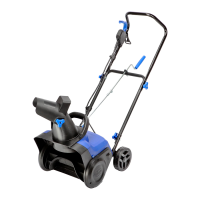
The Snow Joe Electric Snow Thrower is designed for clearing snow from paved surfaces. It is a walk-behind unit that uses a rotating auger with rubber-tipped steel plates to collect and discharge snow. The device is powered by electricity and is intended for residential use.
Technical Specifications:
- Rated Voltage: 120 V ~ 60 Hz
- Power: 13.5 A
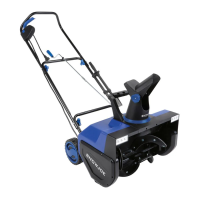
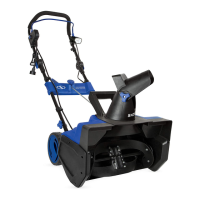
- Light (Model SJ621-RM only): 12 V, 20 W halogen
- No Load Speed: 2450 rpm
- Clearing Width: 18 in. (46 cm)
- Clearing Depth: 10 in. (25.4 cm)
- Throw Distance (max): 20 ft (6 m)
- Plowing Capacity (max): 650 lbs/min (295 kg/min)
- Directional Control: 180° adjustable chute
- Rotor: 4 rubber-tipped steel blades
- Weight (SJ620-RM): 31.5 lbs (14.3 kg)
- Weight (SJ621-RM with light): 32.9 lbs (14.9 kg)
The only difference between the SJ620-RM and SJ621-RM models is the halogen light system present in the latter.
Usage Features:
The snow thrower is designed for ease of use and safety.
- Assembly: The unit comes mostly pre-assembled, requiring the user to connect the upper, middle, and lower frames using joint fixing T-bolts and knobs, and to assemble the discharge chute and chute crank.
- Powering On/Off: To start, the safety switch button must be depressed and held, followed by pulling the ON/OFF switch lever. Releasing the lever turns the machine off.
- Extension Cord: A UL-rated extension cord for outdoor, all-weather use is required. The manual provides an extension cord chart for appropriate wire gauge based on cord length (up to 100 ft). A cable restraint holder is included to prevent accidental disconnection during operation. The snow thrower has a polarized male plug, and the extension cord's female end should also be polarized to ensure a snug fit.
- Snow Plowing: The operator should keep the work area clear of foreign objects, children, pets, and bystanders. The snow thrower can be moved by tilting it on its wheels. Clearing paths should start near the electrical outlet and work outward, throwing snow in a back-and-forth motion. The operator should be mindful of wind direction to avoid snow being thrown back. The machine should be pushed gently and evenly, without excessive force, to prevent engine damage.
- Adjustable Chute: The discharge chute can be rotated 180 degrees using the chute crank to control the snow throwing direction. The chute deflector on top of the discharge chute can be raised or lowered by loosening a knob to adjust the height of the snow stream. Lubricant like WD-40 can be used for smoother chute operation.
- Operation on Uneven Surfaces: When working on pebbles, gravel, or unpaved surfaces, the handle should be pushed down to raise the scraper bar at the base of the unit, preventing loose surface material from being thrown.
- Automatic Reset: The SJ620-RM model features an automatic reset function. In case of a major obstruction halting auger movement, the unit should be unplugged, the obstruction cleared, and after 60 seconds, operation can resume.
- Halogen Light (SJ621-RM): This model includes a halogen light for illuminating the path in the dark. The light switch is located on the back side of the snow thrower and only turns on when the snow thrower is running.
Maintenance Features:
Regular maintenance is crucial for the snow thrower's safety and longevity.
- General Inspection: Before each use, the unit should be thoroughly inspected for secure and correctly installed parts. Bolts, nuts, and knobs should be checked for tightness.
- Post-Use Cleaning: After each snow removal session, the snow thrower should be run for a few minutes to prevent the collector/impeller from freezing. The motor should then be shut off, all revolving parts allowed to stop, and residual ice and snow wiped off. The chute crank should be rotated several times to remove excess snow.
- Rubber Plate Replacement: Worn rubber plates can be replaced. The coarse side of the new plates should face inside, and the smooth side outside. The process involves detaching the worn rubber plate assembly from the auger assembly, loosening the middle nuts and bolts to separate the rubber plate from the metal frame, attaching the new rubber plate, and reassembling.
- Scraper Bar Replacement: The scraper bar, located at the base of the rotor housing, can be replaced by removing two screws, installing the new bar, and fastening it securely.
- Belt + Pulley Replacement: This involves removing the left panel of the snow thrower, lifting the belt tension pulley, and rolling the worn belt off the big pulley. To replace the big pulley, a screw and washer are removed, and the outer nut is turned clockwise (it's left-handed, so clockwise loosens). The new pulley is then installed, and the outer nut is tightened counterclockwise. Installing a new belt involves lifting the belt tension and rolling the belt onto the little pulley at an angle, then onto the top of the big pulley by rotating it counterclockwise.
- Lubrication: The motor and auger are lubricated for lifetime use at the factory; additional lubrication is not necessary and may cause damage.
- Cord Inspection: The extension cord should be inspected for signs of wear or damage before each use and replaced if necessary.
Safety Instructions:
The manual emphasizes several safety precautions:
- Personal Safety: Stay alert, wear proper clothing (rubber boots, protective headgear, safety glasses), keep hands and feet away from moving parts, maintain proper footing and balance, and avoid accidental starting.
- Work Area Safety: Keep the work area clean, well-lit, and free of children, pets, and bystanders.
- Electrical Safety: Ensure electrical plugs match the outlet, avoid body contact with grounded surfaces, keep cords away from heat/oil/sharp edges, replace damaged cords, avoid contact with water, use only UL-rated outdoor extension cords, and disconnect power before adjustments or servicing.
- Discharge Chute Safety: Never direct the discharge chute at the operator, bystanders, vehicles, or windows. Stop the motor before removing debris from the chute.
- Object Impact: If the snow thrower strikes an object, immediately stop the unit, disconnect power, inspect for damage, and repair before restarting.
- Abnormal Operation: If the unit runs unstably or makes abnormal sounds, stop the machine, disconnect power, and contact an authorized service center.
- Frozen Parts: Do not attempt to operate the snow thrower with frozen parts. Free all parts before restarting.
- Storage: Store the snow thrower indoors in a dry, locked area, disconnected from the power source, and out of reach of children.
The manual also includes a section on safety symbols, explaining their meaning for quick reference. It concludes with information on service and support, model and serial numbers, and available accessories. A refurbished goods warranty is provided, covering defects for 90 days for residential use, with specific exclusions for wearing parts and batteries.