8 9
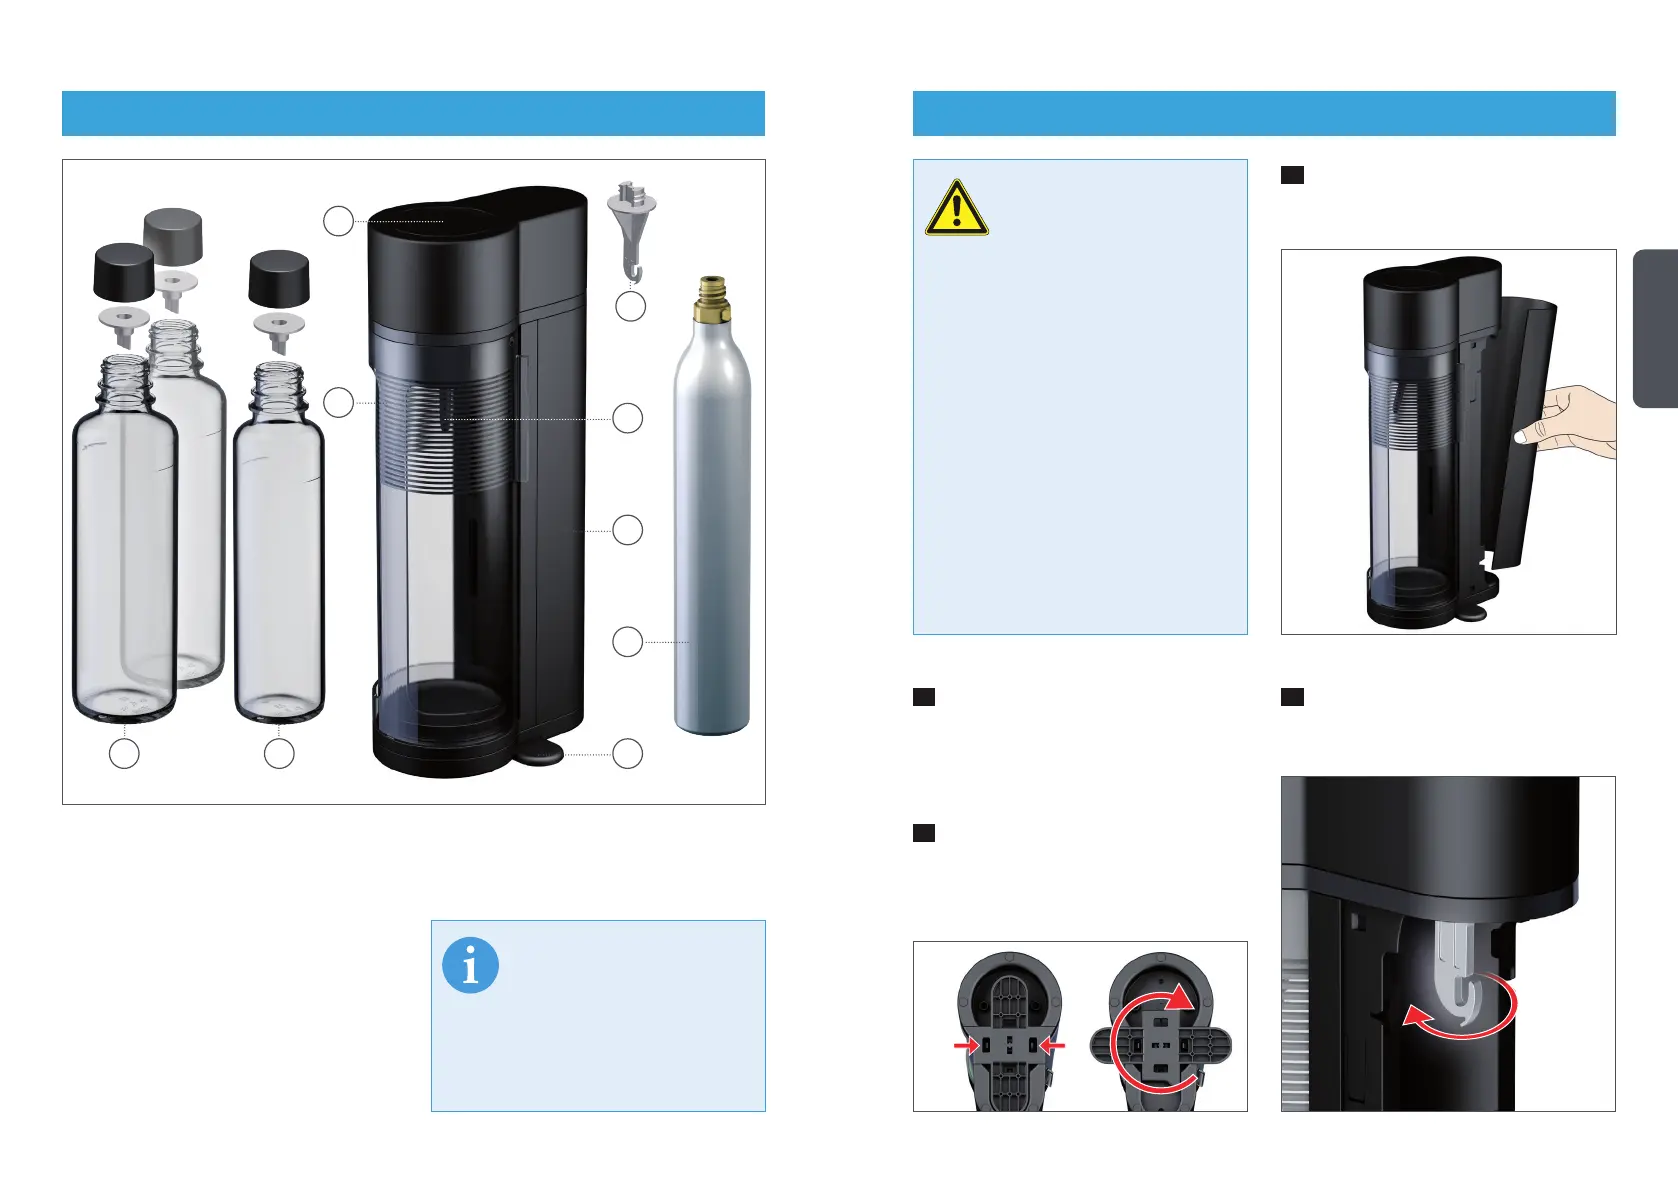
CAUTION!
Risk of injury!
Prior to use, inspect the
CO
2
cylinder and valve for dents, punc-
tures or other damage. Defective cylin-
ders must not be used. In such cases,
please contact our customer service
team.
Place the appliance on a level, dry sur-
face. Do not position in direct sunlight
and keep away from heat sources such
as ovens and naked flames.
Inspect the glass bottle for cracks, mi-
nor internal damage and flaws before
each use.
INFO!
All parts shown here and the
original instruction man-
ual are included in the delivery. Before
using the appliance for the first time,
please check the delivery for complete-
ness.
3
Insert CO
2
cylinder: Hold the middle of
the rear panel and pull backwards to re-
move.
4
Before inserting the CO
2
cylinder for
the first time, unscrew the valve protection.
1
Unpack the appliance and accessories,
clean bottles with lukewarm water, wash-
ing-up liquid and a bottle brush and leave
to dry. Wipe the appliance with a soft,
damp cloth and washing-up liquid.
2
For optimal stability, loosen the fixture
underneath the appliance (see arrows),
rotate the feet out by 90 degrees and click
the fixture into place.
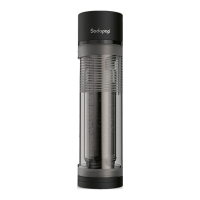
1. 2 x Glass bottle, 850 ml / 29.92 fl oz (nominal capacity) and seal
2. Glass bottle, 600 ml / 21.12 fl oz (nominal capacity) and seal
3. Carbonating button
4. Safety door
5. Valve protection
6. CO
2
lance
7. Rear panel
8. CO
2
cylinder
9. Folding feet
2
4
3
7
9
4
8
3
2
5
6
1
English
Initial start-up
Appliance overview / scope of delivery
 Loading...