1
Installation and Operation
Use the following procedure when mounting an PSX series
supply into a standard EIA 19" equipment rack.
1. Ensure any internal configuration (voltage selection, fault
detection settings, etc) are complete before mounting.
See Section 1.3 of this manual for more information.
2. Securely mount the included ears to the enclosure sides
using the eight included 6-32 countersunk screws (four
per ear).
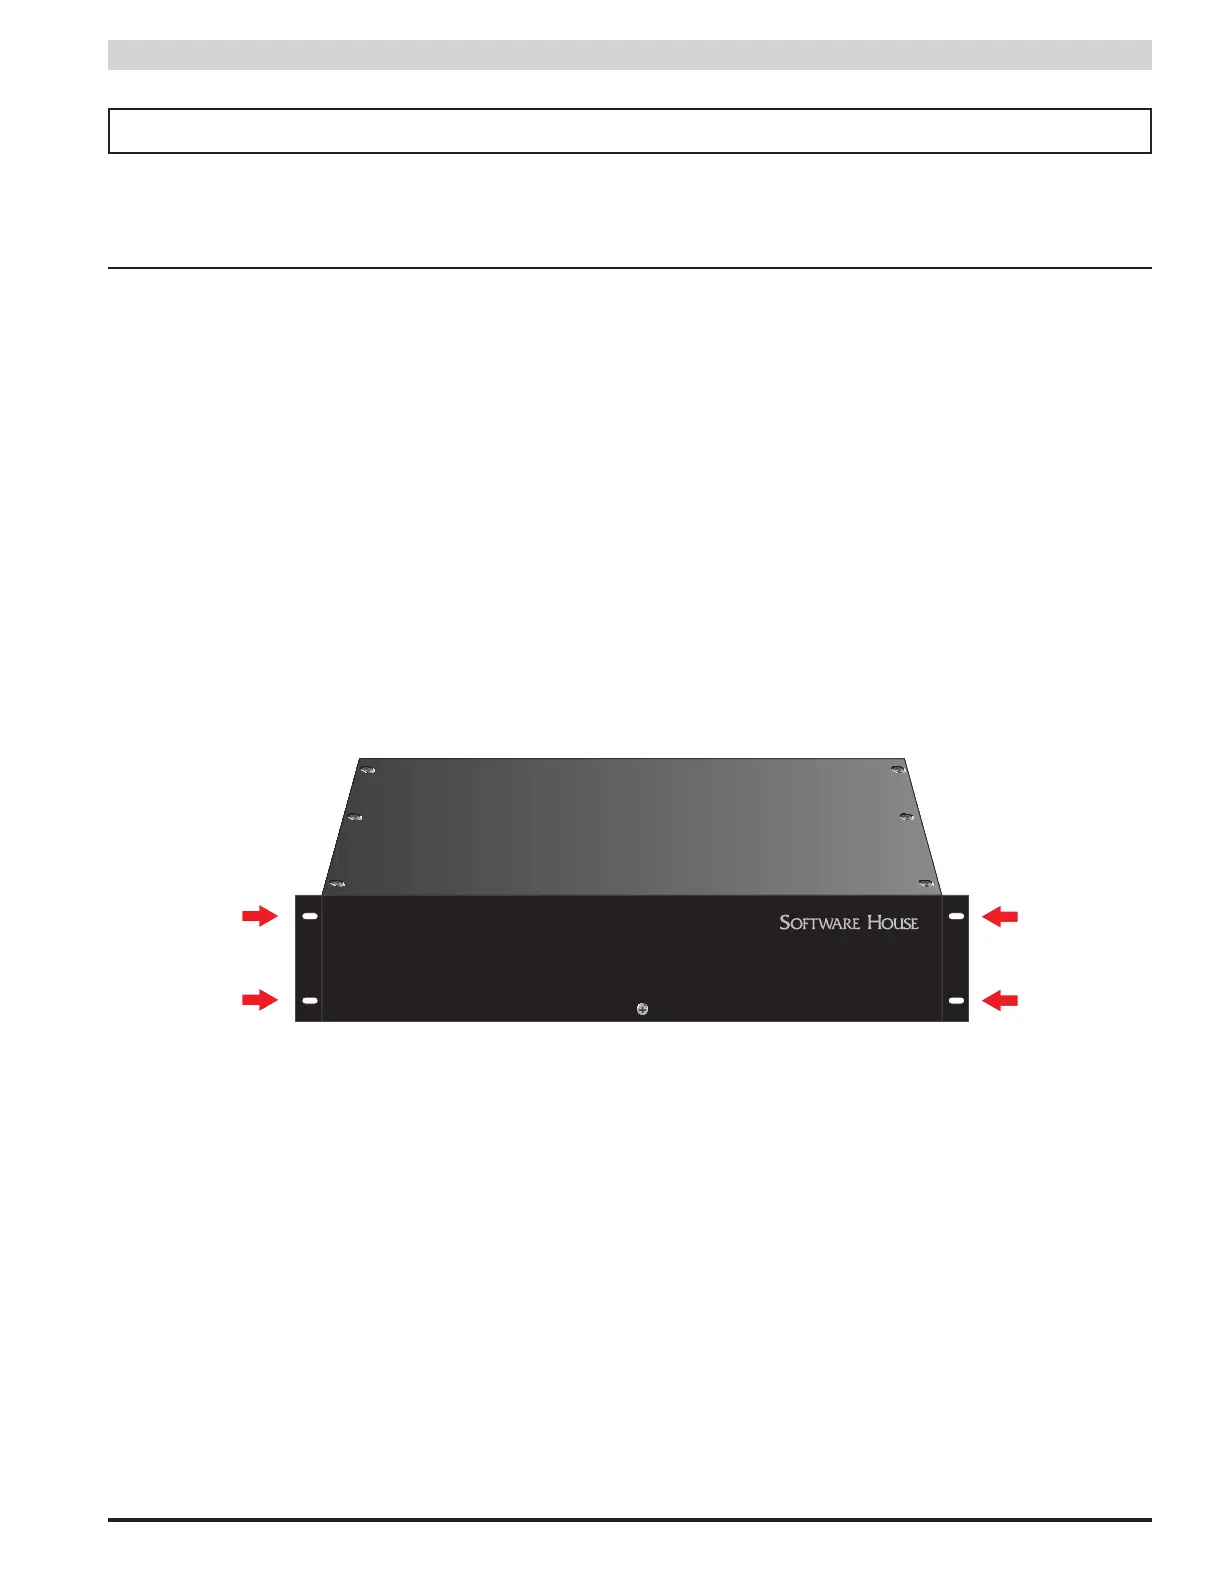
3. Locate the rack-mounting holes in the ears of the en-
closure. (Figure 1)
4. Slide the enclosure into an open 2U location in the rack
5. Center the enclosure in the rack and secure with the
four 10-32 x 3/4" screws provided.
NOTE: Use rails or other appropriate support for heavy
enclosures. Keep heavier components near the bottom of
the rack to reduce the risk of toppling of a top-heavy rack.
NOTE: For UL864 Installations, the Rack Mount Supply
must be mounted in an ENCLOSED rack where the field
wiring will be protected.
1.1 Mounting the Rack Mount Supply into a Standard 19" Rack
The following pages cover the installation of the PSX Series rack-mountable power supplies.
Section 1 – Installation
Figure 1 - The Enclosure Mounting Holes