V Sensor base
W Charger
X Load contact points
DUST TANK
Y Dust tank
Z Dust tank cover
AA Textile prelter
AB EPA Filter
AC Sponge Filter
AD Dust container removal button
WATER TANK
AE Water tank
AF Microber mop
AG Hermetic water tank lid
AH Water tank removal button
REMOTE CONTROL
AI AUTO cleaning mode button
AJ Button Cleaning mode Go Home (returns to
the charging station automatically)
AK Direction buttons (up / down / right / left)
AL Start button or stop
AM Button to select the time
AN Button to select the schedule
AO Spiral cleaning mode button
AP Edge Cleaning Mode button
AQ Button Room cleaning mode
AR Maximum suction button in room and AUTO.
NOTA: Insert 2 AAA batteries before using the
remote control for the rst time. Make sure that
the positive and negative poles are located in the
correct direction in the battery compartment.
If the model of your appliance does not have the
accessories described above, they can also be
bought separately from the Technical Assistance
Service.
IMPORTANT:
- Cables or other objects on the ground can
hinder the mobility of the robot. Remove these
objects before using the robot vacuum cleaner.
- Use the vacuum cleaner the robot only on short
pile carpets.
- Furniture less than 8cm can block the robot.
Lift the furniture if you need to clean this area.
- Put a safety barrier on the stairs to prevent it
from falling in case the fall arrest sensors do
not work properly.
INSTALLATION
- Be sure to remove all packaging material from
inside the appliance.
CHARGING BASE POSITION:
- Connect the charger to the charging base.
- Place the load base at and next to the wall.
- To receive a good signal, you must leave a
radius of 1m to the right and left and 2 meters
forward of the base.
- Connect to the power.
INSTALL SIDE BRUSHES:
- Mount the side brushes on the bottom of the
robot by pressing the brushes into its slot.
before plugging in the charger.
- Connect the appliance to a socket that can
supply a minimum of 10 amperes.
- The charger’s plug must t correctly into the
mains socket. Do not alter the plug. Do not use
plug adaptors.
- Do not force the power cord. Never use the
power cord to lift up, carry or unplug the battery
charger.
- Do not touch the plug with wet hands.
- Do not use the appliance if the cable or plug is
damaged.
- If any of the appliance casings breaks, im-
mediately disconnect the appliance from the
mains to prevent the possibility of an electric
shock.
- Do not use the appliance if it has fallen on the
oor, if there are visible signs of damage or if it
has a leak.
- Avoid all contact with the liquid that could be
released from the battery. In case of contact
with eyes, wash them thoroughly and seek me-
dical advice. The liquid spilled from the battery
may cause irritation or burns.
USE AND CARE:
- Do not use the appliance if its accessories are
not properly tted.
- Do not use the appliance to gather up water or
any other liquid.
- Do not use the appliance if the on/off switch
does not work.
- Respect the MAX level indicator.
- Remove the batteries from the appliance if you
are not going to use it for some time.
- Store this appliance out of reach of children
and/or persons with physical, sensory or
reduced mental or lack of experience and
knowledge.
- Do not work on areas where there are metal
objects, such as nails and/or screws.
- Never vacuum hot or sharp objects (cigarette
butts, ashes, nails, etc.).
- Do not open the battery/ies under any circum-
stances whatsoever.
- When the battery/ies is not in use, keep it away
from other metal objects like paper clips, coins,
keys, screws ... that could connect a terminal
to another.
- Do not shortcircuit the battery terminals as this
may cause an explosion or re.
- The battery/ies should be stored at a tempera-
ture of below 40ºC.
- Recharge the battery/ies only with the charger
supplied by the manufacturer. A charger that
is suitable for one type of battery may cause
explosion or re hazard when used with other
battery/ies.
- Use the device only with the battery/ies for
which has been specically designed. The use
of any other battery/ies s can cause an explo-
sion or re hazard.
SERVICE:
- Make sure that the appliance is serviced only
by specialist personnel, and that only original
spare parts or accessories are used to replace
existing parts/accessories.
- CAUTION: There is a risk of re if the
appliance’s cleaning is not done according to
these instructions.
- Any misuse or failure to follow the instruc-
tions for use renders the guarantee and the
manufacturer’s liability null and void.
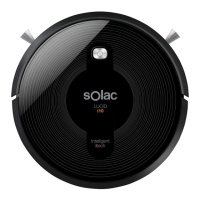
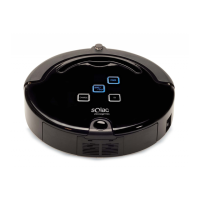
DESCRIPTION
TOP VIEW
A Robot vacuum cleaner top cover
B Antiscratch band
C Front impact infrared sensor
D Operation button
E Red light xed or blinking error
F Operating light
G Charge light indicator.
H Selfcleaning brush
BOTTOM VIEW
I Antifall sensors
J Side brushes
K Load contact points
L Swivel wheels
M Right wheel
N Left wheel
O Main rotative brush
R Power interuptor
S Battery cover
CHARGING BASE
U Charging base
 Loading...