English (Original instructions)
EN
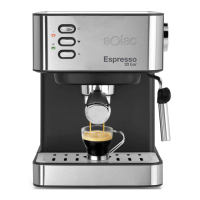
ESPRESSO COFFEE MAKER
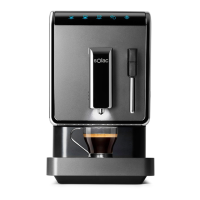
TASTE SLIM
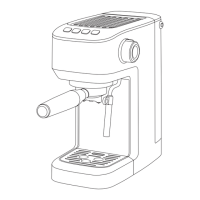
DESCRIPTION
A On/Off button
B 1 cup button
C 2 cups button
D Steam button
E Steam/water knob
F Cup warming plate
G Water tank lid
H Water tank
I Filter holder
J Steam pipe
K Drip tray
L Drip tray grill
M Full drip tray warning
N 1 cup lter
O 2 cups lter
P Measuring spoon
Q Tamper
If the model of your appliance does not have the
accessories described above, they can also be bought
separately from the Technical Assistance Service.
USE AND CARE
• Fully extend the appliance's supply cord before each use.
• Do not use the appliance if the parts or accessories are
not properly tted or are defective.
• Do not switch the appliance on without water.
• Do not use the appliance if the on/off button does not
work.
• Respect the MAX and MIN levels on the water tank
• Disconnect the appliance from the mains when not in use
and before undertaking any cleaning task.
• Do not put the appliance away if it is still hot.
• Only use water with the appliance.
• Never leave the appliance connected and unattended if
is not in use. This saves energy and prolongs the life of
the appliance.
• Do not remove the lter holder when coffee is being made
as it is then under pressure.
INSTRUCTIONS FOR USE
BEFORE USE
• Make sure that all the product’s packaging has been
removed.
• Please read carefully the “Safety advice and warnings”
booklet before rst use.
• Before using the appliance for the rst time, we
recommend that you run it with water only.
• Before using the product for the rst time, clean the parts
that will come into contact with water or coffee in the
manner described in the cleaning section.
FILLING WITH WATER
• You must ll the water compartment before turning on the
appliance.
• You can dismount the tank and ll it up, or you can just
open the lid and ll it up.
• Fill the water tank taking care to observe the MAX level.
• Ensure the water tank is inserted properly in the product.
• Close the lid.
NOTE: It is not mandatory to remove the water tank to ll
it. Even so, it is advisable to disconnect the device from the
mains and make sure the water tank is positioned correctly
before lling.
NOTE: Before using the machine for the rst time, remove
the protective cap from the water tank (Fig. 1).
PRIMING THE CIRCUIT
• Perform this operation the rst time you use the machine,
when it has been out of use for some time (1 or 2 weeks),
after making steam, or when the water tank has run out
of water.
• Fill the water tank with water, making sure not to exceed
the MAX level marker.
• Place a recipient under the steam pipe.
• Connect the appliance to the mains.
• Turn the appliance on, by using the on/off button.
• The button lights will start to blink.
• For this operation, it is not necessary to wait for the
machine to heat up.
• Open the steam knob.
• The water will come out through the steam pipe.
• Let the water come out until approximately one cup has
been lled.
PLEASE NOTE: When pumping water for the rst time, you
may hear a noise. This is perfectly normal, as the appliance
is expelling air which was inside it. The noise will disappear
after a few seconds.