EasyManua.ls Logo

SolarEdge SE2200H User Manual

SolarEdge SE2200H
77 pages
To Next Page IconTo Next Page
Page #1 background imageLoading...
Page #1 background image
Scanner le guide
d’installaon
complet
FR
Scan for accessing
a more detailed
Installaon Guide
EN
Für vollständige
Installaonsanleitung
scannen
DE
Scansionare per la
Guida di installazione
completa
IT
For Europe, APAC and South Africa Version 1.0
CHS
逆变器启动卡, 请勿扔掉!
CHT
逆變器啟動卡,請勿扔掉!
HU
Inverterakválási kártya, ne dobja ki!
CZ
Akvační karta střídače, nevyhazujte!
TR
Evirici akvasyon kar, atmayınız!
KO
 인버터 활성화 카드는, 버리지 마십시오!
HE
!קורזל ןיא ,ריממ תלעפה סיטרכ 
PT
Cartão de avação do inversor, não descarte!
TH

 
EN
Inverter acvaon card, do not throw away!
FR
Carte d'acvaon de l'onduleur, ne la jetez pas !
NL
Omvormer acveringskaart, niet weggooien!
IT
Scheda di avazione dell’inverter, da conservare!
DE
Wechselrichter-Akvierungskarte, nicht wegwerfen!
PL
Karta aktywacyjna falownika, nie wyrzucać!
JA
パワーコンデーシカー
ドはてないでください!
ES
Tarjeta de acvación del inversor, no la deseche!
p. 01
EN
FR
NL
IT
DE
p. 22
PL
JA
TH
CHS
CHT
HU KO
CZ HE
TR
p. 40
TH
PT
p. 59
Single Phase Inverter
with HD-Wave Technology
Quick Installaon Guide
Scan voor de
uitgebreide
installaehandleiding
NL
より スト
ドにアクセスする
キャン
JA
Question and Answer IconNeed help?

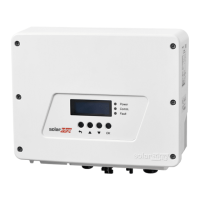
Do you have a question about the SolarEdge SE2200H and is the answer not in the manual?

SolarEdge SE2200H Specifications

General IconGeneral
AC Output Power2200 W
CoolingNatural Convection
Noise Level< 25 dBA
Rated AC Power2200 W
Number of MPP Trackers1
Protection DegreeIP65
Warranty12 years
Operating Temperature Range-40°C to +60°C
AC Voltage220/230 V
Max. Input DC Voltage480 V
Maximum Input Voltage480 V

Summary

Legend

Safety hazard

Warning symbol indicating potential safety risks.

Turn ON/OFF the main circuit board AC switch

Symbol for switching the main AC circuit board on or off.

Safety Switch (on optional DC Safety Unit)

Symbol for a safety switch on an optional DC safety unit.

Inverter ON/OFF Switch

Symbol representing the inverter's ON/OFF switch.

Do not cut cable connectors

Warning symbol indicating not to cut cable connectors.

Torque value

Indicates the specified torque value for fasteners.

Installing the Power Optimizers

Site Setup and Registration

Follow Installation Options A/B

Instructions for setup via Option A or Option B using stickers.

Register Site and Layout

Complete site registration and physical layout in the monitoring platform.

Download Site Mapper App

Access app stores to download the SolarEdge Site Mapper.

Input from module

Output to string

Indicates the output connection point to the solar string.

2:1 series connection

For 2:1 parallel connection the P405 has dual input.

Details on P405 dual input for 2:1 parallel connections.

Check string polarity and measure each string's voltage

Example: 16 optimizers = ~16V

Example calculation for string voltage verification.

Installing the Inverter

Option A / Option B

Specifies mounting options A and B for the inverter.

Connecting the Strings to the Inverter

1-3 MC4 pairs, model dependent

Describes MC4 connector pairs for string connection.

≤150m/500ft from string to inverter. Cables: Min. 11 AWG / 4mm²

Specifies maximum string length and minimum cable gauge.

Connecting the AC to the inverter

Connect PE first

Instruction to connect the protective earth (PE) conductor first.

Commissioning the Installation

Running Script...

Indicates the system is running a script during commissioning.

Done!

Indicates that a process or script has been completed.

Pairing Power Optimizers

Keep holding button for pairing, release to enter menu...

Instruction to hold button for pairing, release to enter menu.

Pairing Completed

Indicates that the pairing process has been successfully completed.

Waking Up...

Indicates that a device is waking up or initializing.

Verifying Proper Operation

Verify all circled values are accurate for the system. DC input voltage 250-480V.

Verify circled system values and DC input voltage range.

Verify P_OK is displayed.

Confirm that the P_OK status is displayed for troubleshooting.

Inverter Configuration

Safety Warning: High DC Voltage

Warning indicating unsafe DC voltage levels.

Configuration Modes and Cover Status

Details on configuration modes (Option 1/2) and cover states.

Menu Navigation and Selection

Instructions for navigating menus and applying settings via button presses.

Password entry

Configuration Menu Options

Lists available configuration options like Country, Language, Communication, etc.

Setting up Communication Modules

Built-in Communication

Indicates built-in communication modules like Ethernet or RS485.

Optional Plug-in Modules

Details for installing optional communication plug-in modules (GSM, ZigBee, Wi-Fi, RS485).

For troubleshooting

Application note: Communication Options

Reference to an application note detailing communication options.

Creating an Ethernet (LAN) Connection

Ethernet Router

Identifies the Ethernet router component in the connection diagram.

Ethernet Cable Preparation

Ethernet Cable Crimping Details

Wire color codes, pin assignments, and signal types for Ethernet crimping.

Polarity Change Note

Note on inverter connection not supporting RX/TX polarity changes.

Ethernet Configuration

The inverter is preconfigured to use the LAN port and DHCP enabled

Inverter's default configuration using LAN port and DHCP.

For static IP Use internal buttons (Option 1)

Instructions for setting static IP using internal buttons.

If your network has a firewall, configure it to enable connection to...

Guidance on firewall configuration for network connection.

Creating an RS485 Bus Connection

Min. 3-wire shielded twisted pair...

Specifies cable requirements for RS485 bus connection.

Slave / Master

Defines roles as Slave or Master for devices on the RS485 bus.

Terminate first and last devices: Move up SW7 DIP switch

Instruction to terminate first and last devices using SW7 DIP switch.

RS485 Configuration

Inverters are preconfigured as slaves

Inverters are pre-configured to function as slaves in RS485 setup.

In the master, select:

Steps for configuring the master device in RS485 setup.

Verifying the Monitoring Connection

If the Slave List does not display the correct number of slaves...

Troubleshooting for incorrect slave count in the list.

Related product manuals