9
Solarpower24.it by Barba S.r.l. – via Locchi, 3F – 47122-Forlì – Italia
Tel/What’s up +39 05431995799 – web www.solarpower24.it – email solarpower24@solarpower24.it
WARNING:
Be sure that AC power source is disconnected before attempting to hardwire it to the unit.
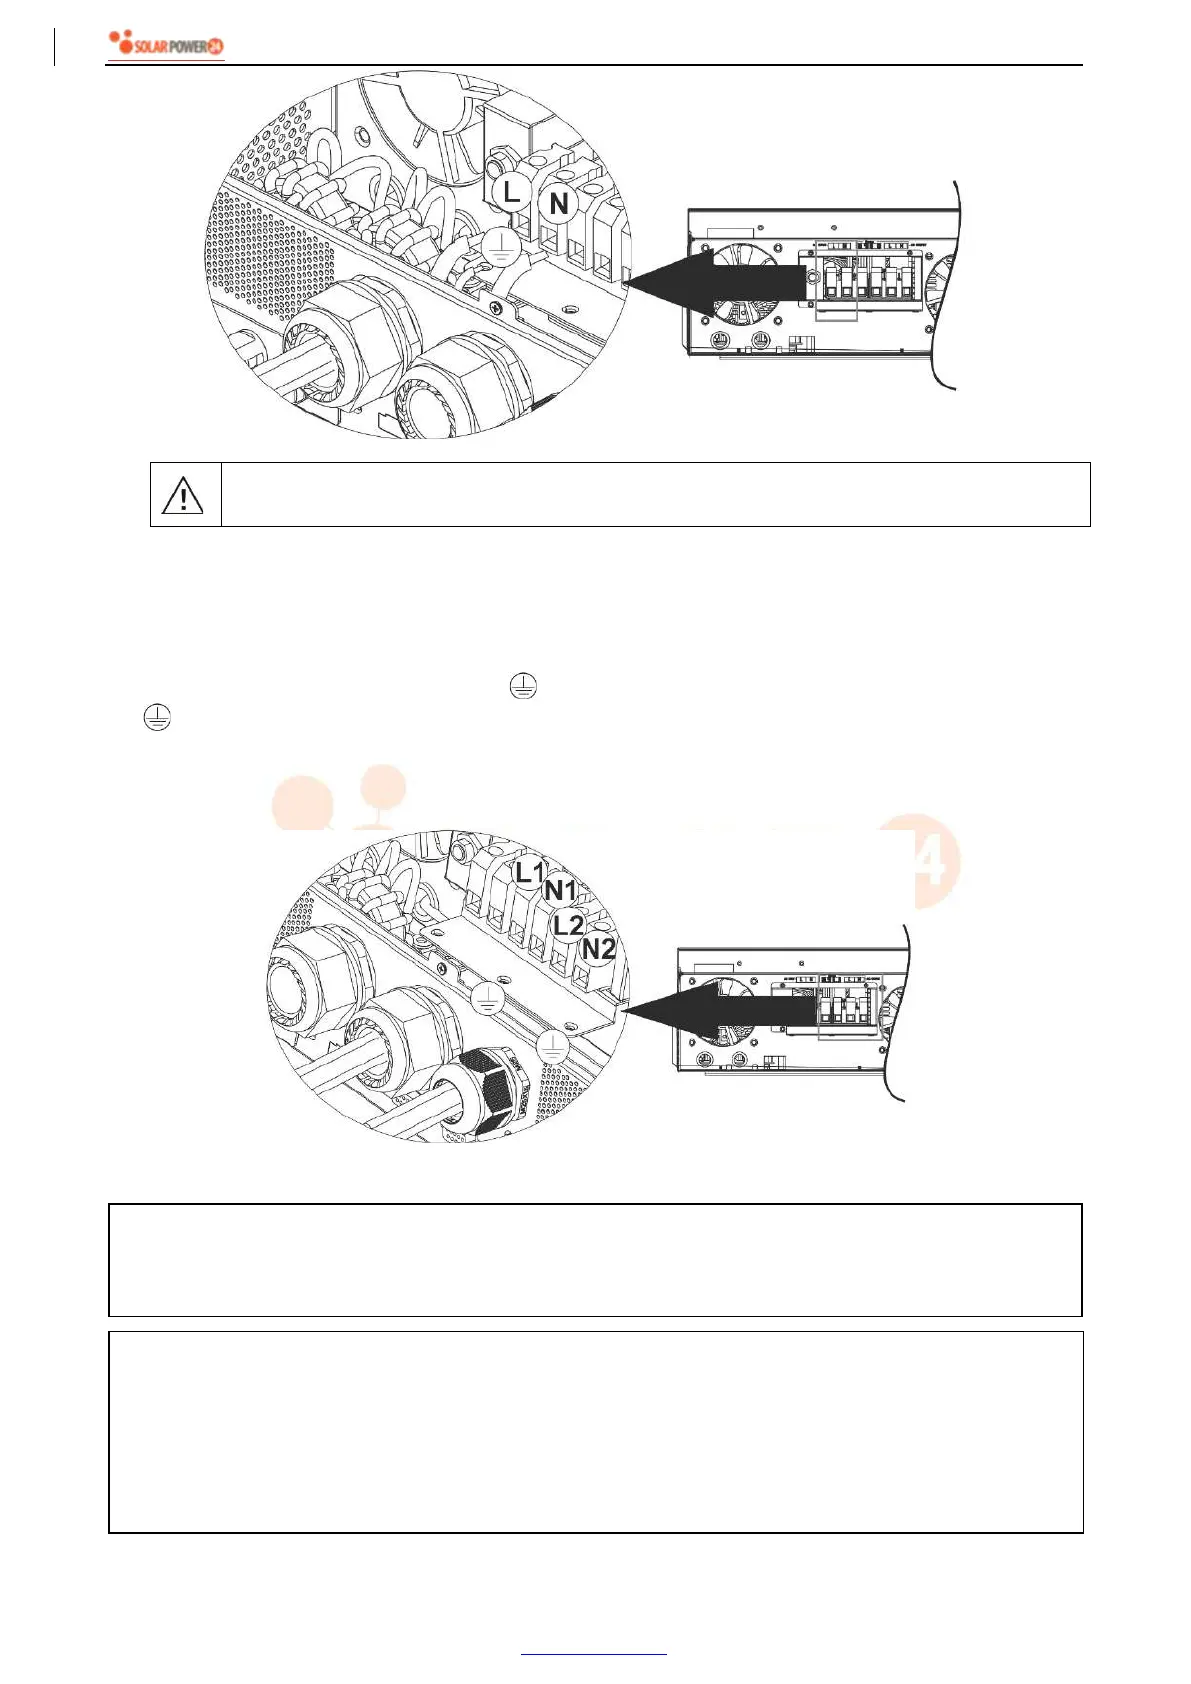
5. This inverter is equipped with dual-output. There are four terminals (L1/N1, L2/N2) available on output port.
It’s set up through LCD program or monitoring software to turn on and off the second output. Refer to “LCD
setting” section for the details.
Insert AC output wires according to polarities indicated on terminal block and tighten terminal screws. Be
sure to connect PE protective conductor ( ) first.
→Ground (yellow-green)
L1→LINE (brown or black)
N1→Neutral (blue)
L2→LINE (brown or black)
N2→Neutral (blue)
6. Make sure the wires are securely connected.
CAUTION: Important
Be sure to connect AC wires with correct polarity. If L and N wires are connected reversely, it may cause
utility short-circuited when these inverters are worked in parallel operation.
CAUTION: Appliances such as air conditioner requires at least 2~3 minutes to restart because it’s required
to have enough time to balance refrigerant gas inside of circuits. If a power shortage occurs and recovers
in a short time, it will cause damage to your connected appliances. To prevent this kind of damage, please
check manufacturer of air conditioner if it’s equipped with time-delay function before installation. Otherwise,
this inverter/charger will be trigger overload fault and cut off output to protect your appliance but sometimes
it still causes internal damage to the air conditioner.