ed externally. It has no light OFF.
n the master mode.
ing).
of the unit to make the unit more or less sensitive in sound active. The panel has LED indicating for sound
ctive.
t controller.
ether via the XLR connector on the rear of the units. For
e master unit to make the unit more or less sensitive in sound active. The panel has LED indicating for
sound active.
Page 5
AUTO
Auto cycles the built-in programs without being controll
Stand-Alone Operation (Sound Active, AUTO mode)
The mode allows a single unit to react to the beat of the music i
1. Install the units in a suitable position (laying or append
2. Set dipswitch to select Sound Active or AUTO mode.
3. Turn on the unit power, the unit begins reset, then the unit begins working.
4. The unit will react to the low frequencies of music via the internal microphone. Adjust the audio sensitivity knob on
the back
a
Master-Slave Operation
This mode will allow you to link up to 32 units together withou
1. Install the units in a suitable position (laying or appending).
2. Choose a unit to function as Master mode, set dipswitch to select Sound Active or AUTO mode. The others must be
set to Slave mode, set dipswitch to select Slave mode.
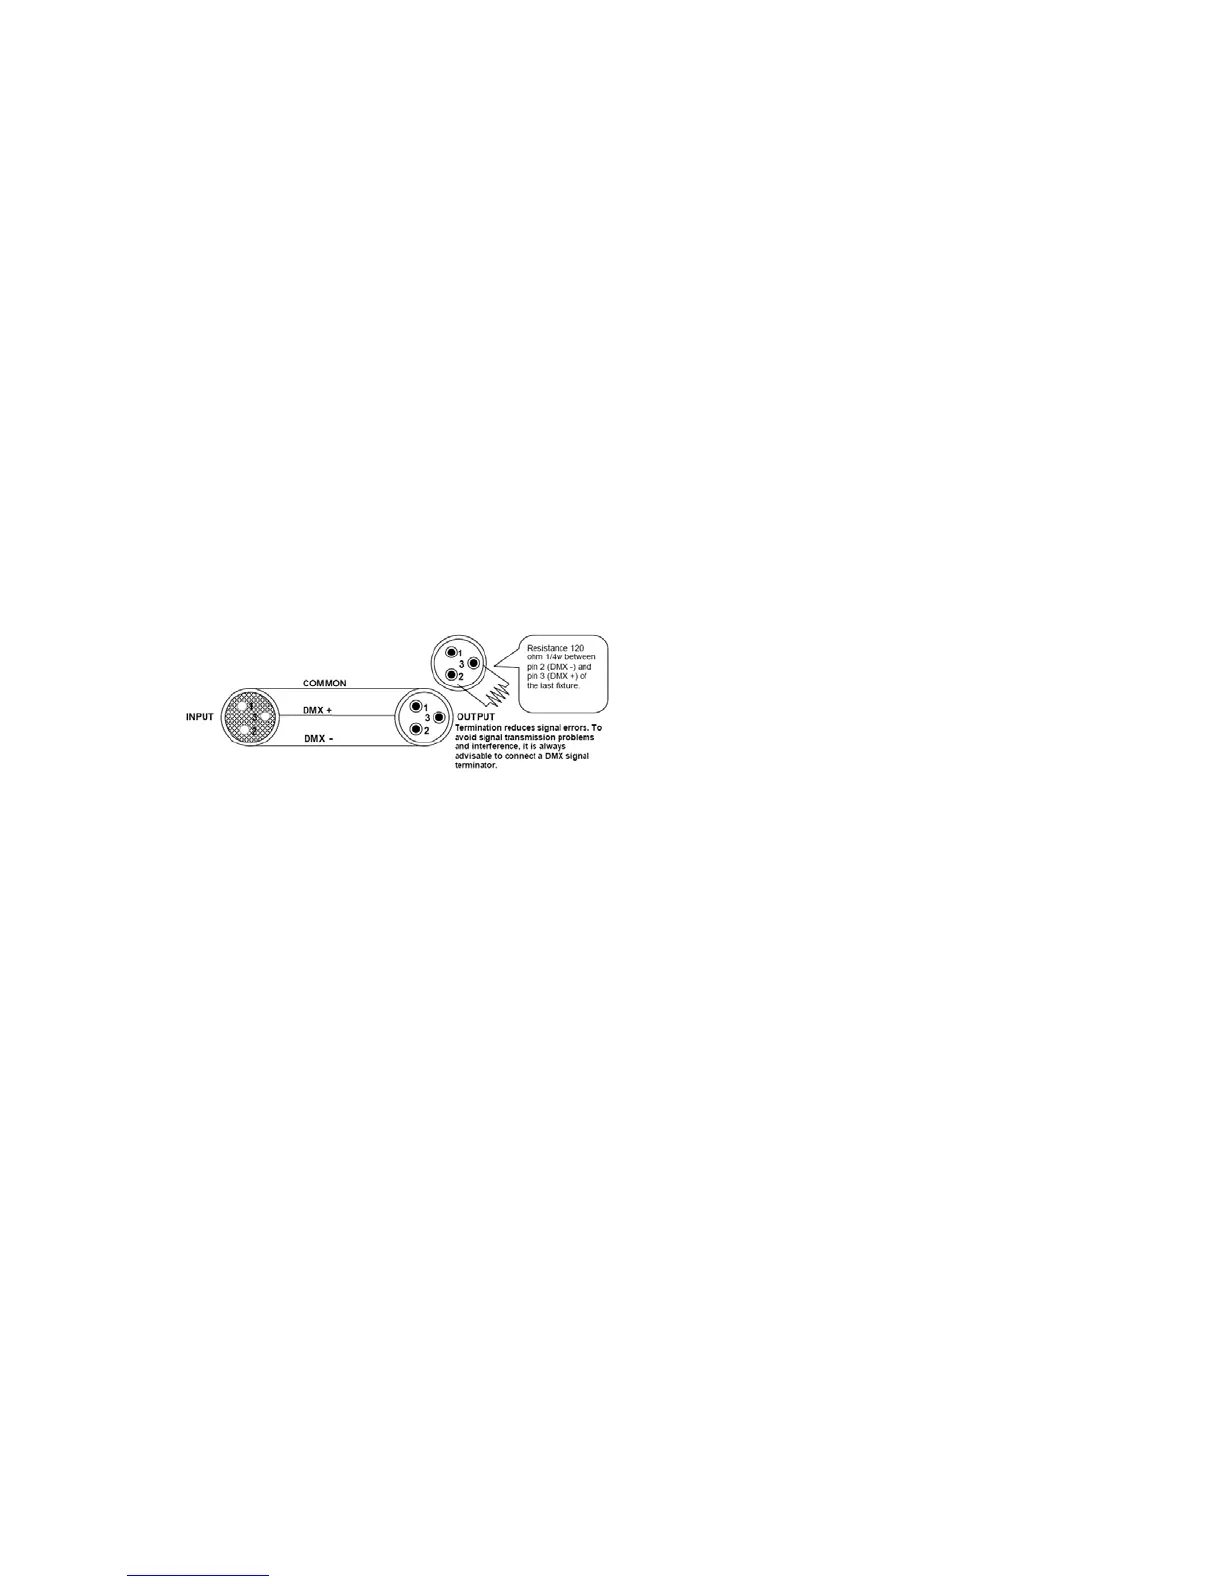
3. Use standard XLR microphone cable chain your units tog
longer cable runs we suggest a terminator at the last fixture.
Caution: Do not allow contact between the common and the fixture’s chassis ground. Grounding the common can
cause a ground loop, and your fixture may perform erratically. Test cables with an
ohm meter
to verify correct polarity
and to make sure the pins are not grounded or shorted to the shield or each other.
4. Turn on the all units' power, the units begins reset, and then the unit begins working. The slave units will re-act the
same as the master unit.
5. The units will react to the low frequencies of music via the internal microphone. Adjust the audio sensitivity knob on
the back of th
 Loading...