CuBox-i series
P.O Box 75
Migdal-Tefen, 2495900
ISRAEL
http://www.solid-run.com/
Quick User’s Guide
Contents of package
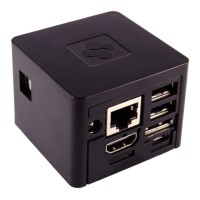
• One CuBox-i Miniature Computer.
• Optionally, one microSD card – inserted in the CuBox-i with Android OS installed.
• Optionally, one power supply adapter ( input: 110V-220V AC ; output 5V DC )
• One Warranty note.
• One User Manual
Models covered by this User Manual:
I1-300-D, I1W-300-D, I2-300-D, I2W-300-D, I2eX-300-D, I2eXw-300-D and I4P-300-D
Setting up the system
1. The CuBox-i boots from the microSD. If you purchased a microSD from SolidRun then skip to
step #3.
2. When using your own micro SD device, we recommend a 4GB micro SD class4 or higher.
3. Skip to step #7 if you are using a SolidRun supplied power adapter.
4. Power Adapter: you may choose your own power adapter, make sure to use a power adapter
with the following specification:
Regulated 5V supply with 2A source capacity (3A for I4P-300-D model).
2.1mm internal diameter and 5.5mm external diameter. At least 10.5mm long.
Use only limited power source (LPS) power adapter with adequate protections.
Power adapter should meet local safety regulations.
DO NOT USE 9V or 12V adapters or any other adapters with output voltage higher
than 5V. These adapters will damage the CuBox-i and possibly other connected USB
devices.
5. To run applications or distributions on your CuBox-i, you must install them on the microSD
card. Visit this link for more details: http://cubox-i.com/install-os-on-micro-sd-flash-card/
6. Once you have your CuBox-i, microSD and power adapter ready, insert the micro SD in the
microSD slot with the microSD pins facing up.
7. Internet: If you have purchased I1-300-D, I1W-300-D, I2-300-D, I2W-300-D- first connect an
Ethernet cable to your CuBox-i device. Models I2eX-300-D, I2eXw-300-D and I4P-300-D, can be
connected via wireless or wired connection.
8. Connect the CuBox-i to a display screen via an HDMI cable.
9. Connect your power adapter to the DC jack, and then connect the adapter to mains supply.
A red LED in the front should light, indicating that the system is booting. The system should be up and
running in few moments, and Android graphical interface should be displayed on the monitor: