49
å
Pin
ç
Round hole for screw
å
ç
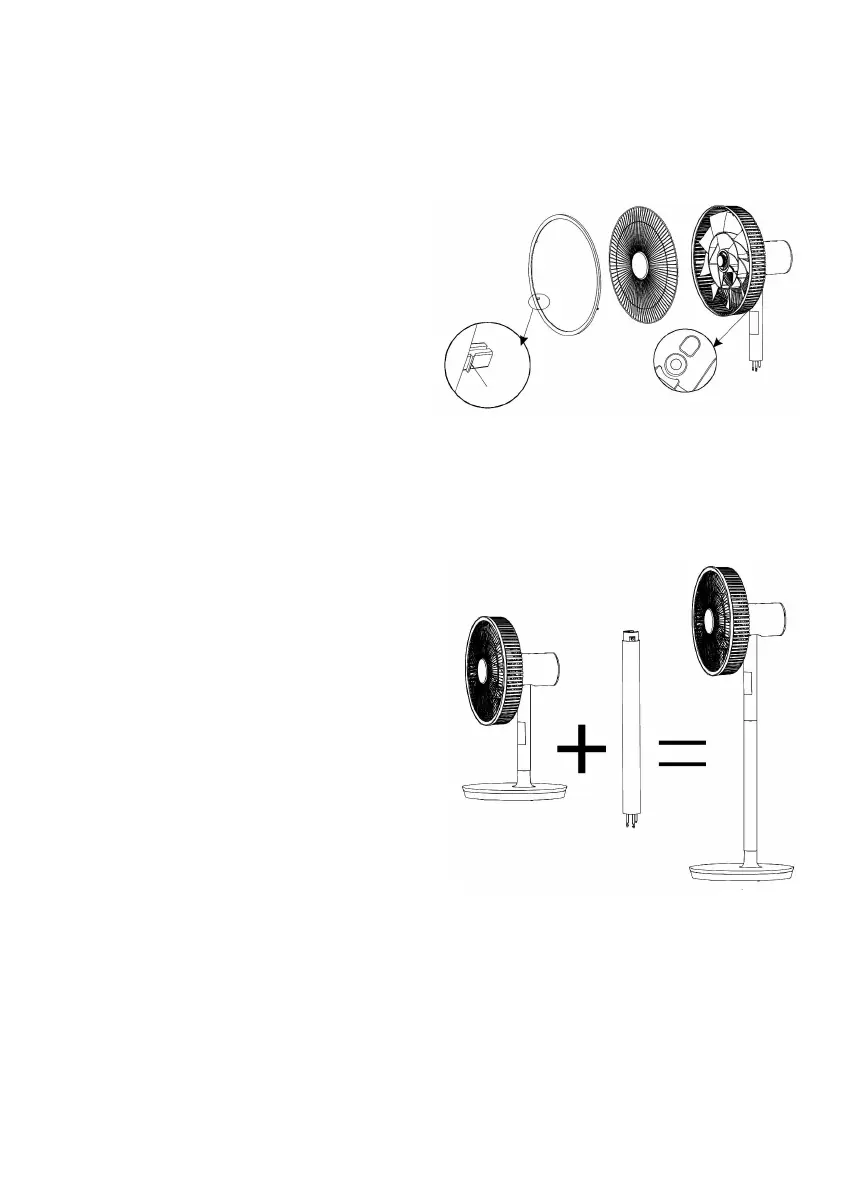
4. Step:
mounting the front guard grille (already pre-assembled)
Insert the front guard grille (2) into the rear
guard grille. Make sure that the grille bars do
not cover the guide holes in the rear guard
grille. Now place the grille fastening ring (1)
over the edge so that it fits into the large guide
holes of the rear guard grille and place it firmly
into the holes. To attach the guard to
the fastening ring securely, the three
small screws provided must be screwed
through the rear guard grille and into
the fastening ring. Insert the screws into
the built-in, round holes in the rear guard grille
and screw them in securely, using a screwdriver.
5. Step:
mounting the motor housing
onto the stand extension or the base
Insert the three male pins on the end of
the motor housing into the top of the
stand extension (12), if you will use the
fan as a pedestal fan, or insert the pins
directly into the base, if you wish to use
the fan as a desktop fan. Press the end
of the motor housing downwards until it
clicks audibly into place.
Caution: Please ensure that you hear
the click-noise, so that the pins connect
securely into the base or the stand extension.
Note: If you press the release button,
the two parts can be separated from each other again.