5
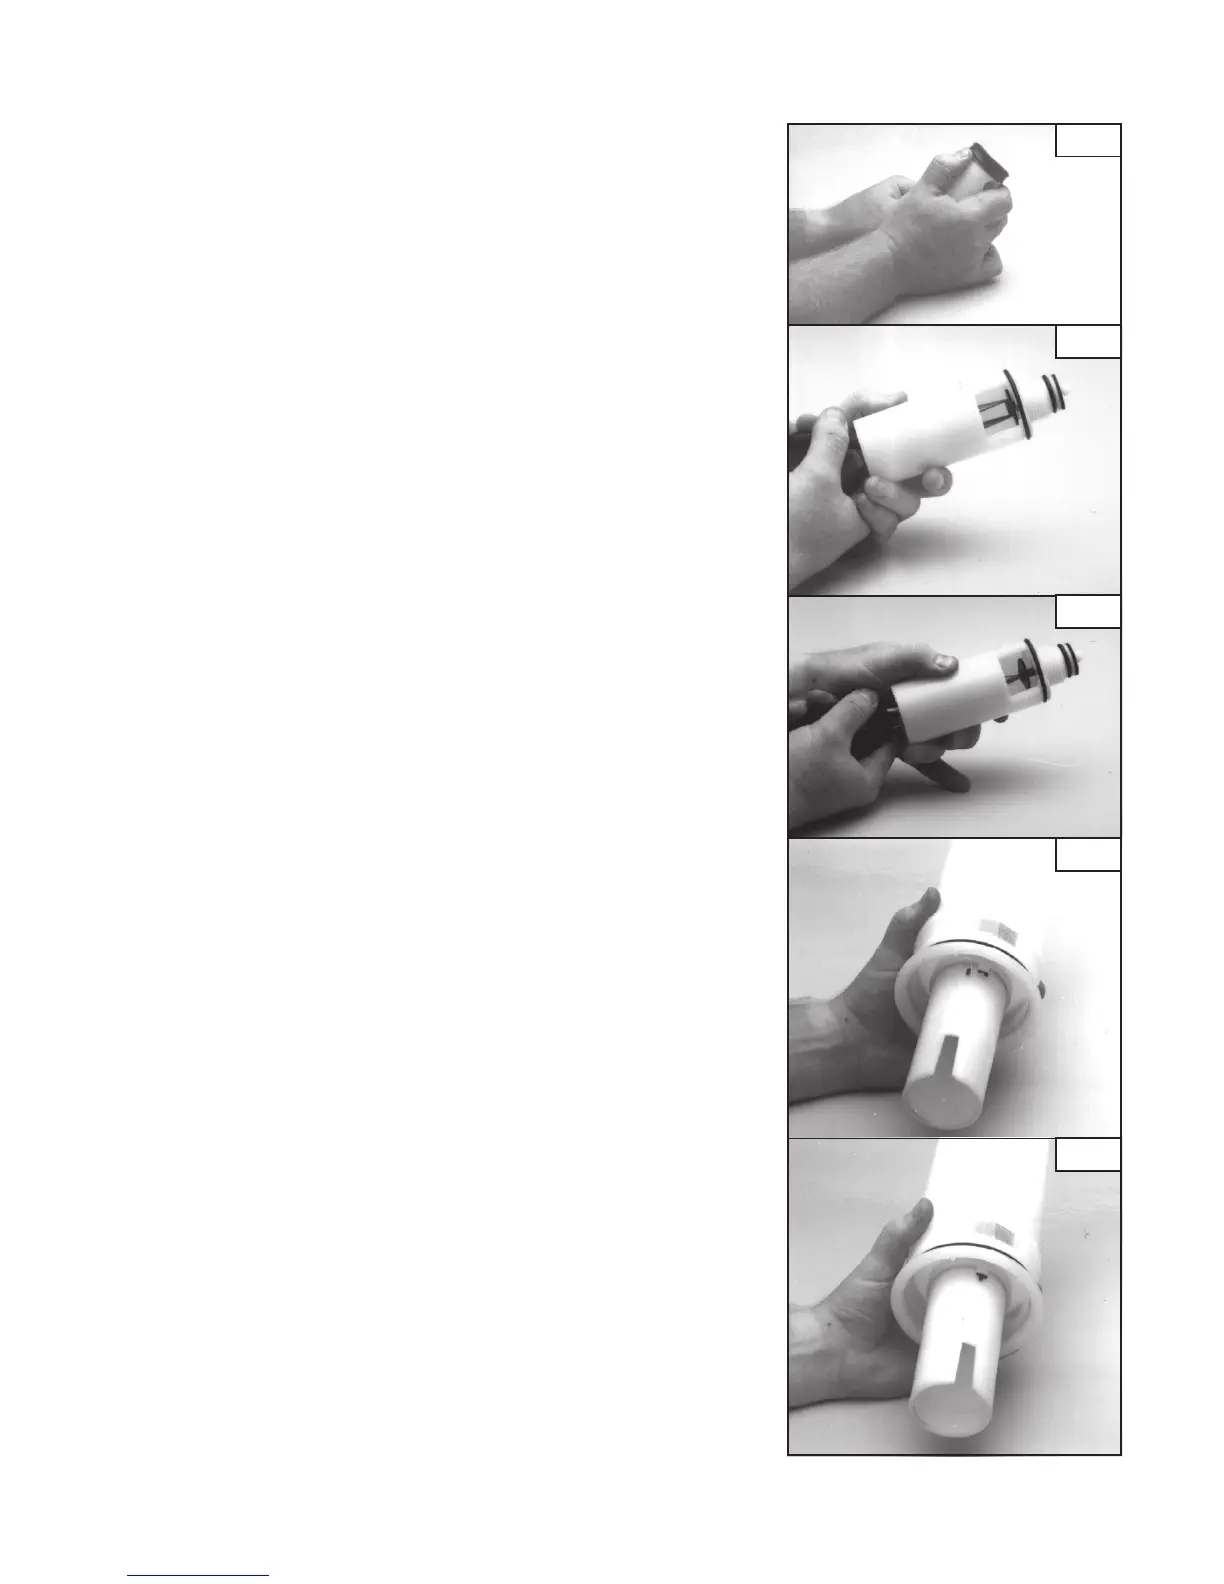
6) To replace the Viton collar, push it off with the top of the
piston with your thumb. The new one is simply pushed
over the piston crown into the form fitted sides. (See
Figure 6).
7) To replace the valve plates and o-rings on the pump
cylinder: remove the outer o-rings, the top valve plate and
replace. The lower valve plate (inside the cylinder) is
replaced by pulling out the retaining pin. Use pliers. (See
Figure 7). Replace the valve plate and then push the
holding pin back into place.
8) The pump cylinder screws into the pressure cylinder. A little
grease on the o-ring makes reassembly easier. Screw
cylinder in tight, and be sure that the notch on pump-
cylinder (A) is lined up with catch on pressure cylinder (B).
(See Figures 9 & 10)
Fig. 6
Fig. 7
Fig. 8
Fig. 9
Fig. 10
 Loading...