Preparing the equipment for use
ENGLISH 10
7. Preparing the equipment for use
7.1 Assembly
Your lawnmower will be ready for use in only a few
steps.
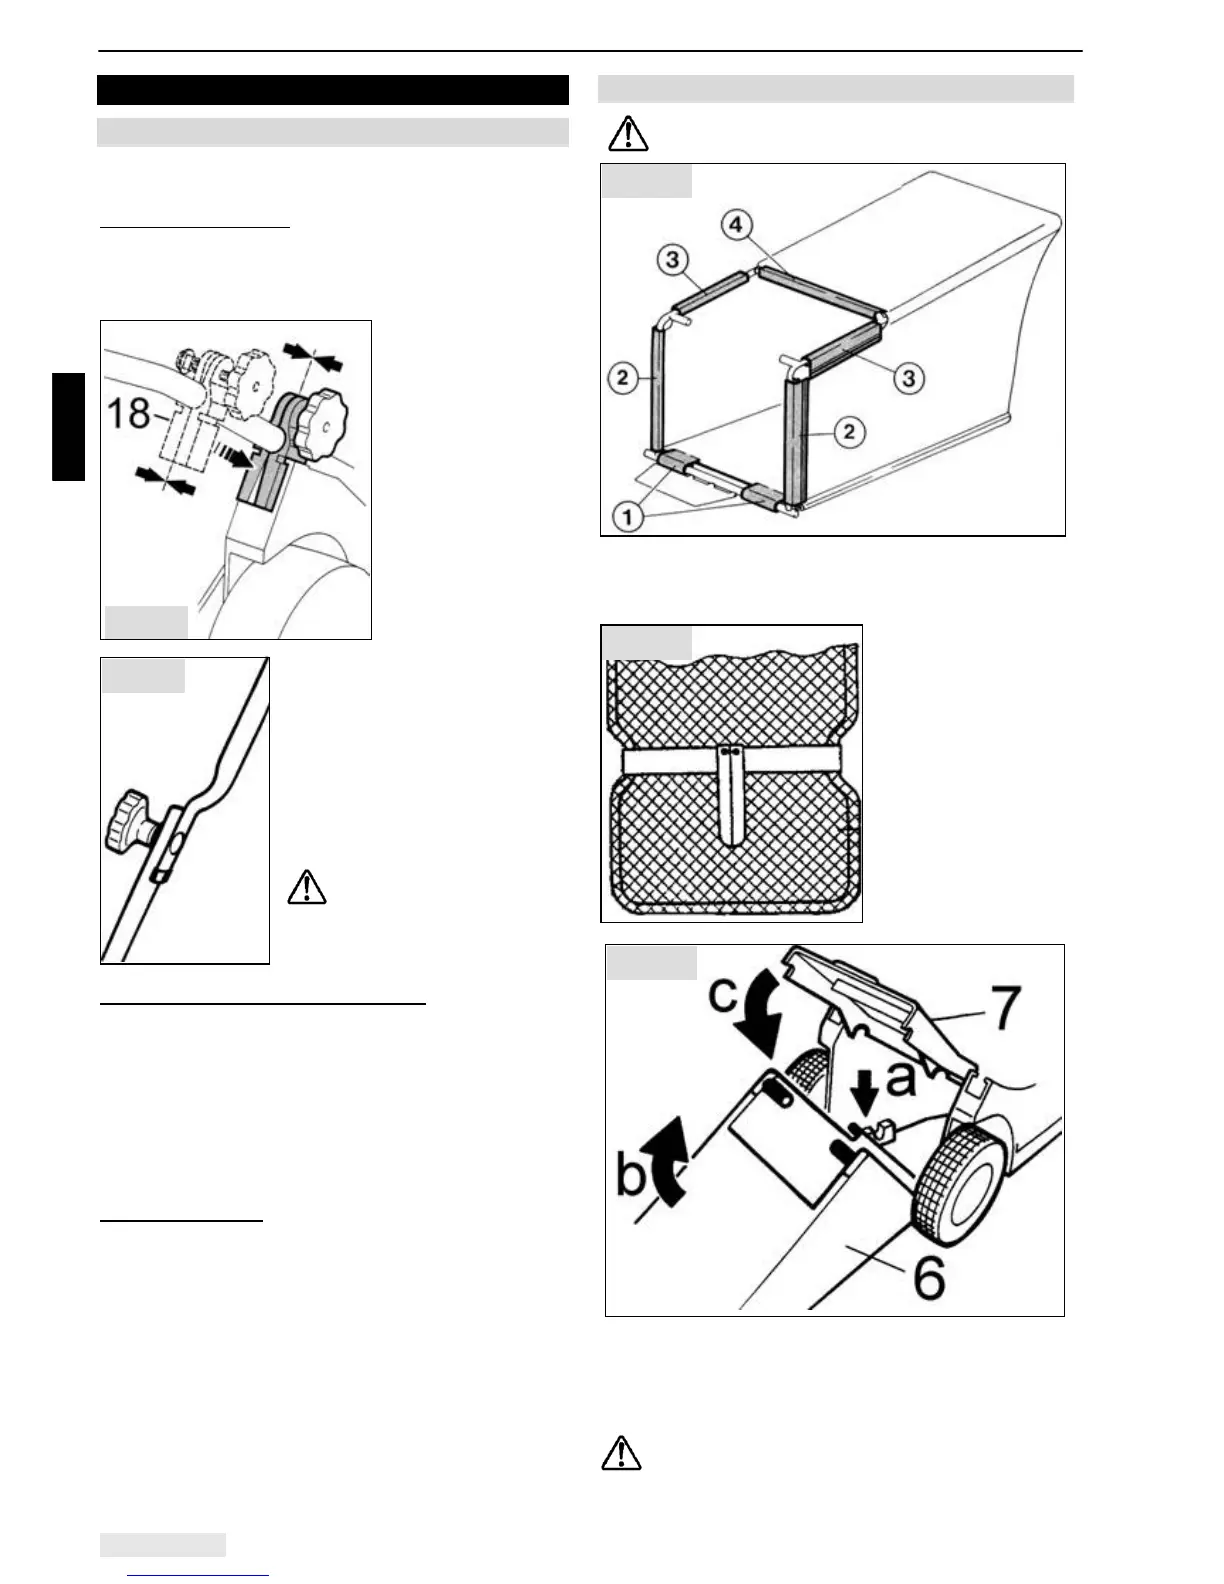
Securing the handle:
The lower handle part is secured with handle pins
(8) and firmly held in place by the clamping block
(18) in the mower housing.
Loosen both star
handles M8 and
insert the clamping
block into the
mower housing
until flush. Tighten
the star handles.
Connect the upper handle with
the lower handle and secure
on both sides with coach bolts
8x45 and washers 8.4 mm
dia.. Tighten with star handles
on the inside of the handle.
Secure both bowden cables
with cable clips to the handle.
Ensure the cables are
free of any sharp bends
and are not damaged.
Placing starter handle in rope guide
Release the engine brake by pushing the brake
lever against the mower handle. Slowly pull the
starter handle and rest handle in rope guide on the
upper handle (4).
Note: Take care when folding and unfolding the
handles to ensure that cables are not damaged in
any way.
Folding of Handle
To fold the handle:
• disconnect starter rope from rope guide (4),
• loosen both clamping blocks with star handles
and pull out from mower housing,
• place lower handle to the rear of the mower,
• loosen handles (15) and
• fold upper handle towards the front.
7.2 Grass Catching Device
Install and remove catcher only with stopped
engine!
Pull the catcher over the frame and attach plastic
retaining flaps in the sequence 1-2-3-4 to the
frame.
Squeeze the upper
frame of the catcher
to allow the carrying
bracket to be fitted.
To fit the catcher (6), lift the rear flap (7), rest the
catcher frame on the lower guide of the mower
housing (a) , lift catcher upwards (b) until the
catcher completely locks in the discharge flap (c).
The discharge chute de.ector (7) is designed
for your personal safety. The de.ector must
Fig. 3b
Fig. 2a
Fig. 2b
Fig. 4
Fig. 3a