Operating and maintenance information
ENGLISH 18
Before you can fit a new saw chain you must check the
condition of the sprocket. Worn sprockets will damage
your new saw chain. If necessary, replace the sprocket
with the new chain. Grease the bearing with lithium-
based grease whenever the sprocket is replaced.
Tip: We recommend the use of two saw chains per
sprocket, and that both chains should be replaced as
frequently as possible so that all of the components
wear evenly. Once a certain wear limit is reached,
replace all of the parts together again.
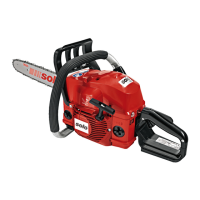
To replace the chain wheel (after dismantling the guide
bar cover and the guide bar with chain), push the chain
wheel with its washer down slightly and lift off the
locking ring with a small screwdriver.
To refit the locking ring after fitting the new chain wheel
push the chain wheel, with its washer, down again
slightly.
Guide bar:
The guide bar of your
chainsaw requires just as
much care as the saw
chain. The running surfaces
must be flat and level, and
the groove must not be
widened.
In order to prevent one-sided wearing of the guide bar,
we recommend that the guide bar be reversed
whenever the chain is sharpened.
On guide bars with a guide
sprocket, the bearing of the
guide sprocket should
preferably be lubricated with
ball bearing grease (through
the lubricating hole on the side with a grease gun)
every time the chainsaw is refuelled. Rotate the guide
sprocket while doing this.
Important: The guide bars are only designed to guide
the saw chain and must not be used as a levering tool.
Any twisting or turning or use of the guide bar to gain
leverage in the wood shortens the service life of the
guide bars.
11.2 Air Filter Maintenance
Contaminated air filters cause a reduction in engine
performance and increase fuel consumption with more
pollutants in the exhaust gas. Engines are less likely to
start readily with a contaminated air filter.
When using the power tool all day, clean the air filter
daily; under very dusty conditions, even several times a
day.
Carry out the following maintenance jobs regularly.
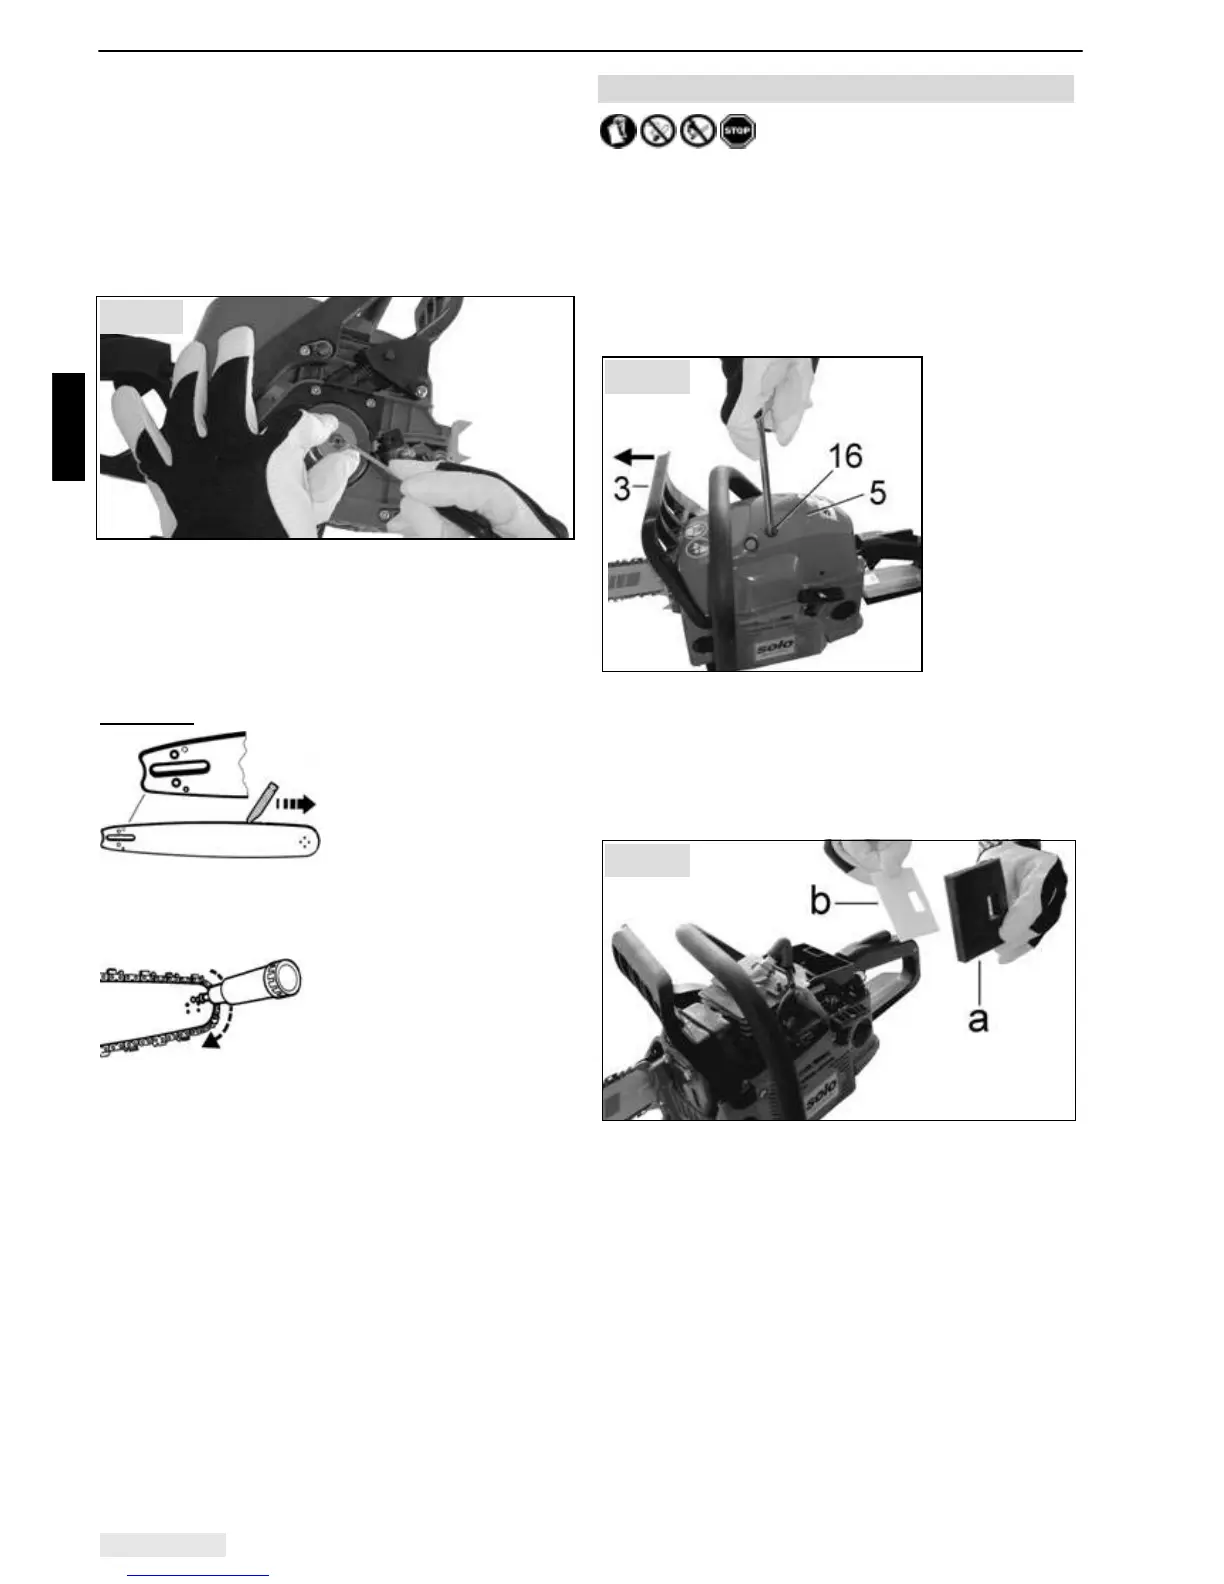
To prevent dirt from entering the carburettor inlet,
always pull out the choke lever (7) prior to removing the
hood (5). To make the hood removal easier (and the
subsequent replacement), it is recommended to push
the hand guard (3) forward (chain brake activated).
Undo the fixing screw (16) completely (screw is retained
inside the hood) and remove the hood (5).
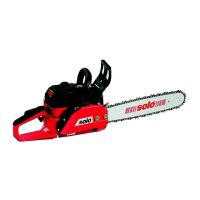
Remove the foam filter (5) and the flow filter insert (b).
The best way to clean the filter is to simply tap out any
dirt or blow it out with a blast of air.
If they are more heavily contaminated, both filters can
be cleaned with non-flammable cleaning fluid (warm
soapy water). Both filters must be absolutely dry before
they are refitted to the device.
The corresponding parts should be replaced
immediately if the filter material is damaged. No
warranty claims can be accepted for engine damage
arising as a result of inadequate care.
Dry out the area surrounding the filter and remove all
dust residues. First introduce the flow filter insert, then
the foam filter.
When positioning the hood, ensure that it fully locks all-
round into the groove of the main casing.
Fig. 16
Fig. 17
Fig. 18