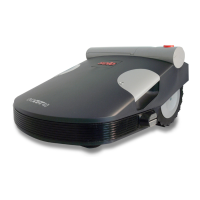
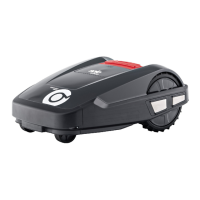
8. START-UP
Preparation
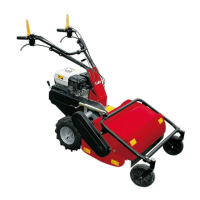
Before starting to operate the evoCUT 4.0, place it
in its starting position in the defined mowing area
(Fig. 8 - 3).
Comply with the specified dimensions.
Switching on
Status display
x Switch on the evoCUT 4.0 by pressing the [ON/
OFF key] (Fig. 3 - 7).
The LCD display (Fig. 3 - 1) then shows the
illustrated information.
Language selection
The corresponding language only needs to be
selected here during the initial start-up.
x Use the [ arrow keys ] (Fig. 3 - 3) to select the
required language.
x Confirm with the [multifunction key] (Fig. 3 - 5).
After confirming, the LCD display (Fig. 3 - 1)
shows [Enter registration PIN].
Entering the factory-set PIN code
The factory-set PIN code only needs to be entered
during the initial start-up. The factory-set PIN code
is [0000].
x Use the corresponding [arrow keys] (Fig. 3 - 3)
to select the corresponding digits and confirm
each one with the [multifunction key]
(Fig. 3 - 5).
x Enter the next 3 required digits in the same
way.
Following this, the LCD display (Fig. 3 - 1) shows
the [Change PIN] dialogue box.
Changing the PIN code
Enter a new PIN and repeat.
After this, the LCD display (Fig. 3 - 1) shows the
[Date dialogue box].
Setting or changing the date
Enter the date and time correctly, because further
programming depends on the date and time.
x Use the corresponding [arrow keys] (Fig. 3 - 3)
to select the corresponding digits and confirm
each one with the [multifunction key] (Fig. 3 - 5)
After confirming, the LCD display (Fig. 3 - 1) shows
[Time dialogue box].
When entering the year (YYYY), it is only
necessary to enter the last two digits
because the first two 20XX are preset.
Setting or changing the time
x Use the corresponding [arrow keys] (Fig. 3 - 3)
to select the corresponding digits and confirm
each one with the [multifunction key] (Fig. 3 - 5).
Following this, the LCD display (Fig. 3 - 1) shows
the [Uncalibrated] status window.
Calibration
For calibration, set up the evoCUT 4.0 accordingly
(Fig. 8 - 3)
x The automatic calibration procedure starts when
the [START key] (Fig. 3 - 4) is pressed.
The [Drive starting] warning flashes on the LCD
display (Fig. 3 - 1).
CAUTION!
The drive starts when the [START key] is
pressed.
Do not reach into rotating parts.