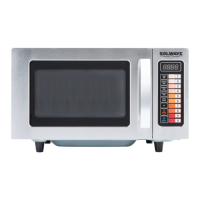
This document is a user manual for the Solwave 1000W Commercial Microwave, model 180MW1000SS. It provides essential information for safe operation, installation, usage, and maintenance of the appliance.
Function Description:
The Solwave 1000W Commercial Microwave is specifically designed for commercial use to heat, cook, or dry food. It is not intended for industrial or laboratory applications. The microwave offers various cooking modes, including manual cook and programmable settings, allowing users to customize cook times and power levels. Its commercial-grade construction suggests durability and suitability for demanding environments.
Important Technical Specifications:
- Power Output: 1000W
- Model Number: 180MW1000SS
- Electrical Requirements: The oven MUST BE GROUNDED and connected to a properly grounded outlet. It is equipped with a cord having a ground wire and a grounding plug. Extension cords should not be used.
- Installation Clearances:
- Top: 12 inches (30 cm)
- Sides: 4.0 inches (10 cm)
- Minimum installation height: 36 inches (91.4 cm)
- Certifications: UL Listed, ETL Intertek Listed.
- Date of Manual: 02/2024
Usage Features:
Safety Instructions (Crucial for Operation):
- Grounding: The equipment must be grounded. Do not alter the plug.
- Intended Use: Use ONLY for heating, cooking, or drying food.
- Prohibited Items: DO NOT heat items that can explode (e.g., eggs, sealed containers, glass jars).
- Damage: DO NOT operate if the cord, plug, door, or oven is damaged or not working properly.
- Servicing: Must be serviced ONLY by qualified service personnel.
- Obstructions: DO NOT cover or block filters or other openings.
- Storage: DO NOT store outdoors.
- Water: DO NOT use near water or immerse the cord/plug in water.
- Cord Safety: Keep cord AWAY from heated surfaces and DO NOT let it hang over table/counter edges.
- Overcooking: DO NOT overcook food to avoid fire. If materials ignite, keep the door CLOSED, turn off, and disconnect power.
- Storage: DO NOT use the cavity for storage.
- Liquids: Do not overheat liquids. Allow containers to stand briefly after heating.
- Operation without Load: DO NOT operate without food in the cavity.
- Utensils: DO NOT use metal utensils.
- Materials: NEVER use paper, plastic, or combustible materials not intended for cooking.
- Cleaning: Clean regularly and remove food deposits.
- Commercial Use: For commercial use only.
- Children: Do not allow children to use this product. Use caution when removing hot items.
Turning the Oven On:
- Upon initial power-up, the display shows "-- --".
Time Entry Mode:
- Allows manual entry of cook time and power level.
- In Ready Mode, the LED displays "0:00."
- Pressing the "Time Entry" key enters Time Entry Mode, displaying "00:00."
- Power Level Selection: Press "Hold 0%", "Defrost 20%", "Medium 50%", or "Med-Hi 70%" keys to select power. Pressing the same key twice sets power to PL10 (full power). Default is PL10 if no power is chosen.
- To start cooking, press the "Start" key. To return to Ready Mode, press the "Stop/Reset" key.
Manual Cook Mode:
- While in Manual Cook Entry Mode, pressing the "Start" key initiates Manual Cook Mode.
- During this mode, the cooking time is displayed, the fan operates, and the oven light is on.
Programming Mode:
- Allows assigning custom cook times and power levels to number keys (1-10).
- Activation: Open the oven door, press and hold number key 1 for 5 seconds. A buzzer sounds, and "ProG." displays.
- Setting a Program:
- Select a number (1-10) for the program.
- Press "Time Entry"; "0:00" displays. Input the desired cook time.
- Select the desired power level (e.g., "Medium 50%"). Default is 100% if none is chosen.
- Press "Start" to save the program. "ProG." displays.
- Close the door to return to Ready Mode.
- Example: To set 1 minute 15 seconds at 50% power under key 4:
- Open door, hold key 1 for 5 seconds ("ProG." displays).
- Press 4.
- Press "Time Entry" ("0:00" displays).
- Input 1, 1, 5 (for 1:15).
- Press "Medium 50%" ("PL5." displays).
- Press "Start" to save.
- Close door. To use, press 4.
User Option Mode:
- Allows customization of oven settings.
- Activation: Open the oven door, press and hold number key 2 for 5 seconds. A buzzer sounds, and "OP: - -" displays.
- Setting Options: Press any number button (1-9) to enter related mode. Repeatedly pressing the same number cycles through sub-options (e.g., for Beeper Volume, pressing 2 cycles through OP:20, OP:21, OP:22, OP:23).
- Saving: Press the green "Start/Confirm" button to save. "OP: - -" displays again. If not saved, settings revert to previous.
- Exiting: Press the red "Stop/Reset" button to enter Door Open Mode. Closing the door enters Ready Mode.
- Available Options (Bold = Default):
- 1: End of Cooking Tone: OP:10 (3 Second Beep), OP:11 (Continuous Beep), OP:12 (5 Quick Beeps, Repeating)
- 2: Beeper Volume: OP:20 (Beeper Off), OP:21 (Low), OP:22 (Medium), OP:23 (High)
- 3: Beeper On/Off: OP:30 (Beeper Off), OP:31 (Beeper On)
- 4: Keyboard Input Time Window: OP:40 (15 Seconds), OP:41 (30 Seconds), OP:42 (60 Seconds), OP:43 (120 Seconds)
- 5: On The Fly: OP:50 (Disabled), OP:51 (Enabled)
- 6: Door Reset: OP:60 (Disabled), OP:61 (Enabled)
- 7: Maximum Cook Time: OP:70 (60 Minutes), OP:71 (10 Minutes)
- 8: Manual Programming: OP:80 (Disabled), OP:81 (Enabled)
- 9: Double Digit: OP:90 (Single Digit Mode - 10 Programs), OP:91 (Double Digit Mode - 100 Programs)
Maintenance Features:
Care and Cleaning:
- Safety First: UNPLUG the power cord or open the circuit breaker before cleaning or removing the lightbulb to avoid electrical shock.
- Interior/Exterior: Clean with a mild detergent, water, and a soft sponge or cloth.
- Prohibited Cleaners: DO NOT use cleaners containing ammonia or citrus.
- Cleaning Methods: DO NOT use water pressure cleaning systems.
- Air Vents: Inspect air vents monthly and clean with a damp cloth.
Troubleshooting Guide:
- Dim oven light: Possible Cause: Cooking at low power level. Remedy: This is normal.
- Steam forms on oven door: Possible Cause: Steam generated when cooking foods. Remedy: This is normal.
- Hot air expelled from vents: Possible Cause: Foods releasing heat. Remedy: This is normal.
- Oven does not start:
- Possible Cause: Power cord not plugged in correctly. Remedy: Plug cord into outlet correctly.
- Possible Cause: Fuse blown or circuit breaker open. Remedy: Replace fuse (authorized servicer) or reset breaker.
- Possible Cause: Malfunctioning outlet. Remedy: Test outlet with another electrical appliance.
- Possible Cause: Door not closed. Remedy: Close door.