EasyManua.ls Logo

SOMFY Orea 50 WT - User Manual

SOMFY Orea 50 WT
8 pages
Print Icon
To Next Page IconTo Next Page
Loading...
33
Copyright © 2005 - 2014 Somfy SAS. All rights reserved.
EN
Non contractual images
1. Prior information 33
1. 1. Sphere of application 33
1. 2. Liability 33
2. Installation 34
2. 1. Assembly 34
2. 2. Wiring 35
2. 3. Set-up 36
2. 4. Tips and advice on installation 37
3. Operation and maintenance 39
3. 1. Raising and lowering the awning 39
3. 2. STOP function 39
4. Tips and advice on operation 39
5. Technical data 39

position reversing switch control point.
CONTENTS
ORIGINAL INSTRUCTIONS
These instructions apply to all Orea 50 WT, Orea 50 WT RH and Orea 60 WT drives, whatever
the torque/speed combination.
1. PRIOR INFORMATION
1. 1. SPHERE OF APPLICATION
Orea 50,
Orea 50 RH
and
Orea 60
drives are designed
to drive all types of outside cassette
awnings that meet at least one of the following conditions:
- The driven product is controlled by a press-and-hold control point (wireless or wired) (see
the enclosed Safety instructions document).
- 
permanent access level.
- The awning is equipped with a safety device that prevents any contact in the shear or crush
zone (a guard that cannot be removed without tools).
1. 2. LIABILITY

the instructions provided in this guide, please also comply with the instructions set out in the
enclosed Safety instructions document.
The drive must be installed by a home motorisation and automation professional, in
accordance with Somfy's instructions and the applicable regulations in the country of
installation.
Any operation of the drive outside the sphere of application described above is prohibited. Such

to comply with the instructions given herein and in the enclosed
Safety instructions document.
After installing the drive, the installer must inform his customers of the operating and maintenance
conditions for the drive and must pass the operating and maintenance instructions on to them, as
well as the enclosed
Safety instructions document. Any After-Sales Service operation on the
drive requires intervention by a home motorisation and automation professional.
Should any doubt arise during installation of the drive or for additional information, consult a Somfy
contact or visit www.somfy.com.
Safety Warning!
1
Caution! 

Other manuals for SOMFY Orea 50 WT

Question and Answer IconNeed help?

Do you have a question about the SOMFY Orea 50 WT and is the answer not in the manual?

Summary

Prior Information

Sphere of Application

Defines the intended use and types of awnings compatible with Orea WT drives.

Liability

Outlines installer responsibilities, warranty conditions, and prohibited operations.

Installation

Assembly

Covers checks for awning security, drive suitability, and component preparation.

Wiring

Details electrical connection procedures, cable routing, and safety precautions.

Set-up

Guides on checking rotation direction and setting the upper and lower end limits.

Tips and Advice on Installation

Provides troubleshooting for common installation problems and procedures for re-setting limits.

Advanced Functions

Explains how to use and adjust the obstacle detection sensitivity.

Restoring the Original Configuration

Details the procedure to reset the drive to its factory default settings.

Operation and Maintenance

Raising and Lowering the Awning

Describes the basic operation for raising and lowering the awning using control buttons.

STOP Function

Explains how to stop the awning movement using different types of control switches.

Tips and Advice on Operation

Questions about the Orea WT?

Troubleshooting common operational issues, such as the awning not operating.

Technical Data

Specifications

Lists key technical specifications including power supply, operating temperature, and protection rating.

Overview

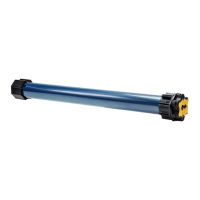
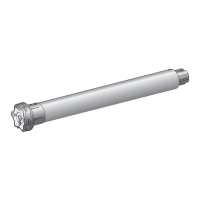
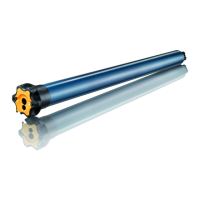
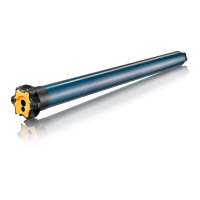
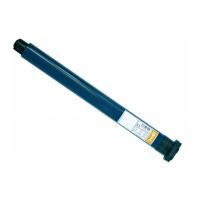
This document provides original instructions for the Somfy Orea 50 WT, Orea 50 WT RH, and Orea 60 WT drives, which are designed for various torque/speed combinations.

Function Description

The Orea 50, Orea 50 RH, and Orea 60 drives are specifically engineered to operate all types of outside cassette awnings. These drives are intended for use with products controlled by a press-and-hold control point (either wireless or wired), ensuring precise movement. A key safety feature is that the crush or shear zone must be located at a height exceeding 2.50 m from the ground or any permanent access level. Additionally, the awning must be equipped with a safety device, such as a guard that cannot be removed without tools, to prevent contact in the shear or crush zone.

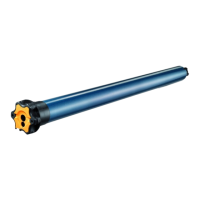
The Orea WT drive can be installed on either the left or the right side of the awning and is controlled from a fixed- or temporary-position reversing switch control point.

Important Technical Specifications

Power Supply: 230 V ~ 50 Hz Operating Temperature: -20 °C to +60 °C Protection Rating: IP 44 Electric Insulation: Class I

Drive Preparation:

  • Orea 50 WT: Requires an inner tube diameter of at least 47 mm.
  • Orea 60 WT: Requires an inner tube diameter of at least 60 mm.
  • Winding Tube: Must be at least 0.5 mm thick with a smooth inner surface (no welds, crimps, folds, etc.).
  • Notch Dimensions for Smooth Winding Tubes:
    • Orea 50 WT: (D) = 4 mm; (E) = 28 mm.
    • Orea 60 WT: (D) = 8 mm; (E) = 35 mm.
  • Wheel Securing: The winding tube must be secured to the wheel using either 4 Ø 5 mm Parker screws or 4 Ø 4.8 mm steel pop rivets, located between 5 mm and 15 mm from the outside edge of the wheel. Screws or rivets must only be fastened on the wheel, not on the drive. Alternatively, a wheel lock can be used for non-smooth tubes.
  • Cable Length: The power supply cable length (L) should be ≤ 50 m. If used outdoors and the cable is H05-VVF type, it must be run in a UV-resistant duct.

Usage Features

Installation: Installation must be performed by a home motorisation and automation professional in accordance with Somfy's instructions and local regulations. The installer is responsible for informing customers about operating and maintenance conditions and providing all relevant instructions.

Assembly:

  1. Drive Preparation: Fit necessary accessories (wheel (A) or ring (B) and wheel (C)) onto the drive. Measure the length (L1) between the inside edge of the drive head and the end of the wheel.
  2. Tube Preparation: Cut the winding tube to the desired length, deburr it, and remove chips. For smooth tubes, cut a notch according to the specified dimensions for Orea 50 WT or Orea 60 WT.
  3. Drive-Tube Assembly: Slide the drive into the winding tube. For smooth tubes, position the cut notch on the protruding part of the ring. Prevent the wheel from moving inside the tube by securing it with screws, pop rivets, or a wheel lock.
  4. Mounting:
    • Star Head Drive: Fit the tube-drive assembly to the end support (F) and then to the drive support (G). Position the retaining ring (H); for drives ≥ 85 Nm, a lockable retaining ring (I) must be used.
    • Round Head Drive: Fit the support to the drive head, then the removable side plate. Slide the tube-drive-removable side plate assembly into the head rail.

Wiring:

  • Cables routed through metal internal walls must be protected by sleeving or sheathing.
  • Secure cables to prevent contact with moving parts.
  • Always make a loop in the power supply cable to prevent water entry.
  • The drive cable is removable and must be replaced with an identical cable if damaged.
  • Ensure the power supply cable remains accessible for easy replacement.
  • Connection: Switch off power supply. Connect according to the provided table:
    • Neutral (N): Blue
    • Live (L1): Brown
    • Live (L2): Black
    • Earth ( ): Green-yellow

Set-up:

  1. Checking Rotation Direction:
    • Switch power supply on.
    • Press "Up" button. If awning moves upwards, wiring is correct. If downwards, switch power supply off, swap brown and black wires, then switch power on and re-check.
  2. Setting End Limits:
    • Use universal adjusting cable 9015971 or a non-locking double push-button switch.
    • The upper end limit is set automatically; the lower end limit must be set manually.
    • Setting Lower End Limit:
      • Press "Up" and "Down" until awning moves back and forth.
      • Press "Up" until awning moves back and forth.
      • Position awning at desired lower end limit (adjust with "Up" or "Down").
      • Briefly press "Up", then press again until awning moves back and forth.
      • Press "Up" and "Down" until awning moves back and forth. The lower end limit is programmed.

Advanced Functions:

  • Obstacle Detection Function: Adjust sensitivity (high-medium-low) of the awning cassette. Default is medium.

    • To activate: Place awning at half-way position.
    • Press "Up" and "Down" until awning moves back and forth.
    • Press "Up" or "Down" until awning moves back and forth to adjust sensitivity (brief movement for medium, long for low/high).
    • Press "Up" and "Down" until awning moves back and forth to save.
  • Restoring Original Configuration:

    • Use universal adjusting cable 9015971 or a non-locking double push-button switch.
    • Simultaneously press "Up" and "Down" until awning moves back and forth once, then again. The drive is restored to its original configuration.

Operation:

  • Raising/Lowering: Press "Up" to raise (stops at upper limit), "Down" to lower (stops at lower limit).
  • STOP Function:
    • Non-locking double push-button switch: Simultaneously press "Up" and "Down" while product is moving to stop.
    • Locking double push-button switch: Press "Up" while product is moving upwards to stop. Press "Down" while product is moving downwards to stop.

Maintenance Features

This drive does not require any specific maintenance operations.

Troubleshooting (Tips and Advice on Operation):

  • Awning rotates in wrong direction: Check and modify wiring.
  • Awning does not operate:
    • Wiring incorrect: Check and modify wiring.
    • Overheating protection activated: Wait for drive to cool down.
    • Control point incompatible: Check compatibility and replace.
  • Awning stops too soon:
    • Friction (rubbing on guide rails/cassette, interference between winding tube/drive): Check installation, adjust rubbing points. If persistent, restore drive to original configuration.
    • Drive installed in new awning: Restore drive to original configuration.
  • Awning does not stop at lower end limit: Fixings unsuitable: Check awning is secured to winding tube with rigid links.
  • Awning does not stop at upper end limit: System for stopping in upper position unsuitable: Check awning is fitted with stops screwed to end slat, fixed/removable stops in guide rails, or end slat acts as stop.

Re-setting End Limits:

  • Use universal adjusting cable 9015971 or a non-locking double push-button switch.
  • Re-setting Lower End Limit:
    • Place awning at lower end limit.
    • Press "Down" for ~5 seconds.
    • Wait 2 seconds.
    • Press "Down" until awning moves back and forth.
    • Repeat previous two steps four times (last movement is brief).
    • Place awning at desired lower end limit.
    • Briefly press "Up". If awning reacts, repeat this step.
    • Wait 2 seconds.
    • Press "Up" until awning moves back and forth. The new lower end limit is programmed.

SOMFY Orea 50 WT Specifications

General IconGeneral
BrandSOMFY
ModelOrea 50 WT
CategoryDC Drives
LanguageEnglish

Related product manuals