EasyManua.ls Logo

SOMFY TaHoma User Manual

SOMFY TaHoma
85 pages
To Next Page IconTo Next Page
Page #1 background imageLoading...
Page #1 background image
TaHoma®TaHoma® Installation and use
Guide
INSTALLATION & USER
ENGLISH
01/2017 Ref. 5133170A

Other manuals for SOMFY TaHoma

Question and Answer IconNeed help?

Do you have a question about the SOMFY TaHoma and is the answer not in the manual?

SOMFY TaHoma Specifications

General IconGeneral
TypeWall-mounted
InterfaceRF Wireless
Product colorWhite
Channels quantity2 channels
Operating frequency868.95 MHz
Connectivity technologyWireless
International Protection (IP) codeIP30
Batteries includedYes
Operating temperature (T-T)0 - 60 °C
Battery typeCR2430
Operating voltage3 V
Weight and Dimensions IconWeight and Dimensions
Depth10 mm
Width50 mm

Summary

Important Warnings and Precautions

Installation Steps

Step 1: Connect the Box

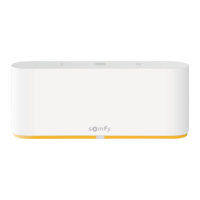
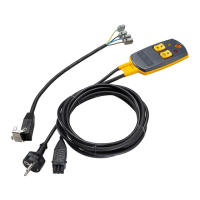
Instructions to physically connect the TaHoma® box.

Step 2: Create Your Account

Process for setting up a user account via somfy-connect.com.

Step 3: Configure Box and Accessories

Guidance on configuring the box and adding accessories.

Connecting the TaHoma® Box

Creating Your TaHoma® Account

Account Creation Process

Steps to create an account via somfy-connect.com and confirm via email.

Configuring Your Connected Home

Step 2: Customizing Your Home

Process for personalizing the home environment within TaHoma®.

Adding Devices (Part 1)

Selecting Device Technology

Guide on selecting the correct technology for the device being added.

Adding Devices (Part 2)

Completing Device Addition

Instructions to click "add" and follow prompts; icons appear centrally.

Customizing Your Home Setup

Configuring Box and Accessories

Adding Security Accessories

Step to add security accessories to the TaHoma® system.

Configuring Security Settings

Step to configure the overall security features.

Adding Pack Security Accessories

Adding Pack Security Accessories (Part 2)

Device Technology Selection

Guide on selecting the correct technology for the security accessory.

Adding Pack Security Accessories (Part 3)

Completing Accessory Addition

Instructions to click "add", follow prompts, and manage devices.

Configuring Security Settings

Understanding Security Modes

Explains the four security modes: Total, Partial 1, Partial 2, and Deactivated.

Configuring Security Settings (Part 2)

SOS Functionality

Details on using the SOS function to alert friends and relatives.

Configuring Security Settings (Part 3)

Security Mode Summary Table

Table summarizing detectors, alerts, and activated devices for each security mode.

Configuring Security Settings (Part 4)

Steps to Configure Security Modes

Three steps to configure modes: select detectors, select alerts, select devices.

Configuring Security Settings (Part 5)

SOS Function Configuration Steps

Two steps to configure SOS: select alerts and select devices/actions.

Configuring Security Settings (Part 6)

Additional Setting Options

Covers 'Times' settings and alerts for power/internet failures.

Controlling Security (Part 1)

Activating a Security Mode

Instructions on activating security modes via computer, tablet, or smartphone.

Controlling Security (Part 2)

Real-Time Security Status

How to check the real-time security status of your home at a glance.

Controlling Security (Part 3)

Deactivating the Security System

Steps to deactivate the system for a comfortable return home.

Intrusion and SOS Alerts (Part 1)

Overall Intrusion Alert View

Describes how TaHoma® alerts upon intrusion detection: buzzer, notifications, device activation.

Intrusion and SOS Alerts (Part 2)

Understanding the Alert Screen

Details the alert screen interface and how to end an alert.

Intrusion and SOS Alerts (Part 3)

Video Alert Screen Functionality

Explains video recording and access for camera-enabled security alerts.

Intrusion and SOS Alerts (Part 4)

Using the SOS Function

How to use the SOS function to alert contacts in an emergency.

Connected Home Features (Part 1)

Connected Home Features (Part 2)

Accessing the My Home Interface

Steps to access the "my home" interface via web or iPad application.

Installation Steps Overview

Step 1: Adding Devices

The first step in installation is adding your devices.

Step 2: Configuring Your Home

The second step is to set up your home environment in TaHoma®.

Adding Devices

Adding New Devices

Instructions on how to add new devices, referencing page 17 for details.

Configuring Your Home

Recreating Home Structure

Guide to recreating home layout, floors, and rooms for device assignment.

Controlling Your Devices

Controlling Devices in Real Time

Real-Time Device Operation

How to control devices and set their position in real time.

Creating Customised Programmes

Programme Types Overview

Introduces the three types of programmes: Scenarios, Schedule, and Smart.

Creating Customised Programmes: Scenarios (Part 1)

Scenario Functionality

How scenarios allow activating multiple devices with one click for specific situations.

Creating Customised Programmes: Scenarios (Part 2)

Creating and Saving Scenarios

Steps to create a scenario by dragging devices and saving with a name.
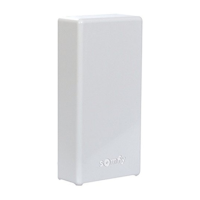
Creating Customised Programmes: Schedule (Part 1)

Creating Customised Programmes: Schedule (Part 2)

Creating Customised Programmes: Schedule (Part 3)

Creating Customised Programmes: Schedule (Part 4)

Creating Customised Programmes: Smart (Part 1)

Creating Customised Programmes: Smart (Part 2)

Creating Customised Programmes: Smart (Part 3)

Additional Features (Part 6)

Safety Instructions

Related product manuals