6
INSTALL YOUR TV, CONNECT YOUR
SOURCES AND ENJOY YOUR NEW
MAG CONCEALED TV AUDIO SYSTEM!
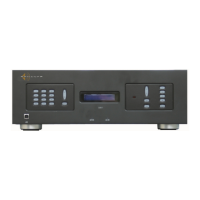
3. SONOS AMP is equipped with ARC (Audio Return
Channel) which allows you to plug in your TV directly
into AMP and any device connected to your TV’s HDMI
will transfer their audio to the SONOS AMP. HDMI
ARC is a special port that looks like a standard HDMI
port. Although they look the same, if you connect to a
standard HDMI port, you won’t hear sound.
On your TV’s audio OUT panel, locate the HDMI ARC port.
It may be on the back or side of your TV. Look for the port
with “ARC” on the label. If your TV does not support ARC
please refer to the SONOS Amp Setup Guide.
For assistance setting up your SONOS AMP please
refer to the provided user manual or reference
www.sonos.com/amp.
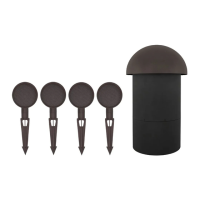
4. Attach the provided Velcro to the to back of the provided
Power Strip and secure to the side of the Wall Box
however it best fits your install.
5. Plug in the Power Strip along with the Sonos AMP and
your TV into the ONE-CK. Plug the amp and TV into the
power strip.
The USB Ports of the Power Strip can be used to power
devices such as Amazon Fire Stick, Google Chromecast
or Roku devices.
Join Button
AC Power
(Mains) Port
RIGHT LEFT
Analog Audio In
Subwoofer Output Speaker Terminals
HDMI
ARC
BACK OF TV
NOTE: Make sure to pair and setup your SONOS AMP before
installing the TV.
Figure 12
Figure 13
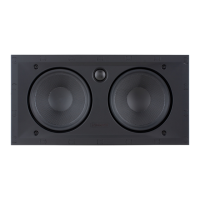
GRILLE PAINTING INSTRUCTIONS
Before You Begin
The MAG6 LCR grilles completely cover the exposed speaker
frame, so only the grilles (not the speakers themselves)
require painting.
Preparing the Grilles for Painting
Carefully remove the scrim cloth from the underside of the
grille. The scrim cloth is held in place with a light tacking
glue. Use a heating agent such as a heat gun or hair dryer
to soften the glue and carefully remove the cloth, since you
will need to replace it when you’re done painting the grille.
Be careful not to deform the cloth’s shape while removing
it - this will make it very dicult to properly replace the
cloth on the grille. Remove any adhesive residue from the
back of the grille before beginning painting.
IMPORTANT: If the wall is painted after MAG6 LCR Speakers
are installed, remove the speakers before painting. The
speaker flanges must be masked before painting the wall.
Figure 14
Painting the Grilles
1. Prime the grille with a metal primer/bonder in a spray can
carefully follow the manufacturer’s directions on the can
and apply very lightly to not clog the grille.
2. We recommend using water-based latex paint on the
grilles. Thin the paint with a proper thinning agent to
a ratio of 1:1 paint-to-thinner, and strain it through a
standard mesh strainer to remove any lumps.
3. Use a small touch-up gun or cap-spray gun with a #3 tip
for painting.
(A) Set the nozzle with a medium to wide fan
(B) Set the pressure regulator to 60psi
(C) Lightly spray the front of the grille in 3 quick
strokes from approximately 10 inches away
(D) Let the paint set for a minute, then turn the grille
90º and lightly spray the grille again in 3 quick
strokes. Repeat this step until all four sides of the
grille have been evenly painted.
4. While the paint is still wet, inspect the grille and make
sure that excess paint has not collected underneath the
grille frame, and that none of the grille perforations are
filled with paint. If any are, use compressed air to blow
the paint out of the perforations.
5. Once the paint has thoroughly dried, replace the scrim cloth
on the back of the grille and mount the grille on the speaker.
IMPORTANT: If you find any grille perforations that are
plugged with paint after the paint has dried, use a straight
pin or sewing needle to carefully remove the paint.
 Loading...