2
INTRODUCTION
Thank you for purchasing the Sonance Navigator Harbor.
The Harbor has audiophile quality not often found in
A/V control products and has easy install features for the
custom installer. When combined with six IR based
keypads, like the Sonance Navigator
®
K1 or K2 keypad,
the Sonance Navigator Harbor becomes a six-zone, six-
source audio/video system controller and distribution
device.
• This product was designed with both the end user and the
installer in mind
• High grade audio and video discrete circuitry
• Two types of connectors are provided for control hookups
• Removable keypad connectors offer easy moving of
zone connections
• A control voltage/keypad voltage fuse is accessible on the rear
panel
• Simple but useful notation space is provided under all
audio/video inputs and outputs.
The first section of this manual provides brief
descriptions of available functions. The second section
gives more detailed information about each function. The
final section contains potential application diagrams.
INTRODUCTION OF FUNCTIONS
The following is a brief overview of Sonance Navigator
Harbor features: (See Function Details for
further information)
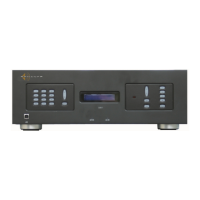
Front Panel (fig. A)
1. Display: The display window shows current activity
for each zone utilizing “SOURCE” and “MUTE”
LED’s. A direct IR receiver, hidden in the display
window, controls any combination of the six zone
cards via the included remote control. The zones
controlled are selected by the DIP switch located inside
the Harbor on the PC board behind the IR receiver.
Factory preset is Zone 1 only.
CAUTION: To prevent serious injury, disconnect AC
voltage before removing the top cover and do not
reconnect AC voltage until the top cover has been replaced
and secured. Sonance strongly suggests that only qualified
technicians perform this procedure. Make sure any system
power amplifiers are unplugged from AC voltage.
2. Status LED’s: – “AC ON” and “ACTIVE” LED’s
match the look and function of the Sonamp family
of amplifier products.
3. Rack Mount: The rack mountable version (3U)
conforms to the E.I.A. 310-D rack mount standard.
Sonance always recommends that only rack systems
with “full-hole” spacing be used.
Rear Panel (fig. B)
4. I/O Jacks: Buffered audio and video loop output
jacks. All jacks are gold plated for better connections
and excellent signal transfer.
5. Labeling Space: White space is provided under each
source input and zone output for labeling and notes.
6. Zone Outputs: Each zone output provides buffered
audio and buffered composite video outputs as well
as a removable keypad connector, a paging Do Not
Disturb (DND) switch and local IR output for zone
specific source components.
7. IR I/O Jacks: There are five Common Emitter flasher
outputs to drive system wide source components, six
zone IR outputs and an IR Linking input jack to
allow connectivity to other systems.
8. Paging: The mute input and signal input for paging
are through a screw terminal and 3.5mm mini-phone
plug respectively. Global paging volume is adjusted
using the level control. In each zone not blocked with
the DND feature, the mute input mutes the local
audio signal during a page. Paging won’t occur in a
zone that is off.
9. Control Output: A +12VDC control voltage is
provided through a screw terminal or 3.5mm mini-
phone plug to control other equipment.
10.Power Linking: A voltage input known as Power
Linking is used to connect systems together. Any
voltage from 5V to 24V either AC or DC will activate
this feature through screw terminals or 3.5mm
mini-phone plug.
11.All Off: Allows connecting of the All Off buss
between multiple Nav Harbors. This transmits the
All Off command between units. Use the included
All Off harness kit.
12.Fused +12VDC: The control voltage and the keypad
supply voltage are protected with a fuse conveniently
located on the rear panel.
13.Switched AC Outlet: A switched AC outlet is
provided to control source components (not
available on 230V version).
14.AC Inlet: A standard IEC inlet allows the use of
removable AC power cords.
Remote Control (fig. C)
The included remote control provides user functions
like Power On, Zone Off, All Zones Off, Source Select,
Volume and Mute. These commands can be learned into
the Sonance Navigator K1 keypad, K2 keypad or any
other IR learning device. These commands will be
available in the Sonance Navigator Manager
programming software, available separately.
Zone Card (fig. D)
Each removable zone card is controlled by it’s own
microprocessor so if one zone fails, the rest will
continue to function. In the case of a zone failure, it is
no longer necessary to return the entire unit. Swap out
the bad card and return it to Sonance for repair. See the
Switcher Card Installation/Removal section for details.
15.Video Gain Jumper: Each Zone Card inside the
Sonance Navigator Harbor has a video gain switch,
which provides versatility for short or long cable runs.
16.IR Receiver Header: This header is where the front
panel receiver routing PC board is connected. Dip
switches on the receiver routing PC board send the IR
information to the selected zones via this header. This
way, all IR commands received by the front panel IR
receiver can control any combination of zone cards
including all of them, creating a “party” mode where
all zones track together. Factory preset is Zone 1 only.
 Loading...