11 12
The product must be operated only from the type of power sources indicated on the
marking lable (100-240V AC, 50Hz/60Hz.)
If the unit will not be used for a long period of time, it should be unplugged from the
wall outlet.
Connect the power cord directly to the wall outlet.
Power Cord
Wall Outlet
HDMl VGA/PC Connection
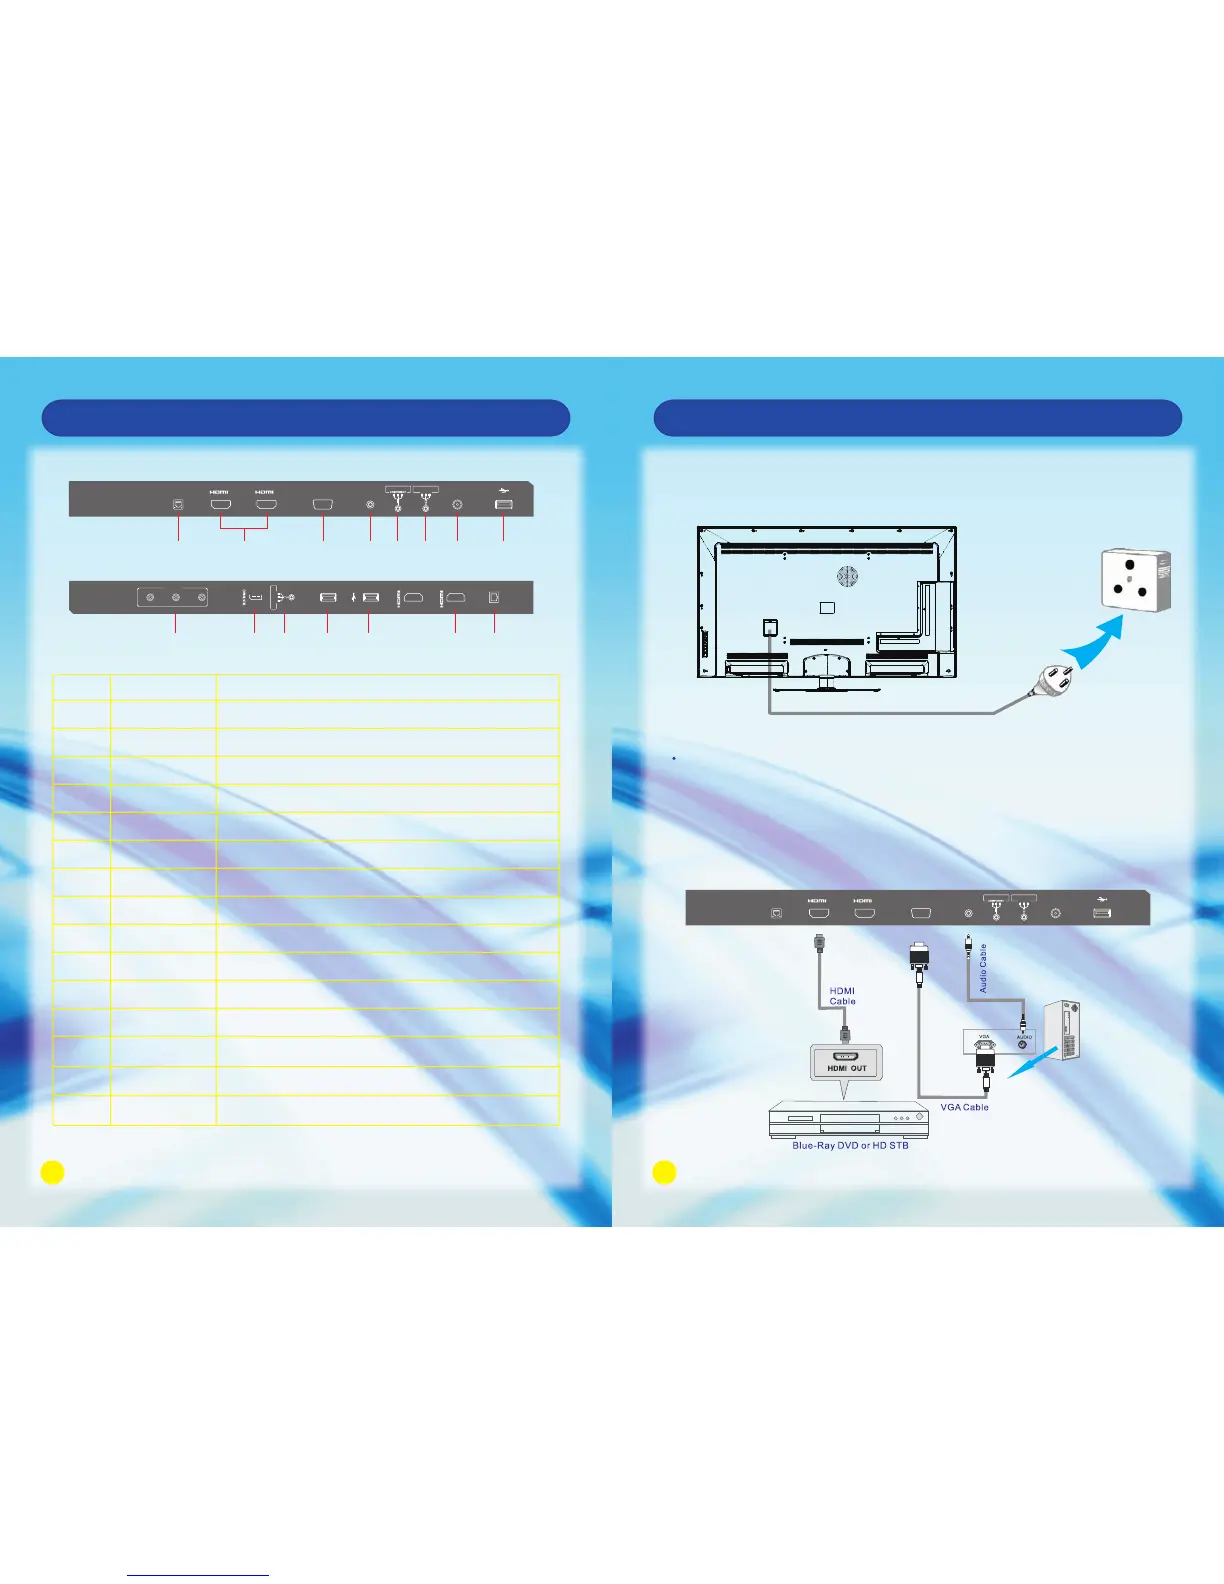
Main Unit Control
Rear Panel
No.
1
2
3
4
5
6
7
8
9
10
11
12
13
14
15
ANT IN
USB
AV IN
SD/MMC
AV/OUT
USB 3.0
USB
HDMI 3
DIGITAL AUDIO OUT
OPTICAL
ETHERNET
HDMI1/HDMI2
VGA
VGA AUDIO IN
COMPONENT IN
R-L-VIDEO VIDEO 1 IN
Connect it to the home network.
Connect the HDMI cable.
Connect the PC VGA cable of your personal computer.
DVI or PC VGA audio input.
Connect the component video signal.
Connect the audio and video output of your AV equipment to the unit
using the AV cable included in the spare part.
Connect to external antenna.
Connect USB device, such as USB disk, HID and so on.
Connect the audio and video output of your AV equipment to the unit.
SD/MMC card reader slot.
Connect for media files playback and program recording.
Not compatible with USB1.1.
Connect for media files playback and program recording.
Connect the HDMI signal.
Connect the OPTICAL to the Audio Amplifier using an optical cable.
Name Description
Connect the audio and video input of your AV equipment to the unit.
Connecting the Power Cord
Connection and Setup
DIGITAL
AUDIO OUT
(OPTICAL)
VIDEO
L
R
AV 2 IN
USB3.0
4
3
USB
AV OUT
R - L - VIDEO
ANT IN
VGA
AUDIO IN
USB
VGA
1 2
ETHERNET
Y Pb Pr
AV 1 IN
R - L - VIDEO
1
2
3 4 7 85 6
9 1110 12 13 14 15
ANT IN
VGA
AUDIO IN
USB
VGA
1 2
ETHERNET
Y Pb Pr
AV 1 IN
R - L - VIDEO