Product Guide
2
• Connect at least one Sonos component to your home network router using an Ethernet cable, and then you can add
other Sonos components wirelessly.
• For best results, you should connect the computer or NAS drive that contains your personal music library collection to
your home network router using an Ethernet cable.
Compatible operating systems
• Windows® XP SP3 and higher
• Macintosh® OS X 10.6 and higher
Adding to an Existing Sonos System
Once you’ve got a Sonos system set up, you can easily add more Sonos components any time (up to 32 rooms).
If your house has structured (built-in) wiring, you can make a wired connection to the additional Sonos components. If you
don’t have structured wiring, our built-in wireless technology is ideal for you.
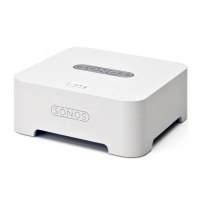
1.
Attach the power adapter and plug in the SONOS BRIDGE. Be sure it is the proper power adapter for your country.
2.
Select Add a Sonos Component from the Manage menu.
• During the setup process, you will be prompted to press and release the Join button on top of the SONOS BRIDGE. The
indicator lights flash green and white while the BRIDGE is connecting.
• You may be prompted to update your Sonos system during this process.
Now that you have added the SONOS BRIDGE to your music system—
• If you are replacing the Sonos component that is currently attached to your router, you can unplug the wired Sonos
component, replace it with the BRIDGE, and move the original Sonos component to a new location.
• If you are using the SONOS BRIDGE to extend the wireless network in your house, locate the BRIDGE wherever you want
additional wireless coverage. If desired, you can also move any of your existing Sonos component(s) to other locations.
A SONOS BRIDGE will not display on your ROOMS pane after it is set up. If you wish to change the settings for this component,
choose one of the following:
• Using the Sonos Controller for PC: Select Manage -> Settings -> BRIDGE Settings.
• Using the Sonos Controller for Mac: Select Sonos -> Preferences -> BRIDGE Settings.
Note: Please visit our Web site at http://faq.sonos.com/specs
for the latest system
requirements, including supported operating system versions.
Note: If you are replacing the Sonos component that is currently attached to your router,
first add the new SONOS BRIDGE to your music system (steps below.) You can then unplug the
wired component from your router, replace it with the BRIDGE, and move the original Sonos
component to a new location.