− 14 (EN) −
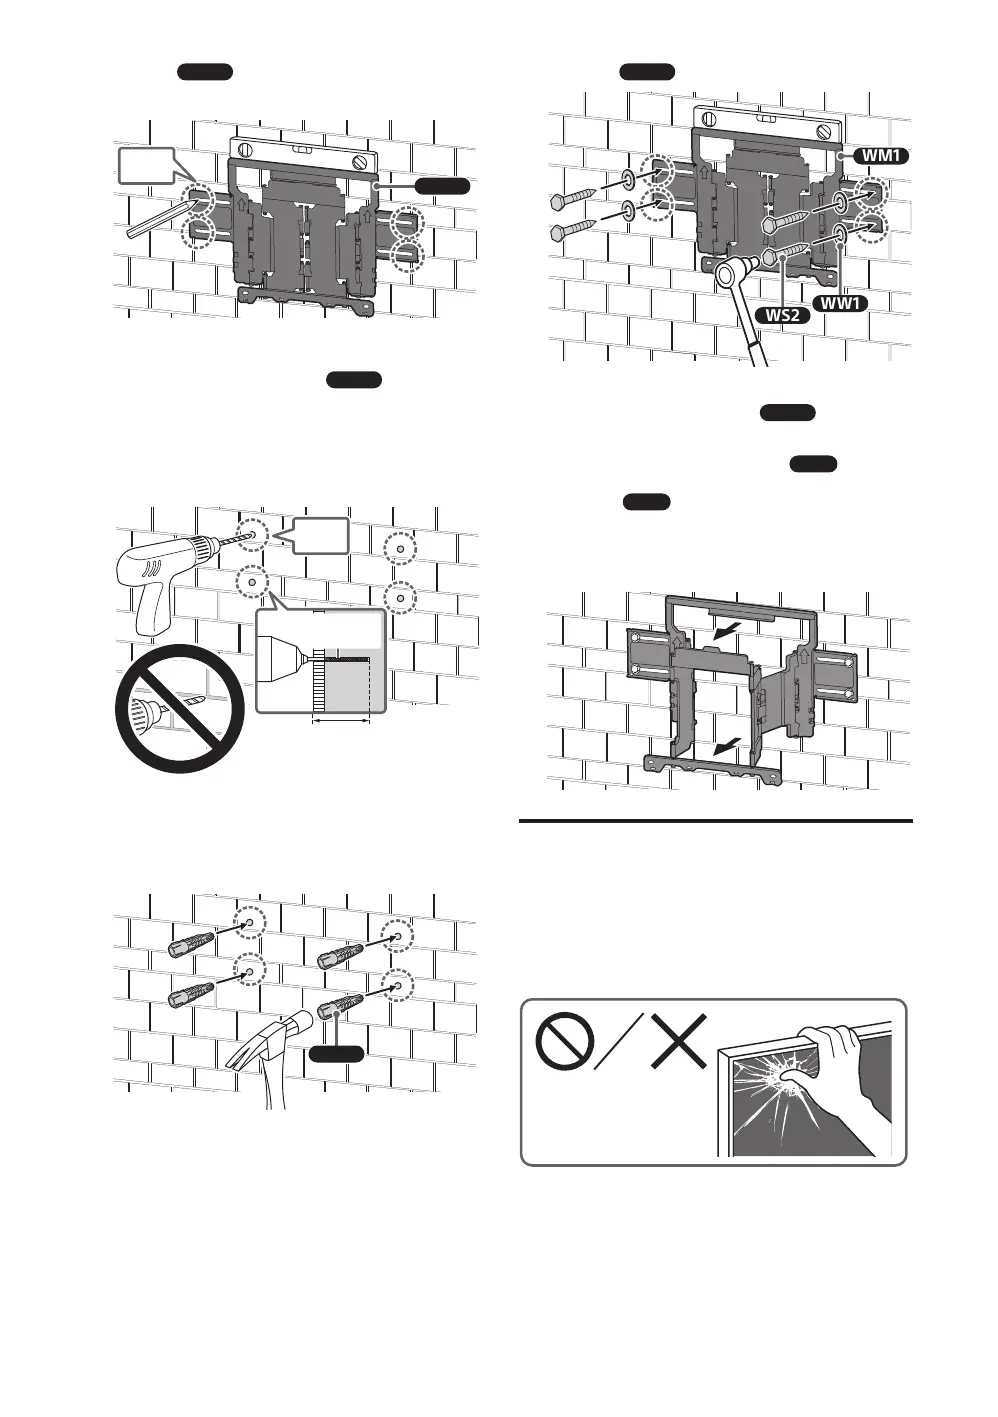
5 Install
WM1
on the wall.
Note
Use a level to check whether
WM1
is level.
Precaution
Do not over-tighten the lag bolts
WS2
. Improper
tightening could reduce the holding power of the
lag bolts
WS2
.
6 Pull out the arm of the bracket to
the end.
Preparing for the Installation
of the TV
Note
Be sure to store the removed screws and unused parts
in a safe place, keeping them away from children.
2 Align
WM1
to the wall and make
four marks.
× 4
WM1
Note
Use a level to check whether
WM1
is level.
3 Drill pilot holes on the marks.
Make sure the location on the wall to drill
the holes are strong enough to support a
weight of at least six times that of the TV.
× 4
75mm
(3inch)
10mm
(13/32inch)
Note
Pilot holes must be drilled to a depth of 75mm
(3inch), using a 10mm (13/32inch) diameter drill
bit.
4
WA1
 Loading...