.....
I
w
.....
Assembly
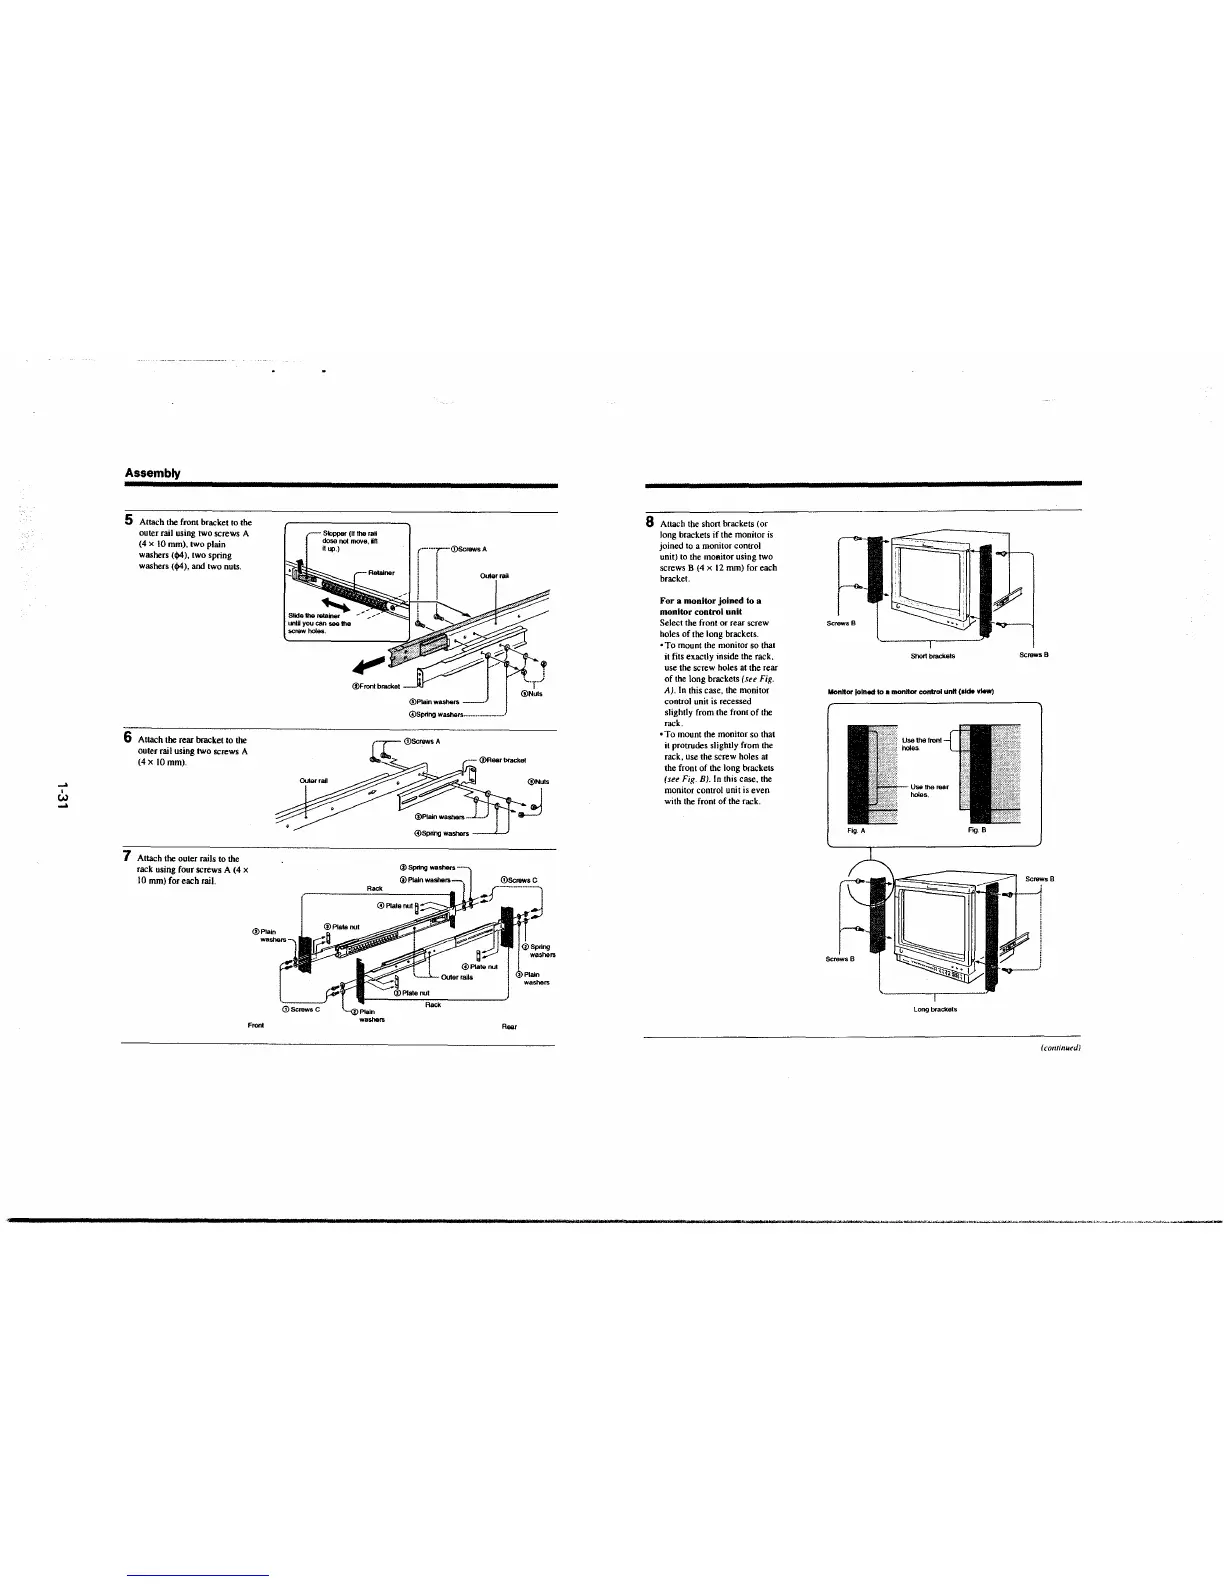
5 Attach the front bracket to the
outer rail using two screws A
(4 x 10 mm). two plain
washers
('?4), two spring
washers
('?4), and two nuts.
6 Attach the rear bracket to the
outer rail using two screws A
(4x IOmm).
7 Attach the outer rails to the
rack using four screws A (4 x
10 mm) for each rail.
@Plain
Front
Stopper (II the rail
dose not move, 1ft
ltup.)
Rear
@Nuls
d
8 Attach the short brackets (or
long brackets if the monitor is
joined to a monitor control
unit) to the
mOBitor using two
screws B (4 x 12 mm) for each
bracket.
For a monitor joined lo a
monitor control unit
Select the front or rear screw
holes of the long brackets.
• To mount the monitor so that
it fits exactly inside the rack,
use the screw holes at the rear
of the long brackets
(see Fig.
A). In this case, the monitor
control unit is recessed
slightly from the front of the
rack.
•To mount the monitor so that
it protrudes slightly from the
rack, use the screw holes at
the front of the long brackets
(see Fig. BJ. In this case, the
monitor control unit is even
with the front of the rack .
Screws B
---r---
Sh0rt brackets
Screws B
MonHor lolnect to a monHor control unH (•Ide view)
Fig. A
Fig.B
Long brackets
( continu~d)
---------·-·--·---------·--·-····--·-'-··--·-·-------
 Loading...


