Do you have a question about the Sony CCD-TR618E and is the answer not in the manual?
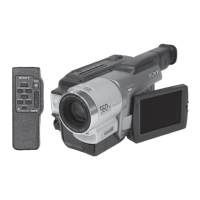
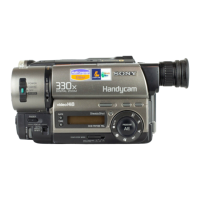
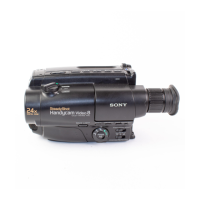
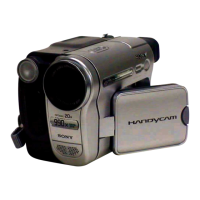
An introduction to the Sony Handycam camcorder and its features.
Important safety notice regarding the AC power adaptor for UK customers.
Overview of the camcorder's key functions for recording and playback.
Key functions for adjusting camera exposure settings during recording.
Features to enhance visual impact and creativity in recorded footage.
Options for achieving a natural and appealing look in video recordings.
Features available for editing video content directly from the camcorder.
Post-recording functions for enhancing or correcting playback.
Step-by-step guide to connect the camcorder to mains power.
Instructions on how to properly insert a video cassette into the camcorder.
Basic steps for recording video footage with the camcorder.
How to view recorded footage directly through the camcorder's viewfinder.
Guidance on how to effectively read and use the camcorder's operating instructions.
Important guidelines for maintaining and protecting the camcorder from damage.
Instructions for physically installing the battery pack into the camcorder.
Procedure for safely detaching the battery pack from the camcorder.
Detailed steps for charging the camcorder's battery pack before use.
Guide on how to connect the camcorder to an AC power source.
Procedure for removing a cassette from the camcorder.
Fundamental steps to start recording video with the camcorder.
How to use the backlight function to properly expose subjects against bright backgrounds.
Utilizing the NightShot feature for recording in very low light conditions.
Adding date and time information directly onto the recorded video images.
How to connect the camcorder to a TV or VCR for playback.
Step-by-step guide to play recorded tapes using the camcorder.
Capturing video with a cinema-like or 16:9 wide aspect ratio.
Applying fade-in and fade-out effects for professional-looking transitions.
Digitally processing images to create various visual effects.
Selecting automatic exposure modes tailored to specific shooting scenarios.
Manually controlling exposure settings like brightness for optimal image capture.
Manually adjusting focus for sharper images in challenging shooting conditions.
Adding pre-set or custom text titles directly onto video footage.
Creating and storing custom text titles for use in videos.
Utilizing the camcorder's integrated light for shooting in dark environments.
Transferring video content from the camcorder to a VCR or other recording device.
Modifying various camcorder settings through the menu system.
Setting automatic exposure modes based on shooting requirements.
Applying special visual effects to images during recording.
Adjusting digital zoom levels and functionality for enhanced magnification.
Enabling wide-screen recording formats like CINEMA or 16:9FULL.
Controlling the NightShot Light feature for improved low-light recording.
Enabling or disabling video editing features directly on the camcorder.
Using the Time Base Corrector to minimize recording distortions.
Activating Digital Noise Reduction to clean up video signal noise.
Setting options for playing back NTSC tapes on different TV systems.
Selecting recording modes like SP (Standard Play) or LP (Long Play).
Configuring the Optimizing Recording Condition feature for best quality.
Displaying the remaining tape or battery level indicators.
Resetting the camcorder's date and time settings.
Enabling automatic date recording for video clips.
Adjusting the display size of menu items.
Activating or cancelling the camcorder's demonstration mode.
Setting the camcorder's clock to different time zones.
Customizing audio alerts for recording start/stop or other events.
Enabling or disabling the remote commander function.
Controlling the camcorder's recording indicator lamp.
A comprehensive guide to diagnosing and resolving common camcorder issues.
Solutions for problems encountered specifically during video playback.
Troubleshooting steps applicable to both recording and playback operations.
Solutions for miscellaneous issues not fitting into specific modes.
Information on compatible video cassettes and playback system settings.
Details about the InfoLITHIUM battery, its features, and usage.
Guidelines for using the camcorder internationally, including TV system compatibility.
Essential care instructions and protective measures for the camcorder.
Information about condensation and how to prevent/resolve it.
Procedure for cleaning the camcorder's video heads to ensure image quality.
Proper methods for cleaning the camcorder's lens and viewfinder.
Guidelines for charging, using, and caring for the camcorder's batteries and power adapter.
Safety measures for the built-in light, tapes, camcorder body, and AC adapter.
Instructions for safe handling, storage, and use of the battery pack.
Notes on using dry batteries and procedures for handling battery leakage.
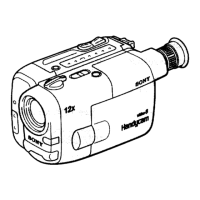
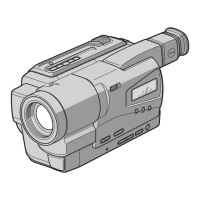
Diagrams and explanations identifying all buttons, ports, and indicators on the camcorder.
| Type | Camcorder |
|---|---|
| Optical Zoom | 10x |
| Image Sensor | CCD |
| Viewfinder | Electronic |
| Focus Adjustment | Auto/Manual |
| Image Stabilizer | Electronic |
| Display Type | LCD |
| Recording Media | Video8 |
| Optical Sensor Size | 1/4" |
| Microphone | Built-in |
| Connector Type | Composite video/audio output |
| Display Size | 2.5" |
| LCD Screen Size | 2.5" |