Convenient Functions
61
GB
Note
• Remove the screws that are indicated in the
illustration. Do not remove other screws.
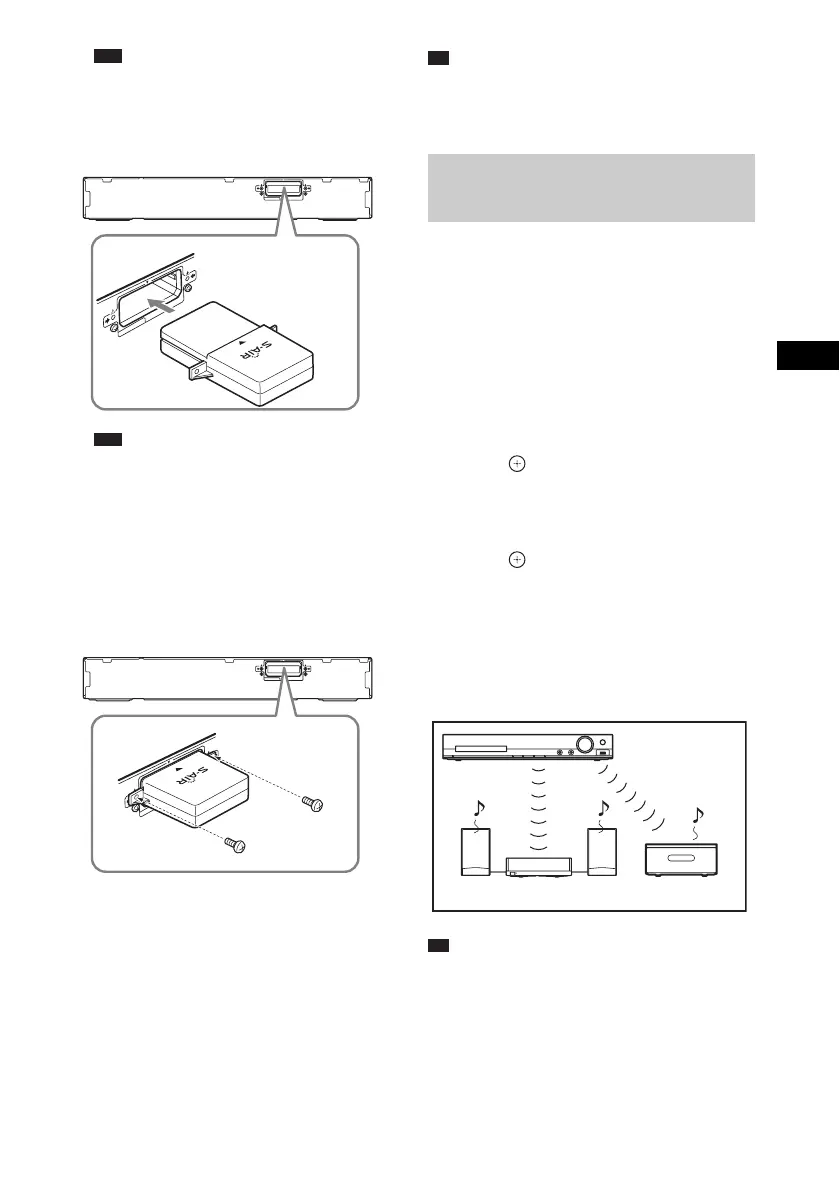
2 Insert the wireless transmitter.
Note
• Insert the wireless transmitter with the S-AIR
logo facing up.
• Insert the wireless transmitter so that the V
marks are aligned.
• Do not insert anything other than the wireless
transmitter into the EZW-T100 slot.
3 Make sure to use the same screws to
secure the wireless transmitter.
To insert the wireless
transceiver into the S-AIR sub
unit
For details on installing the wireless transceiver
into the S-AIR sub unit, such as a surround
amplifier or S-AIR receiver, see the operating
instructions of the S-AIR sub unit.
Tip
• When you change the S-AIR configuration, Sony
recommends that you perform [AUTO
CALIBRATION] (page 74).
Simply by matching the ID of the main unit and
the S-AIR sub unit, you can activate wireless
transmission.
To set the ID of the unit
1 Press SYSTEM MENU.
2 Press X/x to select “S-AIR ID,” then
press or c.
The selected item appears in the front panel
display.
3 Press X/x to select the desired ID, then
press .
You can select any ID (A, B, or C).
4 Press SYSTEM MENU.
5 Set the S-AIR sub unit to the same ID.
Wireless transmission is activated as
follows (example):
Tip
• To confirm the current ID, perform Steps 1 to 3
above. When you pair the unit with an S-AIR sub unit
(page 62), “(PAIRING)” appears beside ID in the
front panel display.
EZW-T100
E
Z
W
-
T
1
0
0
Rear of the unit
EZW-T100
EZW-T100
Rear of the unit
Setting the S-AIR ID to activate
wireless transmission
For the surround amplifier
For the S-AIR receiver
ID A
ID A ID A



 To Next Page