DPF-D710/D720/D810/D820/D1010/D1020
– 10 –
Set the destination when the MAIN PWB ASSY SERVICE was replaced.
The following procedures are used in DPF-D720 model.
Conduct the same adjustment for the other models.
2-1. HOW TO CHANGE THE DESTINATION
Procedure
1. Plug the AC adapter attached to the set into the DC IN 5V(DPF-
D710/D720/D810/D820) or 12V(DPF-D1010/D1020) terminal
on the rear panel of the set and insert the power cord into the socket.
Press the 1 (on/standby) button to turn off the power once.
(The power switch LED on the set changes from green to red.)
2. With the [VIEW MODE] button and [MENU] button pressed, turn
on the 1 (on/standby) button, and when the default setting
screen (Fig. 2-1-1) appears, release the [VIEW MODE] button and
[MENU] button.
3. Check that the model name displayed on the side of “Model”
name meets the following:
D710 : DPF-D710
D720 : DPF-D720
D720 SW : DPF-D720 (CRYSTAL & BLACK,
CRYSTAL & WHITE)
D810 : DPF-D810
D820 : DPF-D820
D1010 : DPF-D1010
D1020 : DPF-D1020
Note:Using [B][b] buttons, move a yellow frame to the model
name to be set.
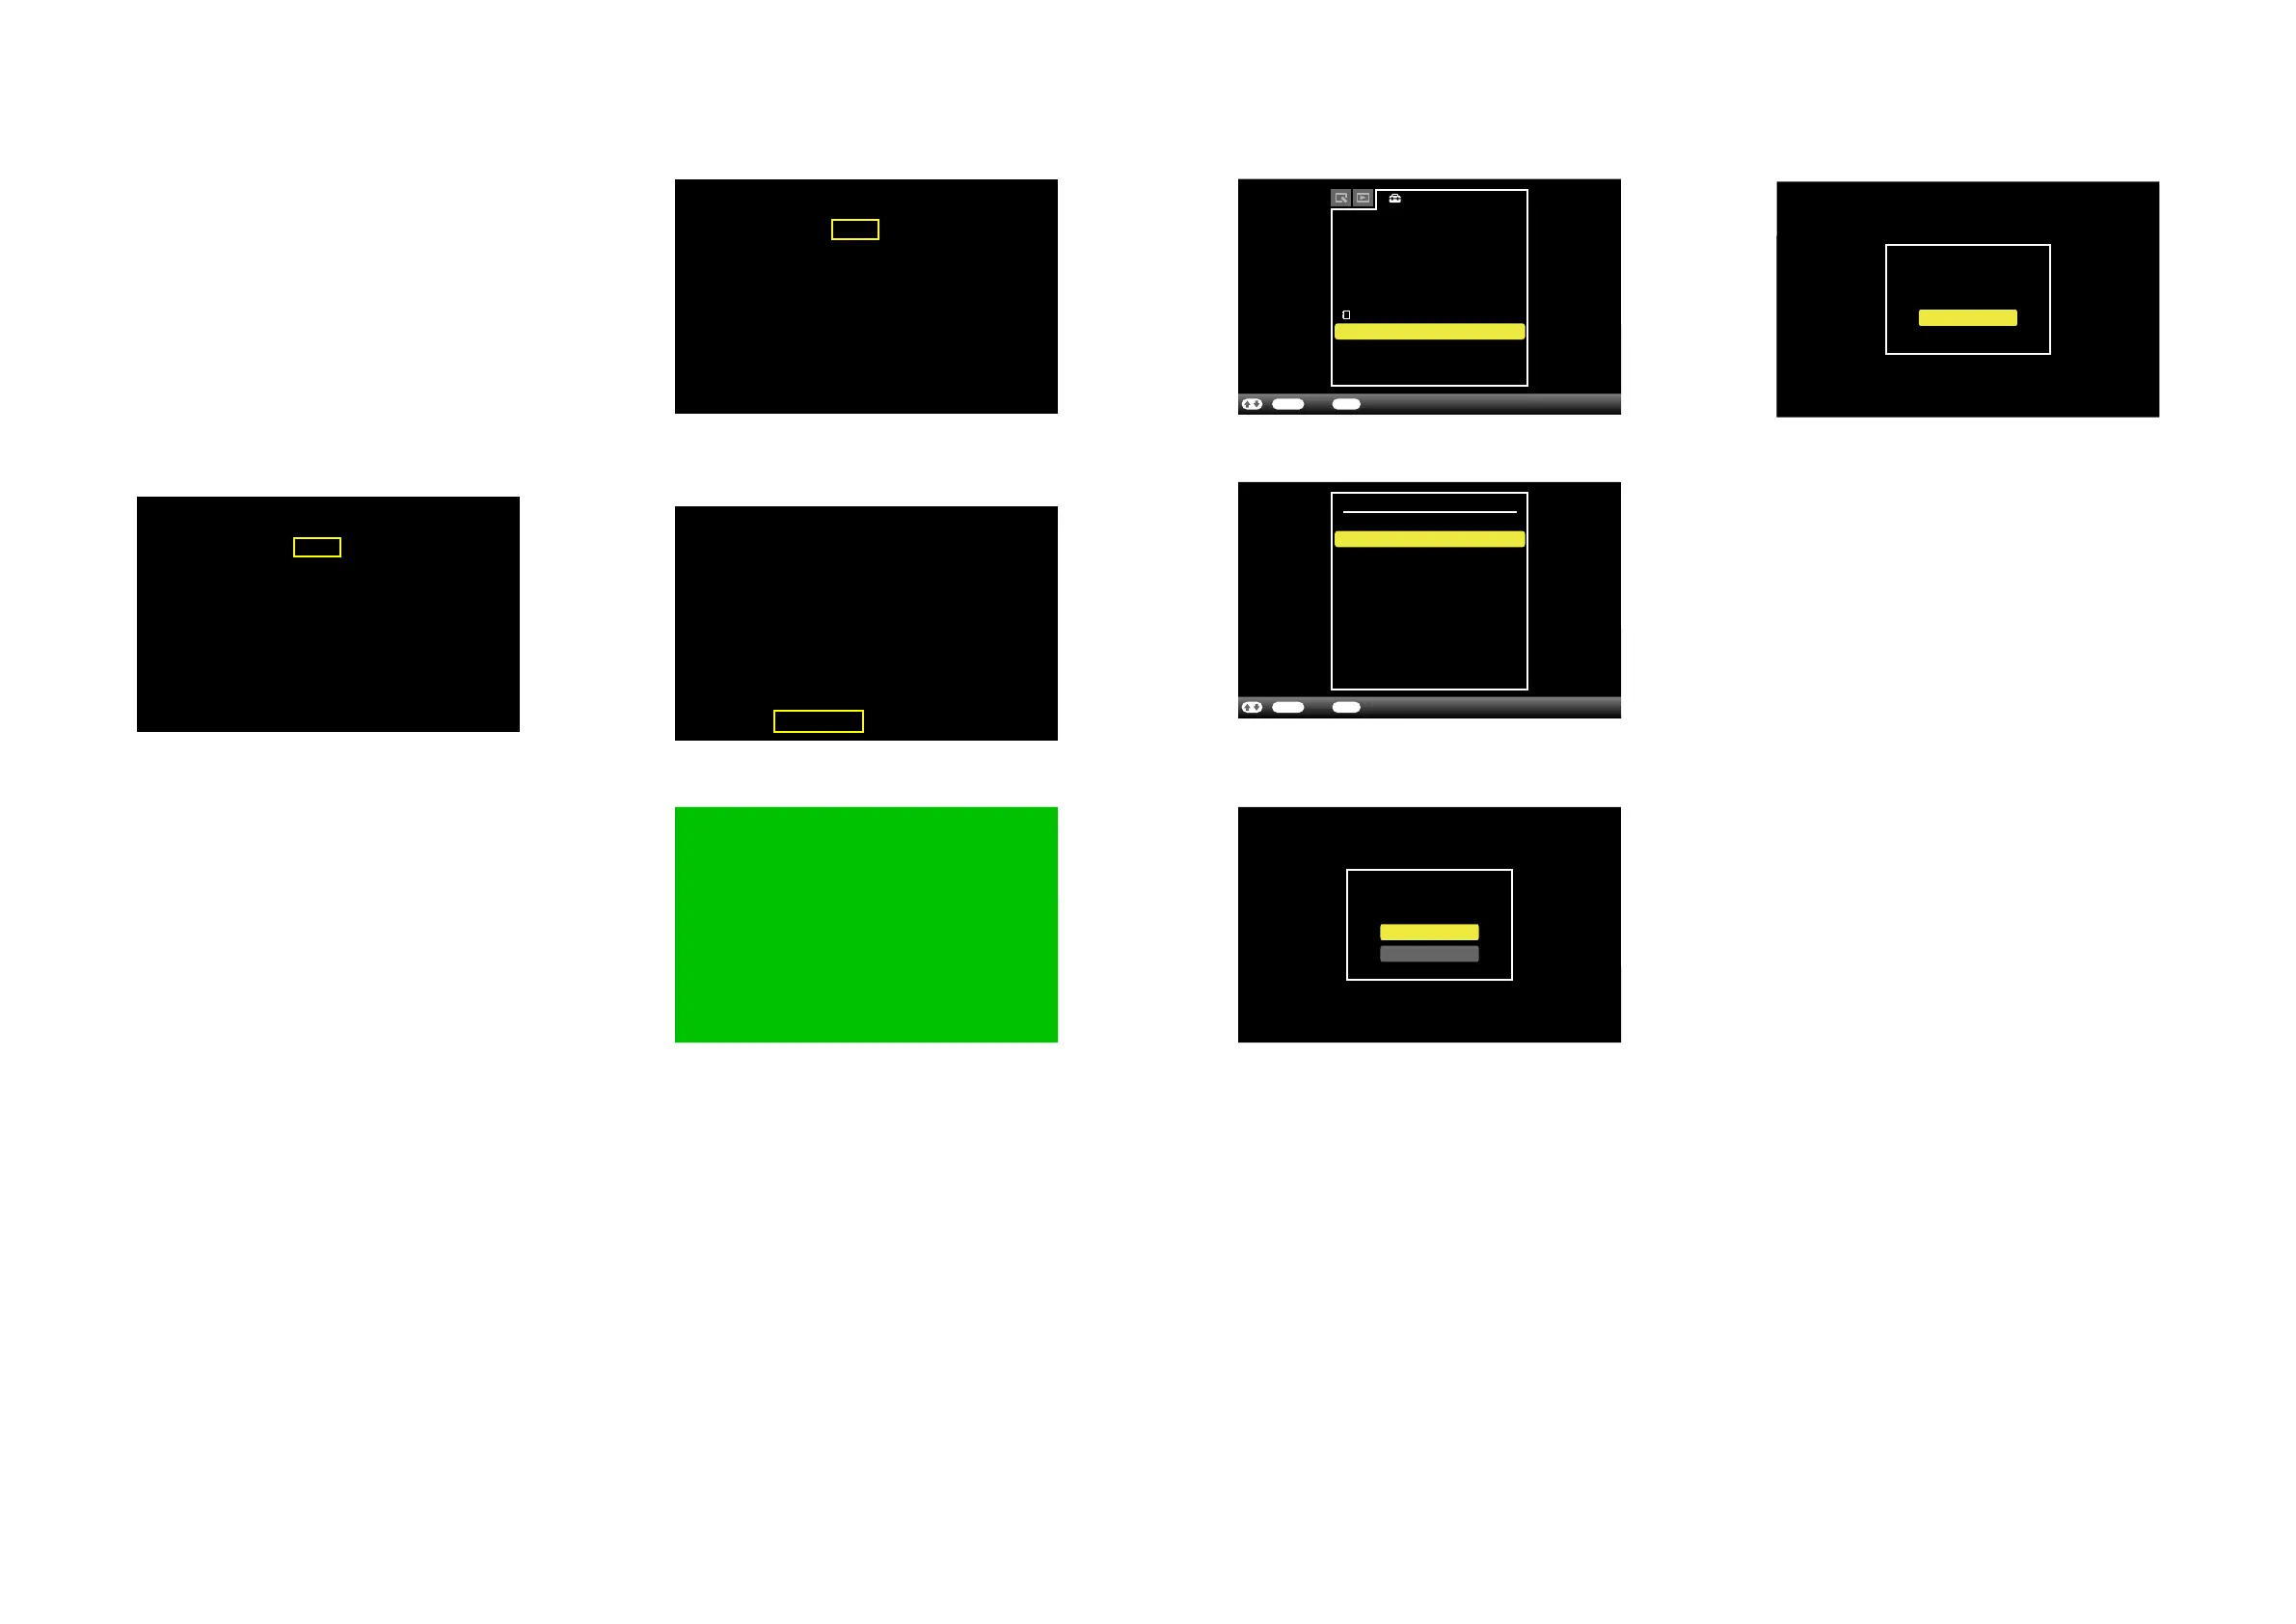
4. Red characters of “Destination” show default setting of this set.
(Fig. 2-1-1 shows that the destination has been set to J1)
Using [V] [v] [B] [b] buttons, move a yellow frame to the
destination to be set. (Fig. 2-1-1 shows that U2 has been selected as
destination.)
5. Press the [ENTER] button, and the characters will change to red,
indicating that the selected destination was set. (Fig. 2-1-2)
2-2. CONFIRMATION OF DESTINATION
6. With a yellow frame moved to “Restore all setting”, press the
[ENTER] button. (Fig. 2-1-3)
7. The screen becomes green and the setting is complete. (Fig. 2-1-4)
8. With green screen displayed, unplug the AC adapter from the DC
IN 5V (DPF-D710/D720/D810/D820) or 12V (DPF-D1010/D1020)
terminal.
9. Plug the AC adapter into the DC IN DC IN 5V (DPF-D710/D720/
D810/D820) or 12V (DPF-D1010/D1020) terminal and turn on the
power.
10. Press the [MENU] button to display the Settings menu, and select
“Initialize” to execute. (Fig. 2-1-5)
11. Select “Initialize settings” of “Initialize” to execute. (Fig. 2-1-6)
12. Select “Yes” for the dialog message “All settings will be returned
to factory default.” to execute. (Fig. 2-1-7)
1. Press the [MENU] button to display the menu, and if the language
you selected is set, the setting has been completed.
– ENGLISH –
13. Select “OK” for the dialog message “Completed” to finish all the
initialize settings. (Fig. 2-1-8)
Fig. 2-1-1
Model:
CED CEP CEU E37
E33 E32 JE3
KR2 CN9 TW6 HK4
Restore all setting
XXXXXXXXX XXXXXXXXX - X
U2 CA2 CEK
Destination:
AR2
BR4 E35
J1
AU3
D720SWD720
Fig. 2-1-2
Model:
CED CEP CEU E37
E33 E32 JE3
KR2 CN9 TW6 HK4
Restore all setting
XXXXXXXXX XXXXXXXXX - X
U2 CA2 CEK
Destination:
AR2
BR4 E35
J1
AU3
D720SWD720
Fig. 2-1-3
Model:
CED CEP CEU E37
E33 E32 JE3
KR2 CN9 TW6 HK4
Restore all setting
XXXXXXXXX XXXXXXXXX - X
U2 CA2 CEK
Destination:
AR2
BR4 E35
J1
AU3
D720SWD720
Fig. 2-1-4
Fig. 2-1-5
Settings
Slideshow Settings
Auto Power ON/OFF
Date/time Settings
General Settings
System Information
Language Setting
Initialize
ENTER BACKSelect End/
A
Slideshow Sound Setting
Fig. 2-1-
6
ENTER BACKSelect Return/
Initialize
Format internal memory
Initialize settings
All settings will be
returned to factory default.
Yes
Fig. 2-1-
7
No
Completed
OK
Fig. 2-1-
8