6
[Procedure]
1. Remove CAPSULE ASSY
CAPSULE ASSY can be removed as shown in Fig.3.
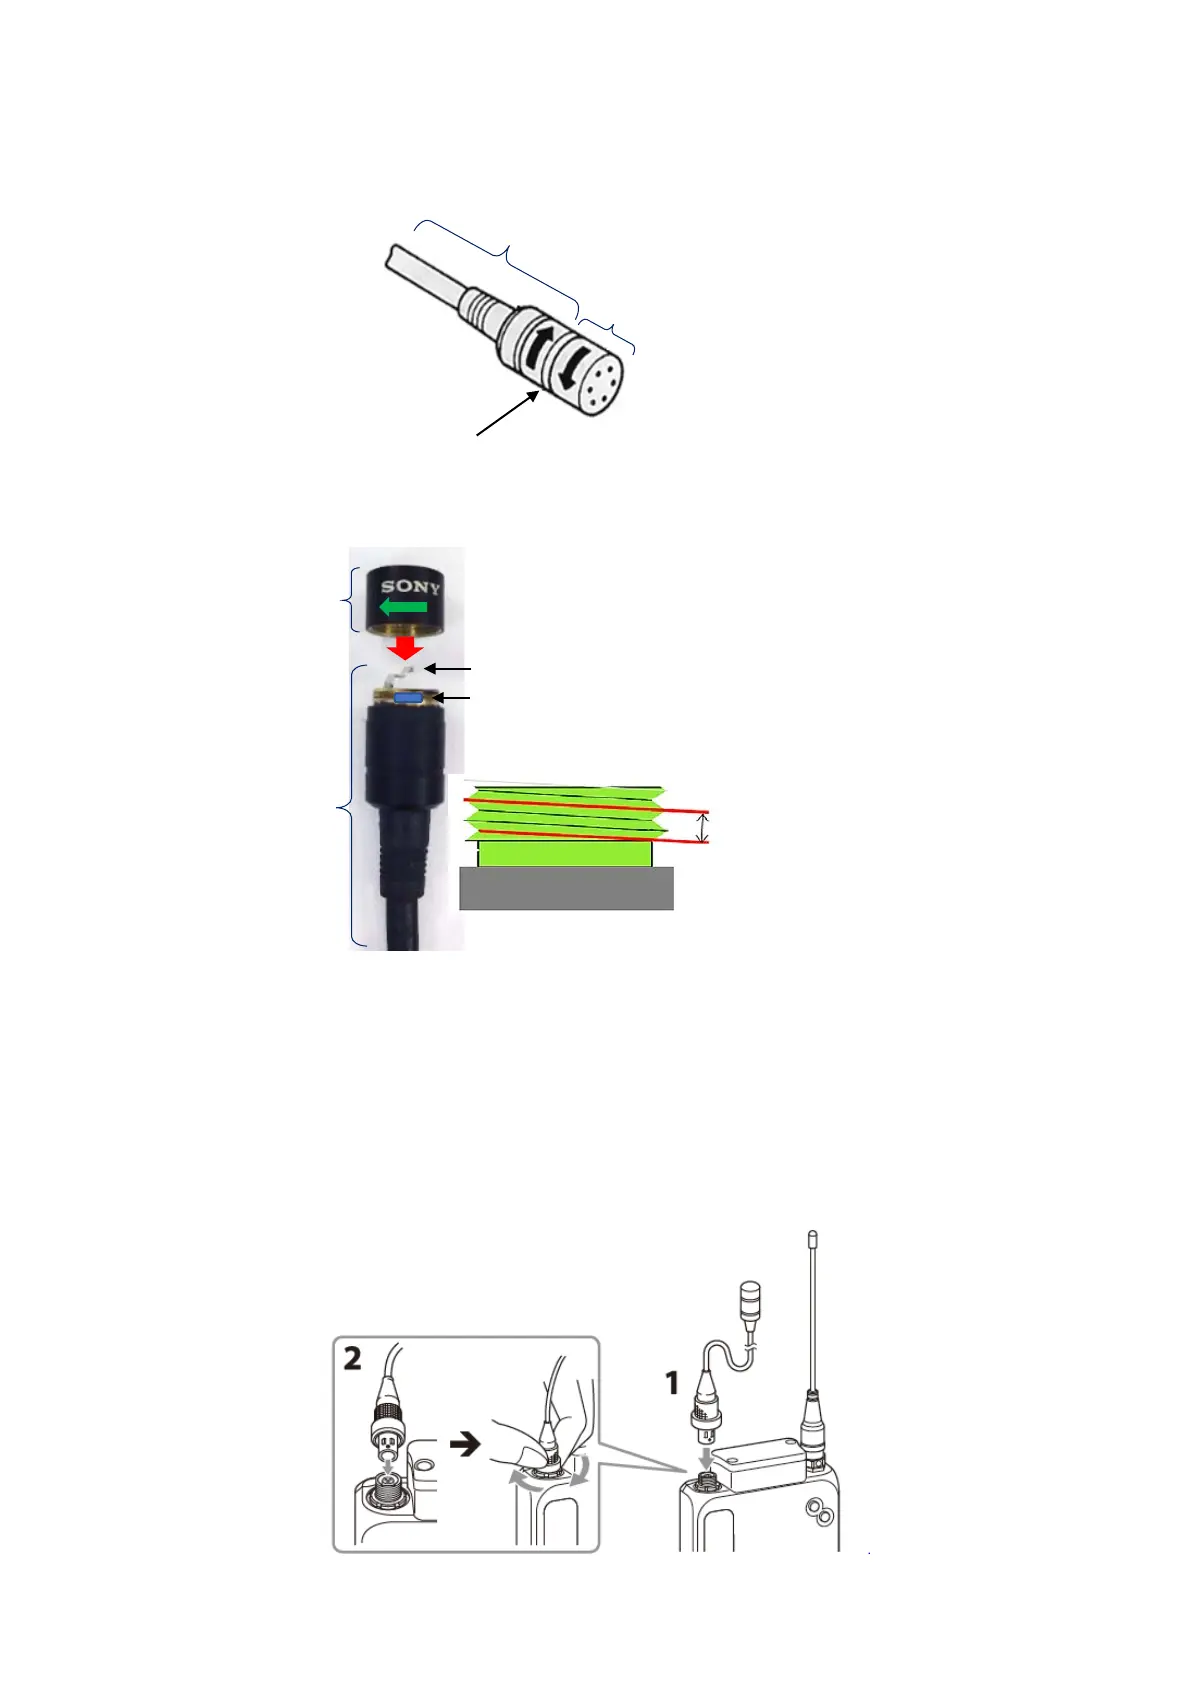
Fig.3
2. Install CAPSULE ASSY
CAPSULE ASSY is installed as shown in Fig.4.
Fig.4
3. Operation check
(1) Confirmation of sound output
1-1 Insert the two projections (Both sides of red mark) on output terminal of “CASE ASSY
(S), AMPLIFIER” while fitting with the groove of input terminal of DWT-B03R side.
(Fig.5)
1-2 Lock the ring located in the output terminal of “CASE ASSY (S), AMPLIFIER” while
rolling.
1-3 Confirm if the sound is output by performing sound output and check the sound quality.
Fig.5
(S),AMPRIFI
Tightening torque::0.11 - 0.12Nm
E ASSY
Clean contact spring with ethanol.
Apply screw locking compound on the area
shown below. (Half circumference)
compound applying