EasyManua.ls Logo

Sony ECM-Z200 - 1. Disassembly

Sony ECM-Z200
8 pages
Print Icon
To Next Page IconTo Next Page
To Previous Page IconTo Previous Page
Loading...
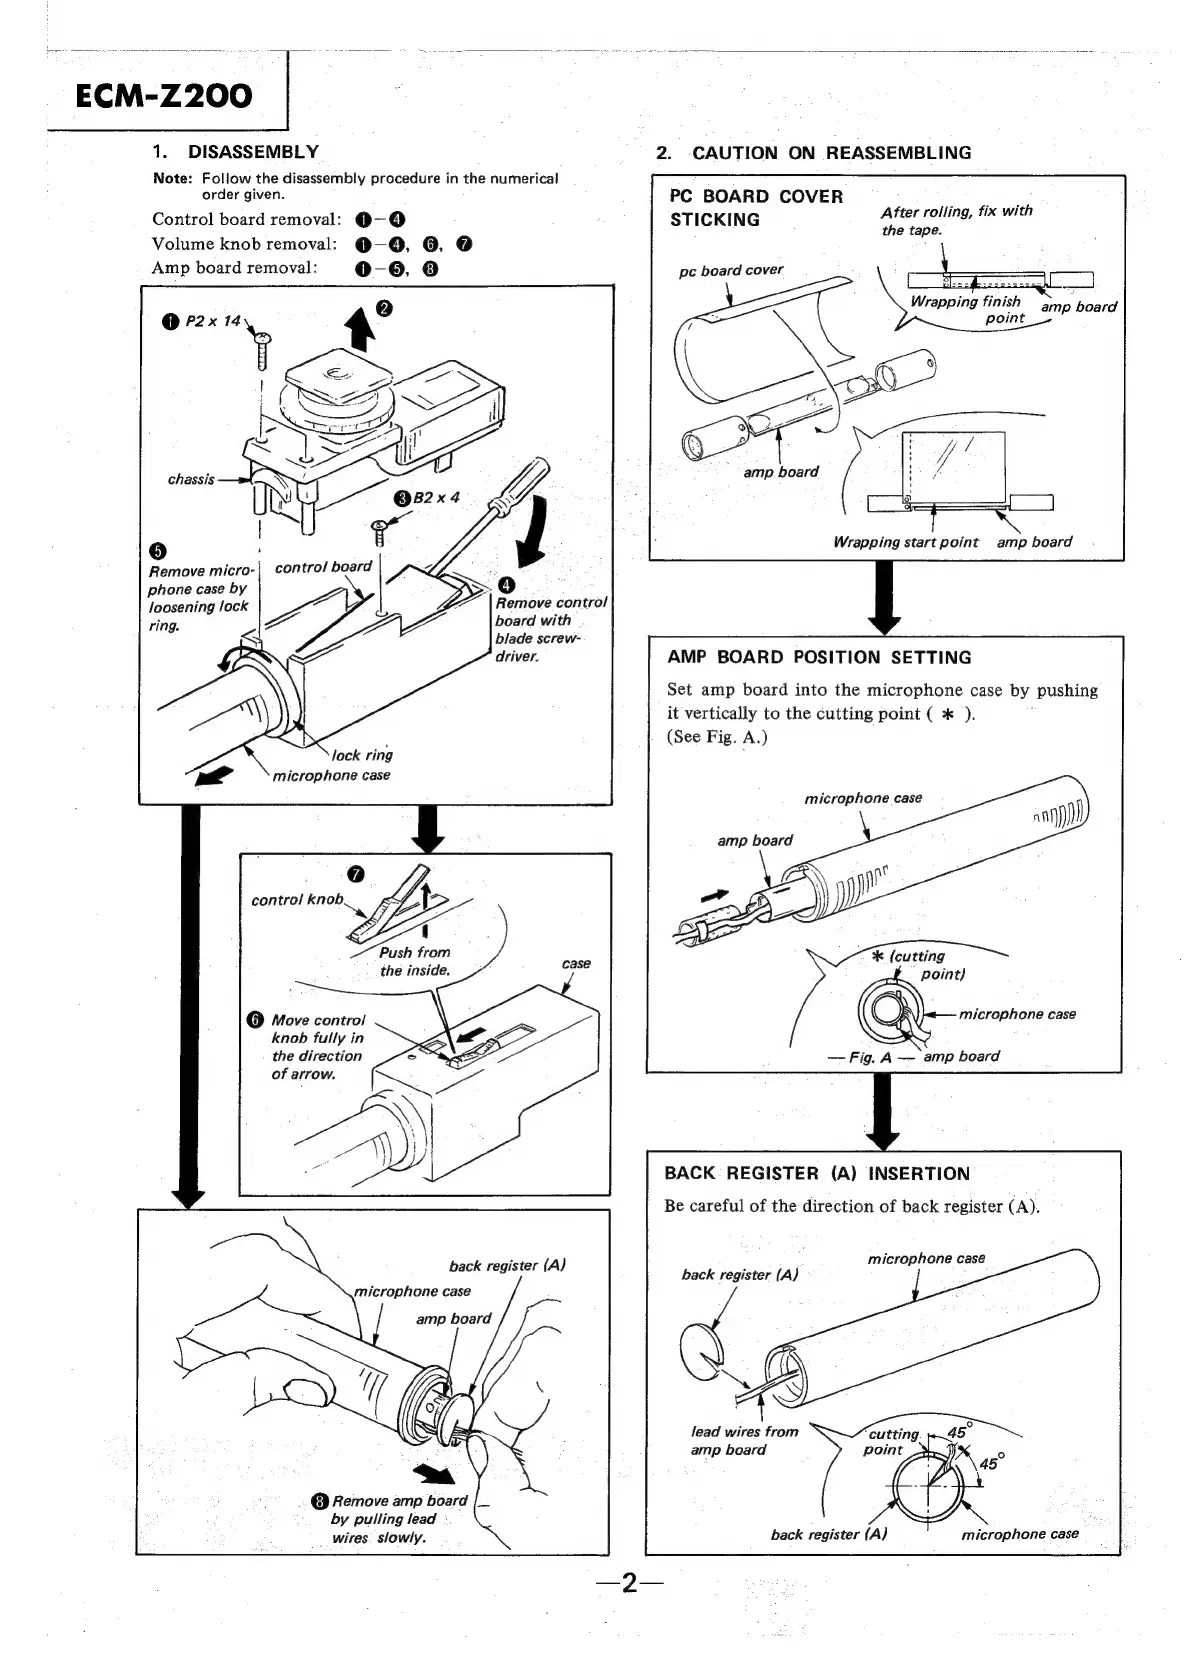
ECM-Z200
1.
DISASSEMBLY
Note:
Follow
the
disassembly
procedure
in
the
numerical
order
given.
Control
board
removal:
@-@
Volume
knob
removal:
@—-0,
6,
@
Amp
board
removal:
0-9,
8
Remove
micro-|
control
board
phone
case
by
loosening
lock
ring.
<
Se
7
|
Remove
control
board
with
blade
screw-
driver.
lock
ring
microphone
case
7)
control
Bn
OD
LB}
|
Push
from
the
inside.
©
Move
control
knob
fully
in
the
direction
of
arrow.
back
register
(A)
microphone
case
amp
board
@
Remove
amp
board
by
pulling
lead
wires.
slowly.
2.
CAUTION
ON
REASSEMBLING
PC
BOARD
COVER
STICKING
After
roiling,
fix
with
the
tape.
pe
board
cover
Wrapping
finish
amp
board
point
amp
board
Wrapping
start
point
amp
board
AMP
BOARD
POSITION
SETTING
Set
amp
board
into
the
microphone
case
by
pushing
it
vertically
to
the
cutting
point
(
*
).
(See
Fig.
A.)
microphone
case
amp
board
—
Fig.
A—-
amp
board
BACK
REGISTER
(A)
INSERTION
Be
careful
of
the
direction
of
back
register
(A).
;
microphone
case
back
register
(A}
lead
wires
from
amp
board
back
register
(A)
microphone
case