Preparativos
o
rl
Check that the following accessories are supplied Compruebe si los siguientes accesorios est_tn
with your camcorder, incluidos con su videoc_nara.
[]
[]
[]
I
[]
[]
[]
• i
[]
[] Wireless Remote Commander (1) (p23, 66)
[] NP-S5 Battery Pack (1) (p;-'])
[] CR2025 Lithium Battery (1) (p_l)
Already installed in the camcorder.
[] A/V connecting cable (1) (p_8)
[] R6 (size AA) battery for Remote
Commander (2) (p.'_'7)
[] Shoulder strap (1) (p.65)
[] AC-VlS/V16/V16A AC power adaptor (1)
(p.7, 26)
[] Telemando InalJimbrico (1) (Pig. 23, 66)
[] Bateria NP-55 (1) (Pig. 7)
[] Pila de Ittio CR2025 (1) (p=ig. 41)
ya est'; insta]ada en la videoc_ira.
[] Cable conector de audio/video (1) (P_tg. 38)
[] Pilas R6 (tamafio AA) para el telemando (2)
(Pig. 67)
[] Bandolera (1) (Pitg. 65)
[] Adaptador de alimentaci6n de CA
AC-V15/V16/V16A (1) (Pig. 7, 26)
Contents of the recording cannot be
compensated if recording or playback is not
made due to a maJfunction of the camcorder,
video tape, etc.
E1contenido de la grabacidn no puede set
compensedo si la grabad6n o la reproducddn
no ha sido posible debido al mal
funcionamiento de ]a videoc_fmara,
videocassette, etc.
6
Before using your camcorder, you first need to
charge and install the battery pack. To charge the
battery pack, use the supplied AC power
adaptor.
: _,rging the Battery pack
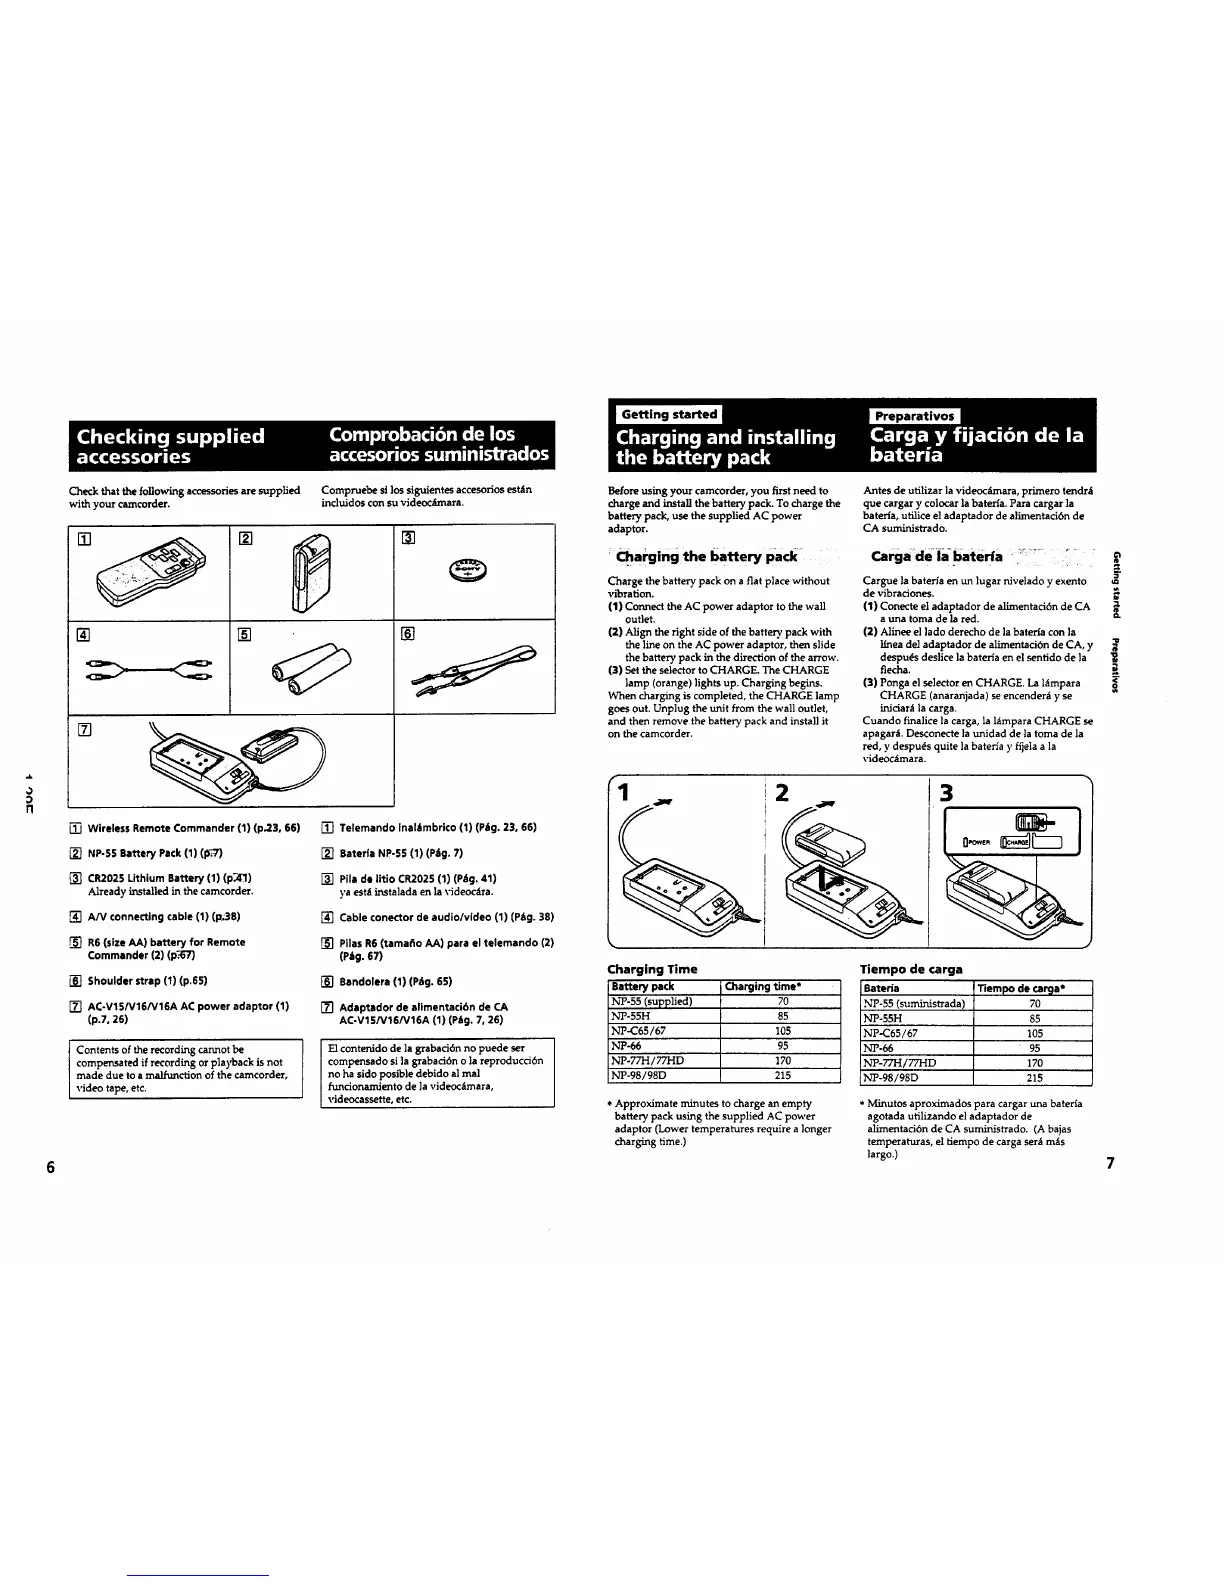
Charge the battery pack on a fiat place without
vibration.
(1) Connect the AC power adaptor to the wall
outlet.
(2) Align the right side of the battery pack with
the line on the AC power adaptor, then slide
the battery pack in the direction of the arrow.
(3) Set the selector to CHARGE. The CHARGE
lamp (orange) lights up. Charging begins.
When charging is completed, the CHARGE lamp
goes out. Unplug the unit from the wall outlet,
and then remove the battery pack and install it
on the camcorder.
;2
/f'_ i
i
f
Antes de utilizar la videocLmara, primero tendril
que cargar y colocar la baterfa. Para cargar la
hateria, utilice el adaptador de alimentaci6n de
CA suministrado.
Cargue la bateria en un lugar nivelado y exento
de vibradones.
(1) Conecte el adaptador de alimentaci6n de CA
a uLna toma de la red.
(2) Alinee el ]ado derecho de la baterta con la
ltnea de] adaptador de alimentaci6n de CA, y
despu_s deslice la bateria en el sentido de ]a
flecha.
(3) Ponga el selector en CHARGE. La htmpara
CHARGE (anaranjada) se encender_t y se
inidar_t la carga.
Cuando finalice la carga, la l_mpara CHARGE se
apagar_t. Desconecte la unidad de la toma de la
red, y despu_s quite la bateria y fijela a la
\,ideoc_mara.
I
3
Charging Time
Battery pack Charging time*
NP-55 (supplied) 70
,x,rP-55H 85
NP-C65/67 105
NP-66 95
NP-77H/77HD 170
N-P-98/98D 215
Tiempo de carga
Bateria
NP-55 (suministrada)
NP-55H
NP-C65/67
NP-66
NP-77H/77HD
NP-98/98D
Tiempo de tara*
70
85
105
95
170
215
* Approximate minutes to charge an empty
battery pack using the supplied AC power
adaptor (Lower temperatures require a longer
charging time.)
* Minutos aproximados para cargaruna bateHa
agotada utilizando el adaptador de
alimentad6n de CA suministrado. (A bajas
temperaturas, el tiempo de carga sera m_s
largo.)
a_
D