EasyManua.ls Logo

Sony Handycam CCD-TRV21E User Manual

Sony Handycam CCD-TRV21E
30 pages
To Next Page IconTo Next Page
Page #1 background imageLoading...
Page #1 background image
CC,-T,V,]E,
T,V2 ,V2E ,V2,P,
RMT-713
SERVICEMANUAL
Video8
Handgcam
I B MECHANISM I
PHOTO : CCD-TRV11 E
CCD-TRV21PK is model that cartingbag are added in
CCD-TRV21.
CCD-TRV21PK is different from CCD-TRV21
only in the accessory and packing materials.
US Model
Canadian Model
CCD-TRV11/TRV21
AEP Model
UK Model
CCD-TRV11E/TRV21E
E Model
CCD-TRV11/TRV11E/TRV21/
TRV21E/TRV21PK
Australian Model
CCD-TRVl 1E
Hong Kong Model
CCD-TRV11/'I'RV1 IE
Tourist Model
CCD-TRV21/TRV21E
I For MECHANISM ADJUSTMENT, refer to the I
8mm Video MECHANICAL ADJUSTMENT
MANUAL W" (9-973-801-11).
SPECIFICATIONS
Video camera recorder
system
V'Kleo recording system
Two rotary heads, Helical
scanning,_ system
Audio recording system
Rotary heads, FIVI system
Usable cassette
8 nun videoformat cassette
(standard 8 ram)
Image device
CCD (Charge Coupled Device)
Viewflnder
Electronic viewfinder
Black and white
Lens
12x, Combined power zoom
lens, FI.8--2.7
Filter diameter 37 mm (1 _
incb_s)
Color temperature
Auto
Recommended illumination
More than 100 Ix
* Mizdmum illundnation
expresses the light level a
camcorder requires to
produce a picture. Visible
minimum low lightexpresses
the light level to produce a
visible signal
LCD screen
Picture
2.5 inches measured
diagomJ]y
50.3x 37.4mm
(2x inches)
dina.y
TN LCD/TFT activematrix
method
Total dot number
61_a80(279x22o)
Input and Output connectors
Vldeo output
Phono jacL 1 Vp-p, 75 Q,
unbalance!
Audio output
Monaural Phono jack, 327
mY, (at load _pedance 47
k.q), impedance less than 2.2
100
RFU IX: OUT
Specialminijack,iX: SV
Earphone lack
Mb'ff.jack
LANC control jack
Stereo mL,d-mi.-diack (e 2-5
_)
mmmmml
lid
MICROFLM
* Refer to the table on page 2 for the differences
of specifications between the respective models.
MR: jack
Minijack,0.388 mV, low
impedance with 2.5 to 3 V DC
output,impedance 6.8 k.q (e
3.5 men)
Speaker
Dy.a_c_
General
Power requirements
7.5 V (AC power adaptor)
Operatlng temperature
0°C to 40°C (32°F to 104°F)
Storage temperature
-20°C to +60°C (--4OFto
+14001:)
Dimensions (Approx.)
113 x 106 x 210 mm
(41/_x4 V4x8 3/8inches)(w/h/
d)
Microphone
Electret condenser microphone,
monauraltype
AC power adaptor
Power requirements
110 - 240 V AC, 50/60Hz
Power consumption
AC-V15:18 W
AC-V16:20 W
AC-V16A_ 22 W
outputvoltage
DC OUT in operation mode
AC-V15:7.5 V, 1.6 A
AC-V16/V16A: 7.5 V, 1.8 A
Bat_z 7 charge _mLnal
10 V, 1.1 A. m charge mode
App,_
Sony battery packs NP-55
(supplied),NP-55H,NP-C65,
NP-67, NP-77H, NP-77I-ID, NP-
98, NP-98D
Operating temperature
O°C to 40°C (32OFto 104°_
Storage temperature
-20°C to +60°C (--4°F to +140°F)
Dimensions (Approx.)
166 x 43 x 75 mm (6 s/ax 1 11A6x
3 inches) (w/h/d)
including projecting parts and
controls
Mass (Approx.)
AC-V15/V16:420 g (15 oz)
AC-VI6A: 450 g (16 oz)
VIDEOCAMERARECORDER
Question and Answer IconNeed help?

Do you have a question about the Sony Handycam CCD-TRV21E and is the answer not in the manual?

Sony Handycam CCD-TRV21E Specifications

General IconGeneral
Image SensorCCD
CCD Sensor Size1/4 inch
Video Resolution250 lines
Display2.5 inch LCD
ViewfinderColor
TypeCamcorder
Recording MediaVideo8
Effective Pixels270, 000 pixels

Summary

Specifications

Video Camera Recorder Specifications

Details system, lens, image device, and illumination requirements.

LCD Screen Specifications

Information on the screen size, on-screen display, and total dot number.

Input and Output Connectors

Lists all available audio, video, and control jacks on the camcorder.

Audio, Microphone, and General Specifications

Covers microphone type, speaker, operating temps, and dimensions.

Power Requirements and Consumption

Details power needs, consumption, output voltages, and battery compatibility.

Getting Started

Checking Supplied Accessories

Lists all items included with the camcorder package.

Charging and Installing the Battery Pack

Step-by-step guide for charging and fitting the battery pack.

Charging Time Details

Table detailing charging times for various battery packs.

Getting Started (Continued)

Battery Life Estimates

Provides runtime estimates for various battery packs and camcorder models.

Removing the Battery Pack

Instructions on how to safely detach the battery from the camcorder.

Basic Operations

Inserting and Ejecting Cassettes

Procedures for loading and removing video tapes from the camcorder.

Preventing Accidental Erasure

How to use the tape's write-protect tab to prevent accidental recording.

Camera Recording Fundamentals

Steps to start, stop, and manage recording sessions, including modes.

Basic Operations (Continued)

Controlling Recording Operations

Managing recording start/stop, standby mode, and focus.

Recording Mode Notes

Details on recording modes, standby, and specific recording techniques.

Basic Operations (Continued)

Tape Counter and Beep Settings

Managing tape tracking, audio cues, and AUTO DATE feature.

Using the Zoom Feature

Adjusting magnification levels for desired shots.

Basic Operations (Continued)

Digital Zoom Function (CCD-TRV21)

Using digital magnification and its effects on picture quality.

Shooting with the LCD Screen

Recording using the flip-out LCD screen, including angle and brightness.

Basic Operations (Continued)

Shooting Techniques and Tips

Advice for stable hand-held shooting and using tripods.

Viewfinder and LCD Screen Precautions

Precautions against sun damage and notes on LCD screen usage.

Basic Operations (Continued)

Reviewing Recorded Pictures

Using EDITSEARCH to find and review recorded scenes.

Re-recording and Editing

How to start recording from a specific point and re-record footage.

Basic Operations (Continued)

Playing Back a Tape

Monitoring playback on LCD screen and TV connections.

Using the Remote Commander

Controlling playback functions using the supplied remote control.

Basic Operations (Continued)

Playback Modes and Features

Understanding SP/LP playback, skip scan, and tape end search.

Searching for Recorded Content

Locating the end of recorded footage efficiently.

Advanced Operations

Alternative Power Sources

Using batteries, AC adapter, and car battery for power.

Using the House Current

Connecting the camcorder to AC power for operation.

Using a Car Battery

Connecting the camcorder to a vehicle's power source.

Subject Monitoring

Allowing subjects to view the recording process via the LCD screen.

Advanced Operations (Continued)

Mirror Mode Operation

Recording yourself while viewing yourself on the LCD screen.

Recording Date and Time

Adding date/time stamps to video recordings.

Advanced Operations (Continued)

Backlight Compensation

Improving shots with light behind the subject using the backlight function.

PROGRAM AE Function

Using automatic exposure modes for various shooting situations.

Advanced Operations (Continued)

PROGRAM AE Mode Settings

Adjusting exposure modes and shutter speeds for specific scenes.

START/STOP Recording Modes

Selecting different recording start/stop methods for quick shots.

Advanced Operations (Continued)

Title Superimposition

Adding preset text titles to video recordings.

Wide Mode Function (CCD-TRV21)

Recording in 16:9 aspect ratio for wide-screen viewing.

Advanced Operations (Continued)

Steady Shot Function (CCD-TRV21)

Stabilizing video against camera shake for smoother footage.

Customizing Mode Settings

Adjusting various camcorder functions like BEEP, D ZOOM, and LCD backlight.

Advanced Operations (Continued)

Watching on a TV Screen

Connecting the camcorder to a TV for playback monitoring.

Additional Information

Editing Onto Another Tape

Procedures for creating new video programs by editing recorded footage.

Changing the Lithium Battery

Replacing the internal clock battery for date/time functions.

Additional Information (Continued)

Resetting Date and Time

Adjusting the camcorder's internal clock and date settings.

Additional Information (Continued)

Playback Modes and Compatibility

Understanding SP/LP playback and foreign tape compatibility.

Tips for Using the Battery Pack

Maximizing battery performance, care, and replacement guidelines.

Additional Information (Continued)

Battery Pack Usage and Care

Detailed tips on charging, storage, handling, and battery pack maintenance.

Maintenance and Precautions

Moisture Condensation

Preventing and handling internal moisture buildup in the camcorder.

Video Head Cleaning

Procedures for cleaning video heads to maintain picture quality.

Maintenance and Precautions (Continued)

Viewfinder Maintenance

Cleaning dust from the viewfinder and reattaching the eyecup.

General Precautions

Safety and care guidelines for camcorder operation, handling, and storage.

Maintenance and Precautions (Continued)

AC Power Adaptor Care

Guidelines for safe use, handling, and maintenance of the AC power adapter.

Using Your Camcorder Abroad

Important considerations for power sources and TV color systems in different countries.

Identifying the Parts

Camcorder Components

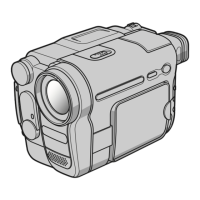
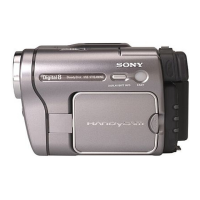
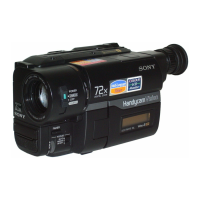
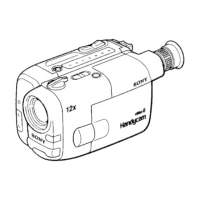
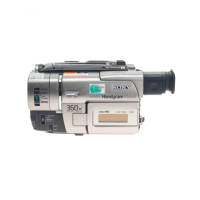
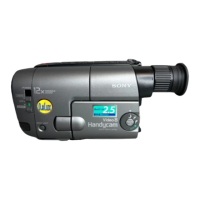
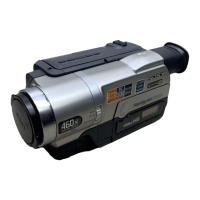
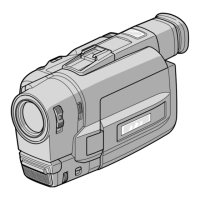
Labels and descriptions for the camcorder's physical parts and controls.

Remote Commander Components

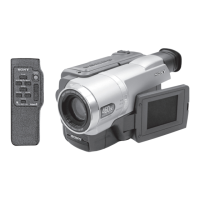
Labels and descriptions for the remote control unit and its buttons.

Identifying the Parts (Continued)

More Camcorder Component Labels

Further labeling of camera parts and connectors.

Attaching the Shoulder Strap

How to connect the included shoulder strap to the camcorder.

Identifying the Parts (Continued)

Remote Control Operation and Range

How to aim the remote and understand its operational range and limitations.

Demonstration Mode

Instructions for entering and exiting the camcorder's demonstration mode.

Warning Indicators

Indicator Meanings

Explaining the meaning of various warning lights and symbols on the camcorder.

Related product manuals