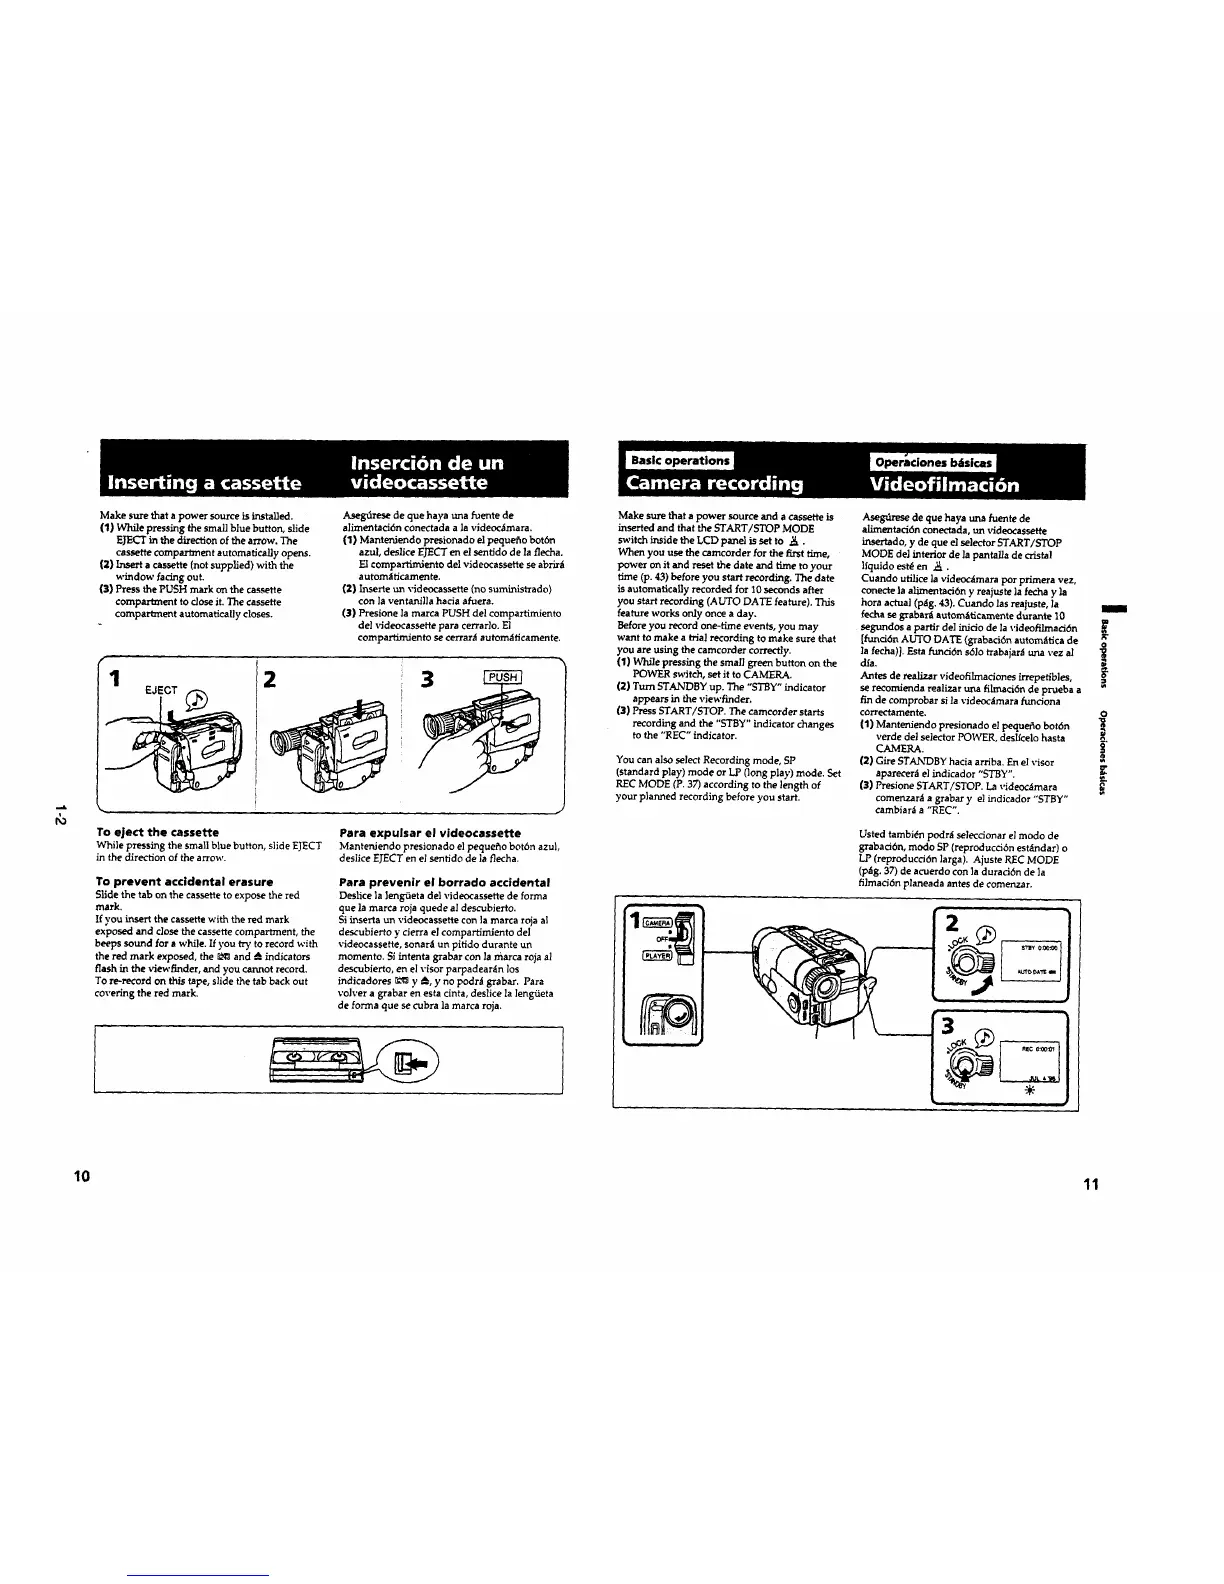
Make surethata power sourceisinstalled.
(I)While pressingthesmallbluebutton,slide
EJECT in the direction of the arrow. The
cassette compartment automatically opens.
(2)Inserta cassette(not supplied) with the
window facing out.
(3) Press the PUSH mark on the casse,e
compartment to dose it. The cassette
compartment automatically closes.
Aseg_rese de que haya una fuente de
alimentad6n conectada a la videoc_mara.
(1) Manteniendo presionado el pequeflo bot6n
azul, deslice EJECT en el senfido de ]a flecha.
El compartimlento del videocassette se abrir_t
automaficamente.
(2) Inserte un videncassette (no suministrado)
con ]a ventanllla hacia afuera.
(3) Presione la marca PUSH del compartimiento
del videocassette para cerrar}o. El
compartlm,iento se cerrar_ automdticamente.
1
EJECT
2 3
To eject the cassette Para expulsar el videocassette
While pressing the small blue button, slide EJECT Mantenlendo presionado el pequefio bot6n azul,
in the direction of the arrow, deslice EJECT en el sentido de la flecha.
To prevent accidental erasure
Slide the tab on the cassette to expose the red
mark.
If you insert thecassette with thered mark
exposed and close the cassette compartment, the
beeps sound for a while. If you try to record with
the red mark exposed, the _ and _ indicators
flash in the viewfinder, and you cannot record,
To re-record on this tape, slide the tab back out
covering the red mark.
Para prevenir el borrado accidental
Deslice ]a ]eng_eta del videocassette de forma
que la marca roja quede al descubierto.
Si inserta un videocassette con ]a marca roja a]
descubierto y cierra el compartimiento del
videocassette, sonar_i un pitido durante un
momento. Si intenta grabar con la marca roja al
descubierto, en el visor parpadear_n los
indicadores _ y A., y no podnl grabar. Para
volver a grabar en esta cinta, deslice la lengfieta
de forrna que se cubra ]a marca roja.
Make sure that a power source and a cassette is
inserted end that the START/STOP MODE
switch inside theLCD panel issetto ._.
When you use the camcorder for thefirst time,
power on it and reset the date and time to your
time (p. 43) before you start recording. The date
is automatically recorded for 10 seconds after
you start recording (AUTO DATE feature). This
feature works only once a day.
Before you record one-time events, you may
went to make a trial recording to make sure that
you are using the camcorder correctly.
(1) While pressing the small green button on the
POWER switch, set it to CAMERA.
(2) Turn STANDBY up. The "STBY" indicator
appears in the viewfinder.
{3) Press START/STOP. The camcorder starts
recording and the "STBY" indicator changes
to the "REC" indicator.
You can also select Recording mode, SP
(standard play) mode or LP (long play) mode. Set
REC MODE (P. 37) according to the length of
your planned recording before you start.
Asebn£rese de que haya una fuente de
alimentaci6n conectada, un videocassette
insertado, y de que el selector START[STOP
MODE de] interior de ]a pantalla de crista!
]fquido est& en ,_..
Cuando uidlice ]a vldeoc_imara por primera vez,
conecte is alimentaci6n y reajuste ]a fecha y la
hora actual (p_g. 43). Cuendo las reajuste, la
fecha se grabar,_l automfiticamente durante 10
segundos a partir de] inlclo de la videofilmaci6n
[funci6n AUTO DATE (grabacidn autom_tica de _"
la fecha)]. Esta funci6n s6lo rrabajar_ tma vez a]
dia.
Antes de realizar videofilmadones irrepetibles,
se recomienda realizar una filmacidn de prueba a
fin de comprobar si la videoolmara funciona
correctamente, o
(1) Manteniendo presionado el pequefio botdn
verde del selector POWER, deslfcelo hasta
CAMERA. _'
(2)Gire STANDBY hacia arriba. En el visor
aparecer_ el indicador "STBY".
{3) Presione START/STOP. La videooimara
comenzara a grabar y el indicador "STBy"
cambiar_ a "REC".
Usted tambi(_n podr_t selecoonar el modo de
grabad6n, modo SP (reproducddn est_lndar) o
LP (reproducci6n ]arga). Ajuste REC MODE
(p_g. 37) de acuerdo con la durad6n de ]a
filmacidn planeada antes de comenzar.
'2
10 11
 Loading...