EasyManuals Logo

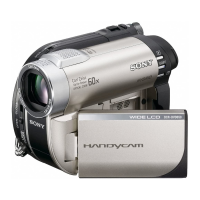
Sony Handycam DCR-DVD201E User Manual

Sony Handycam DCR-DVD201E
148 pages
To Next Page IconTo Next Page
To Previous Page IconTo Previous Page
Page #29 background imageLoading...
Page #29 background image
29
Shooting movies/still images
Perform Getting Started from step 1 to 5 beforehand (page 15 to 27).
The following operation is common with VIDEO mode and VR mode.
1 Remove the lens cap by pressing both knobs on the sides of the cap.
2 Install the battery pack or connect the AC adaptor (page 15).
3 Open the LCD screen.
The image is not displayed in the viewfinder when the LCD screen opens.
4 Set the mode dial to (Movie).
5 Turn the power on by pressing the POWER button for a few seconds.
6 Insert a disc (page 26).
This sets your camcorder to standby.
6
1
3
4
2
7
5
Shooting movies
STBY0:00:00
-
R
VIDEO
Recording
lamp

Table of Contents

Questions and Answers:

Question and Answer IconNeed help?

Do you have a question about the Sony Handycam DCR-DVD201E and is the answer not in the manual?

Sony Handycam DCR-DVD201E Specifications

General IconGeneral
Sensor TypeCCD
Sensor Size1/6 inch
Recording MediaDVD
Video FormatMPEG2
Image StabilizationElectronic
FocusAuto/Manual
MicrophoneStereo
USBYes
AV OutputYes
Video Resolution720 x 576
LCD Screen Size2.5 inches
Storage MediaDVD-R/DVD-RW
LCD Screen Pixels123k
White BalanceAuto

Related product manuals