23
DCR-DVD7
2-597-462-11(1)
Getting Started
A new 8 cm DVD-R, DVD-RW, or
DVD+RW is required for recording (p. 13).
• Remove dust or fingerprints from the
disc beforehand, using the cleaning
cloth supplied with your camcorder (p.
5).
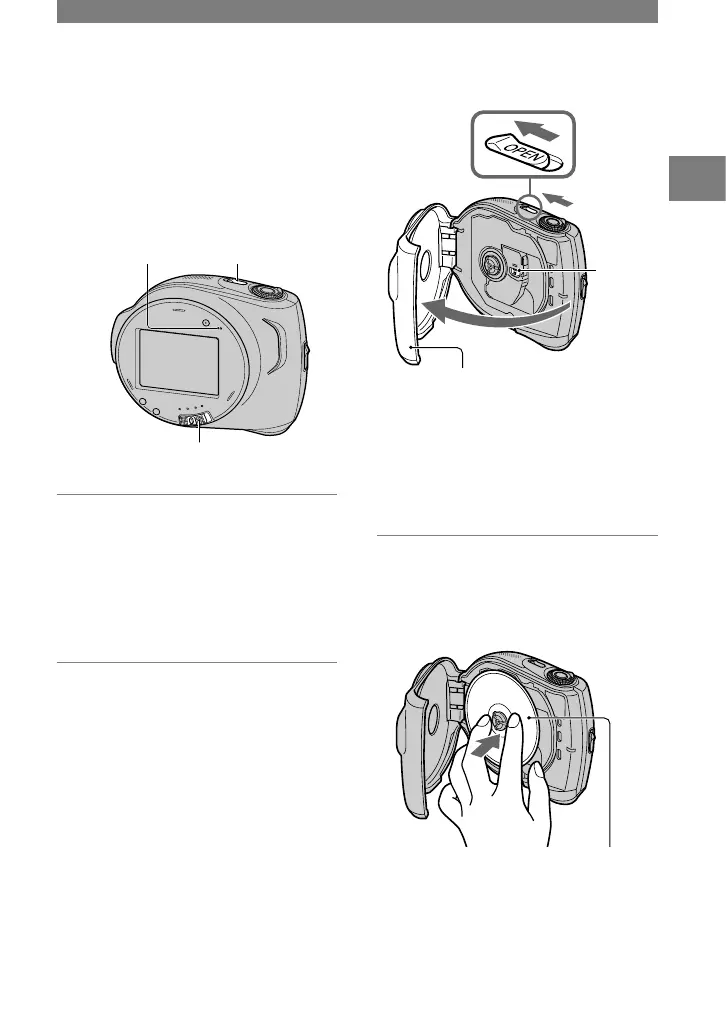
Disc cover
OPEN switch
POWER switch
ACCESS lamp
1 Check that the power of your
camcorder is on.
•
You can remove the disc when a power
source is connected to your camcorder
even when your camcorder is turned off.
However, the disc recognition process
(step 4) does not start.
2 Slide the disc cover OPEN switch
in the direction of the arrow
(OPEN).
[PREPARING TO OPEN] appears on the
LCD screen. Then the opening melody
sounds once, and the camcorder beeps.
After the beeps stop, the disc cover
opens slightly automatically.
Disc cover
OPEN
switch
Pickup
lens
When the disc cover opens
slightly, open it further.
•
Be careful not to obstruct the opening or
closing of the disc cover, with your hand or
other objects.
•
Be careful not to catch the wrist strap when
closing the disc cover. This may cause your
camcorder to malfunction.
3 Set the disc with the recording
side facing your camcorder, then
press the center of the disc until
it clicks.
Set the disc with the label
side facing out when using
a single sided disc.
•
Do not touch the recording side of the disc
or pickup lens. For details about pickup
lens, see page 103.
Step 6: Inserting a disc
 Loading...