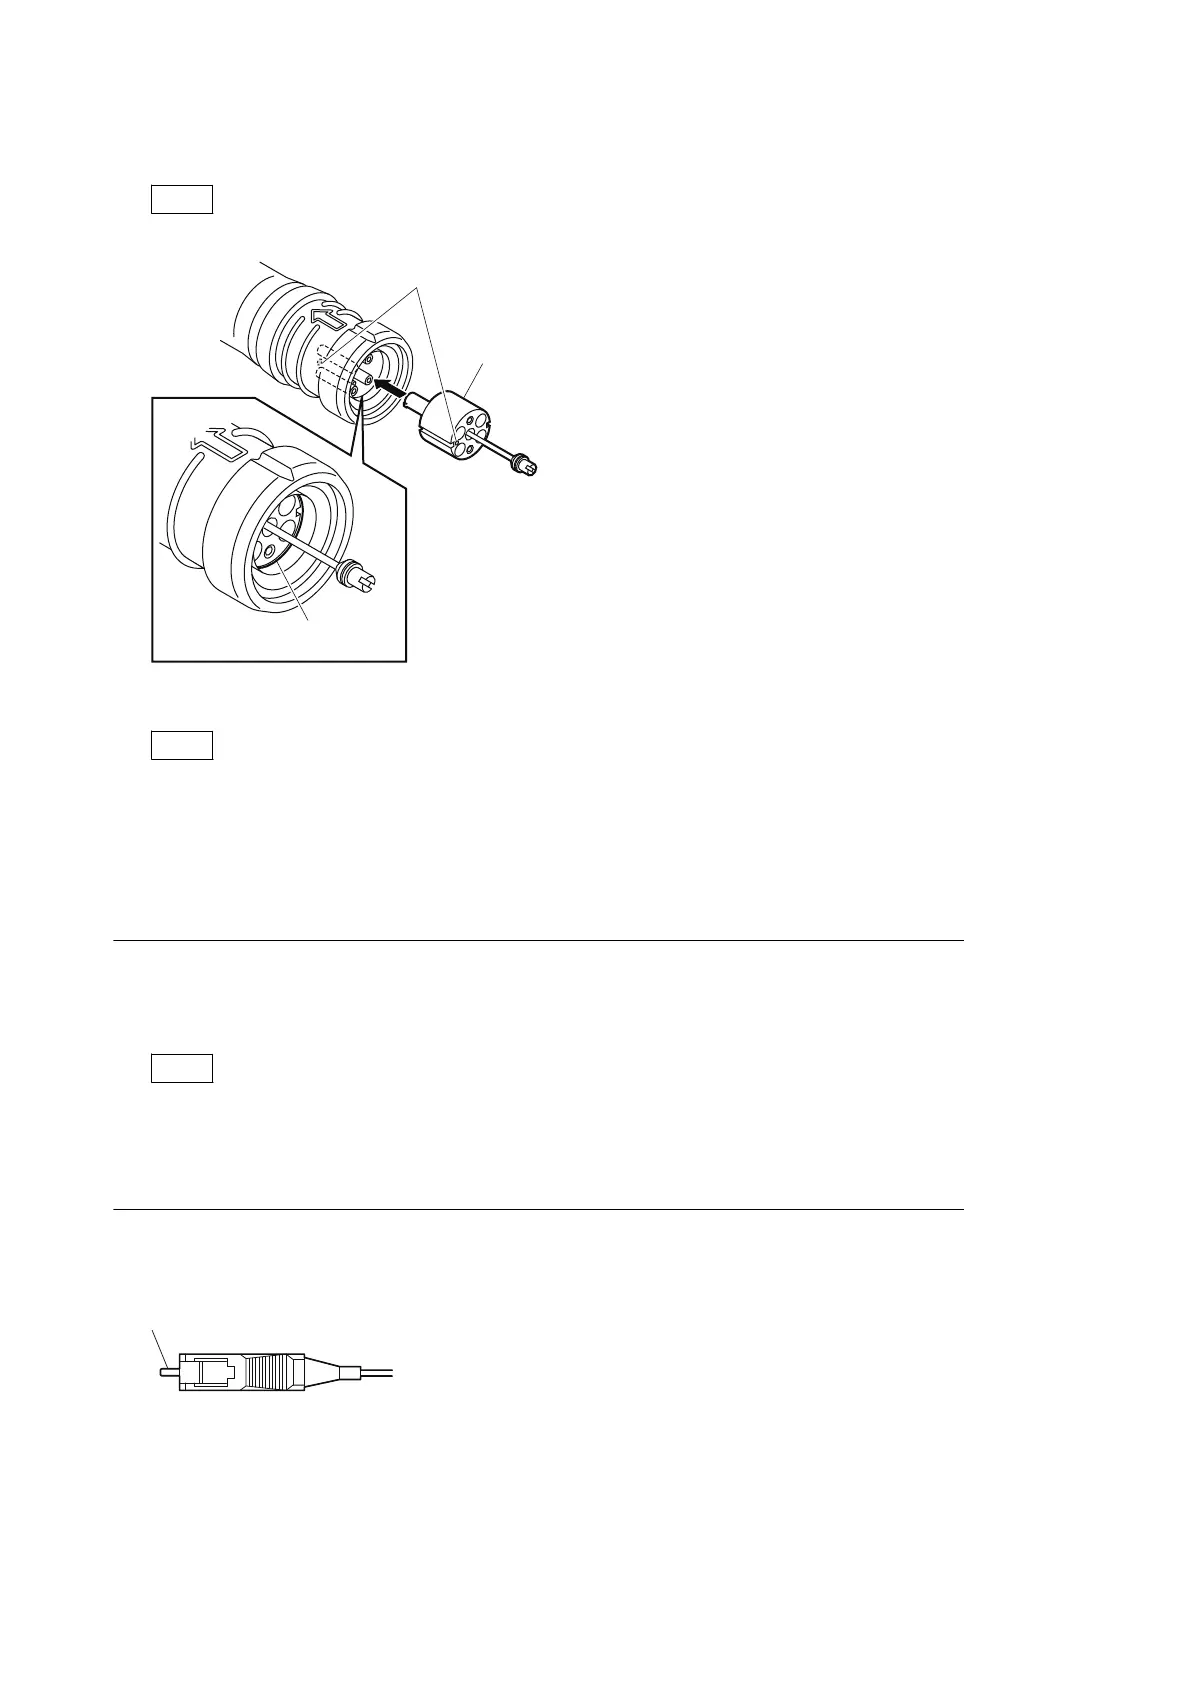
4. Match the positioning marks of the adapter and the connector, and then push the adapter into the connector.
Note
Push the adapter until the confirmation groove comes in sight as shown in the figure.
Adapter
Positioning marks
Confirmation
groove
5. Tighten the adapter pin clockwise until being lightly fixed.
Note
Do not fully tighten the adapter pin. (Extent where adapter pin is lightly fixed)
1-5-4. When the Optical Connector Cleaner (Commercially Available) is not
Available (Connector)
Fixtures
• Alcohol (commercially available)
• Cotton swabs (commercially available)
Note
Use a cotton swab whose diameter is about 4 mm. If a cotton swab whose diameter exceeds 5 mm is used, the
cotton swab cannot be inserted into the end of the connector and the tip of the optical contact cannot be cleaned.
Connector
Clean the tip of the white optical contacts with a cotton swab moistened with alcohol.
HDCU3500/HDCU5500
1-15

 Loading...