Do you have a question about the Sony PDW-850 and is the answer not in the manual?
Details the camcorder's key features including CCDs, reliability mechanisms, multi-format support, and format compatibility.
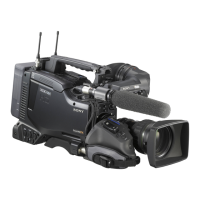
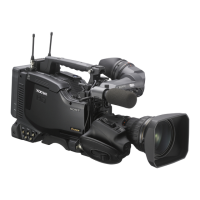
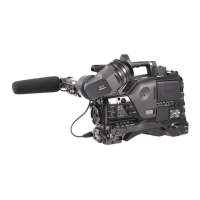
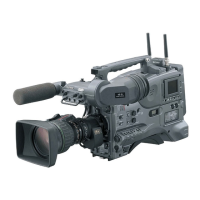
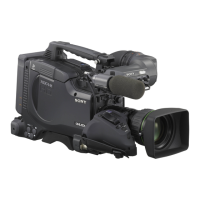
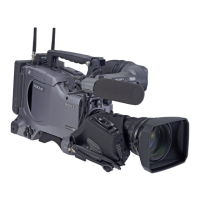
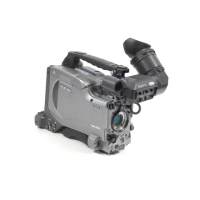
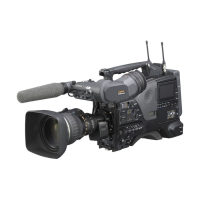
Identifies and explains the physical controls, connectors, and indicators on the camcorder and viewfinder.
Instructions for connecting battery packs or AC adaptors for camcorder power.
Detailed instructions for connecting the optional viewfinder to the camcorder.
Procedure for attaching and securing a lens to the camcorder's lens mount.
Steps for adjusting the flange focal length to ensure accurate focus from telephoto to wide angle.
Instructions for connecting microphones and setting up audio input channels.
Procedure for securely mounting the camcorder onto a tripod using an adaptor.
Instructions for connecting and using an external video light with the camcorder.
Steps for attaching and removing the camcorder's shoulder strap for easier carrying.
How to adjust the shoulder pad for optimal balance and comfort when shooting.
Instructions for connecting and using the remote control unit for camera functions.
Details supported video and audio recording formats, system frequencies, and bit rates.
Procedure for adjusting black balance and white balance for optimal image quality under varying lighting.
Explanation of shutter modes (Standard, ECS, SLS) and how to select shutter speeds.
How to adjust the auto iris reference value to improve exposure in backlight or prevent blown-out highlights.
Instructions for adjusting audio input levels for channels 1-4, including automatic and manual settings.
Procedures for setting timecode, user bits, and synchronizing timecode.
Information on supported discs, notes on handling, storage, care, and write-protecting discs.
Explains the salvage function for recovering data after recording interruptions.
Step-by-step guide for basic shooting operations, from power supply to disc loading and stopping recording.
How to review recorded clips using normal playback, recording review, and color playback.
Instructions on how to delete recorded clips from the disc.
How to use the Freeze Mix function to overlay a still image for framing new shots.
How to display and interpret the focus assist indicator in the viewfinder for easier focusing.
Covers advanced shooting features like essence marks, clip flags, and picture cache.
Specifying which frame to use as the thumbnail image for a recorded clip.
Using internal memory to cache video before recording starts, allowing recording to commence earlier.
Capturing time-lapse video by shooting at specified intervals.
Configuring settings for Auto Interval Rec mode, including take total time and recording time.
Configuring settings for Manual Interval Rec mode, including number of frames and trigger interval.
Achieving slow motion or fast motion effects by adjusting the recording frame rate.
Continuing recording by using internal memory while exchanging discs.
Recording continuously into the same clip, avoiding many short clips, for easier management.
Easily erasing and re-recording the last recorded clip using a shortcut.
Automatically assigning titles to clips for better clip management across discs.
Using user-defined names for clips and clip lists to facilitate file management.
Loading planning metadata files to embed clip information and facilitate shooting preparation.
Recording video signals from external devices via SDI IN or GENLOCK IN connectors.
Recording analog composite signals via the GENLOCK IN connector.
Transferring proxy AV data or metadata to a computer during shooting.
Saving proxy AV data and metadata to a USB flash drive for easier editing and management.
Setting up and verifying GPS location data for recording with GPS information.
Introduction to Graphical User Interface (GUI) screens for scene searches, playback, and clip list editing.
How to navigate between different GUI screens like clip playback and thumbnail views.
Explanation of clip and clip list name displays, selection frames, scrollbars, and recording format information.
Displays thumbnails of clips in recorded order, allowing clip management operations.
Displays thumbnails of sub clips within a clip list, enabling clip list creation and editing.
Displays thumbnails related to essence marks (shot marks, Rec Start) found in clips.
Menu accessed from thumbnail screens for performing operations like clip information, selection, and deletion.
Using keyboard shortcuts to quickly access commands from menu items.
Allows loading/saving clip lists, managing planning metadata, and formatting discs.
How to navigate and interact with GUI elements like menus, cursors, and selection buttons.
How to select individual or multiple thumbnails using the selection frame and navigation controls.
Dividing clips into blocks and displaying thumbnails to quickly find target scenes.
Using thumbnails to cue up and play clips and sub clips efficiently.
Displaying thumbnails of chapters (sections between essence marks) within a clip to locate specific scenes.
How to cue up and play a clip after locating it using thumbnails or search functions.
Filtering clips based on criteria like video format, clip flags, or planning metadata.
Choosing which data (clip name, time code, duration) appears below thumbnails in screens.
Setting a specific frame from a clip as its index picture for better visual identification.
Viewing detailed information about clips, including title, timecode, format, and date/time.
Setting flags (OK/NG/KEEP) on clips for easier identification and selection by editors.
Preventing accidental deletion or alteration of selected clips by locking them.
Procedure for deleting clips, including confirmation and handling of referenced clip lists.
Selecting and arranging clips to create custom edit lists (clip lists) for field editing.
Explanation of clip lists as virtual editing data that specifies clip ranges for playback.
Steps to create, add sub clips, reorder, trim, and save clip lists.
Defining the start and end points for sub clips to adjust their range and overall duration.
Setting a custom starting timecode for clip lists, independent of original clip timecodes.
Saving created or edited clip lists to the disc, either under the current name or a new name.
Managing discs, including checking properties, sorting clip lists, and formatting.
Viewing disc information such as user ID, titles, total duration, and rewrite count.
Loading planning metadata files to embed clip information and facilitate shooting preparation.
Displaying names of user-defined essence marks (Shot Marks) specified in planning metadata.
Procedure for initializing (formatting) a disc, including options to disable the command.
Accessing and viewing disc/clip properties and loading metadata via a web browser.
Transferring MXF files and clip lists between the unit and external devices via FTP.
Checking network connection, power supply, and necessary settings for FTP transfers.
Procedure for uploading selected clips or all clips and lists to a remote host via FTP.
Selecting and configuring items like device type, host name, and user name for FTP connection.
Options to cancel FTP transfer processing, either immediately or after the current clip.
Selecting and uploading specific parts of a clip using expand or chapter thumbnails.
Procedure for downloading clips from a remote host (XDCAM device or material server) via FTP.
Copying clips between XDCAM devices by direct connection without a network.
List of keyboard shortcuts for accessing functions without navigating menus.
Overview of the camcorder's menu structure, showing the hierarchy of TOP, USER, OPERATION, PAINT, MAINTENANCE, FILE, and DIAGNOSIS menus.
Detailed listing of items, settings, and descriptions within the OPERATION menu.
Settings related to slow & quick motion, interval recording, disc exchange cache, and live logging.
Assigning functions to the camcorder's assignable switches for personalized operation.
Settings for displaying markers like center, safety zone, and aspect ratio on the viewfinder.
Adjusting gain values for the L, M, H, and TURBO positions of the GAIN selector.
Configuring viewfinder display options like zebra patterns, detail levels, and aspect ratios.
Selecting shot data like date, time, model name, and serial number to be superimposed.
Configuring the display of status confirmation screens for abnormal conditions, system, functions, audio, and GPS.
Adjusting white balance settings, including preset values, ATW, and filter white balance memory.
Selecting shutter speed display units (seconds or degrees) and enabling specific shutter modes.
Setting system frequency, recording format, aspect ratio, and country settings.
Enabling automatic clip titling, setting prefixes, and managing serial numbers for clip names.
Detailed image adjustments including gamma, knee, detail, aperture, and flare settings.
Settings for white shading, black shading, level adjustments, and battery management.
Input mode selection for front microphone, audio channel routing, and reference level settings.
Settings for audio data length (IMX), reference levels, AGC modes, and limiter settings.
Adjusting audio levels for channels 1-4, including microphone input and rear input controls.
Settings for wireless receiver channels, delay compensation, transmitter signal status, and audio delay.
Configuring timecode output, drop/non-drop frame modes, and user bit settings.
Settings for tally lights, REC START beep, SDI REC control, remote control interface, and clip naming.
Settings for test signals, color bars, remote control memory, shutter speed display, and fan control.
Settings for aberration correction, Wi-Fi/Ethernet remote control, and preset white balance.
Adjusting DCC function, range, point, gain, delay time, and peak filter.
Configuring auto iris window, level, aspect ratio, and clip highlight settings.
Enabling genlock, setting HD/SD output H phase, and selecting reference signal type.
Network settings including DHCP, IP address, subnet mask, gateway, link speed, duplex, DNS, and UPnP.
Selecting shutter speed display units (seconds or degrees) and registering custom shutter degree settings.
Setting system frequency, recording format, aspect ratio, and country settings.
Enabling automatic clip titling, setting prefixes, and managing serial numbers for clip names.
Detailed image adjustments including gamma, knee, detail, aperture, and flare settings.
Guide to displaying menus, navigating, selecting items, changing values, and confirming selections.
Step-by-step guide on operating the USER menu, navigating pages, and changing settings.
Adding, deleting, replacing, and renaming pages within the USER menu for personalized operation.
Selecting which items are displayed on the viewfinder and LCD screens, including status indicators and warnings.
Limiting or suppressing messages that provide feedback on setting changes and adjustment progress.
Turning center, safety zone, and aspect markers on/off, and configuring their display settings.
Adjusting viewfinder settings like zebra patterns, detail levels, and aspect ratios for optimal viewing.
Selecting shot data (date, time, ID) to be recorded superimposed on color bars for reference.
Assigning alphanumeric IDs (up to 12 characters) to four different shot IDs for identification.
Confirming camcorder status and abnormal conditions via dedicated screens on the LCD and viewfinder.
Configuring camera settings like gain values, output signals, and assigning functions to switches.
Configuring gain values (dB) for the L, M, H, and TURBO positions of the GAIN selector.
Choosing the video signal output for SDI OUT 1, SDI OUT 2, and TEST OUT connectors.
Assigning desired functions to the camcorder's assignable switches for quick access.
Details functions that can be assigned to the ASSIGN 2 slide-type switch, including REC VIDEO SOURCE and ZEBRA.
Registering up to ten custom functions (UA01-UA10) into the ASSIGN switch list.
Limiting output connector functions to save power, including ETHERNET/USB, REC AUDIO OUT, TEST OUT SAVE, and Wi-Fi.
Installing the Wi-Fi adaptor and configuring wireless LAN settings for network connection.
Controlling the camcorder remotely via Wi-Fi using a connected device like a smartphone or tablet.
Scanning for and selecting access points automatically for Wi-Fi connection.
Adjusting white balance by manually setting the color temperature and fine-tuning with temp balance.
Adjusting auto white balance for warmer or colder pictures by setting offsets for color temperature and gain.
Loading lens files to compensate for lens characteristics like flare, white shading, and auto iris gain.
Entering country code, organization code, and user code to define UMID ownership information.
Saving camcorder settings as user files onto a USB flash drive and loading them for recall.
Saving camcorder settings as user files onto a USB flash drive and loading them for recall.
Setting a file ID before saving data to help identify user files quickly.
Loading saved user file data from a USB flash drive into the camcorder.
Restoring scene file settings to their factory default values.
Automatically displaying relevant file menus when a USB flash drive is connected.
Saving and loading scene files to quickly recreate specific shooting setup conditions.
Saving the current scene settings as a scene file onto a USB flash drive or into memory.
Loading scene files from a USB flash drive into the camcorder's memory for quick recall.
Introduction to file operations using FTP for managing recorded data.
Visual representation of the disc's directory structure as seen by a remote computer via FTP.
Details on allowed operations (Read, Write, Rename, Create, Delete) for files in different directories.
Using File Transfer Protocol (FTP) for file operations between the unit and a remote computer.
Ensuring correct network connection, power, and IP address settings for FTP communication.
Steps for establishing an FTP connection using command prompt or FTP client software.
Reference for standard and extended FTP commands supported by the unit for file operations.
Creating new clips with continuous timecode synchronized with an external timecode via FTP.
Pre-shooting checks of camcorder functions, including camera, viewfinder, VDR, audio, and timecode.
Verifying correct operation of the lens iris and zoom controls, including auto and manual modes.
Performing tests on recording, playback, and fast reverse/forward functions of the VDR.
Instructions for cleaning the viewfinder and disassembling the eyepiece for cleaning.
Information on the fog-proof filter and its fitting to maintain viewfinder clarity.
Information regarding the battery terminal as a consumable part and its maintenance.
Explanation of visible and audible warning indicators and messages for troubleshooting.
Guidelines for proper use, storage, handling, and precautions against environmental factors and interference.
Technical details including mass, dimensions, power requirements, operating conditions, and recording formats.
List of optional accessories available for the camcorder, including microphones, viewfinders, and adapters.
Details on supported USB keyboard languages and layouts for use with the unit's software keyboard.
List of Sony USB flash drives recommended for optimal compatibility and performance with the unit.
Information regarding MPEG-4 Visual Patent Portfolio License, Independent JPEG Group, and other software licenses.
Explanation of GPS technology, positioning accuracy, restrictions, and geodetic reference system used.
| Sensor type | - |
|---|---|
| Total megapixels | - MP |
| Optical sensor size | 2/3 \ |
| Optical zoom | - x |
| Image stabilizer | No |
| Internal storage capacity | - GB |
| Built-in display | Yes |
| Display diagonal | 3.5 \ |
| Display resolution | 960 x 540 pixels |
| Viewfinder type | Optical |
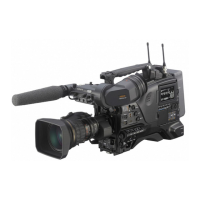
| Camcorder type | Shoulder camcorder |
| Product color | Black |
| Video formats supported | MPEG4 |
| Maximum video resolution | 1920 x 1080 pixels |
| Maximum image resolution | - pixels |
| Headphone outputs | 2 |
| USB 2.0 ports quantity | 1 |
| Component video (YPbPr/YCbCr) out | 0 |
| Battery capacity | - mAh |
| Battery life (max) | - h |
| Storage temperature (T-T) | -20 - 60 °C |
| Operating temperature (T-T) | -5 - 40 °C |
| Operating relative humidity (H-H) | 10 - 90 % |
| Signal-to-Noise Ratio (SNR) | 62 dB |
| Depth | 332 mm |
|---|---|
| Width | 124 mm |
| Height | 269 mm |
| Weight | 4200 g |